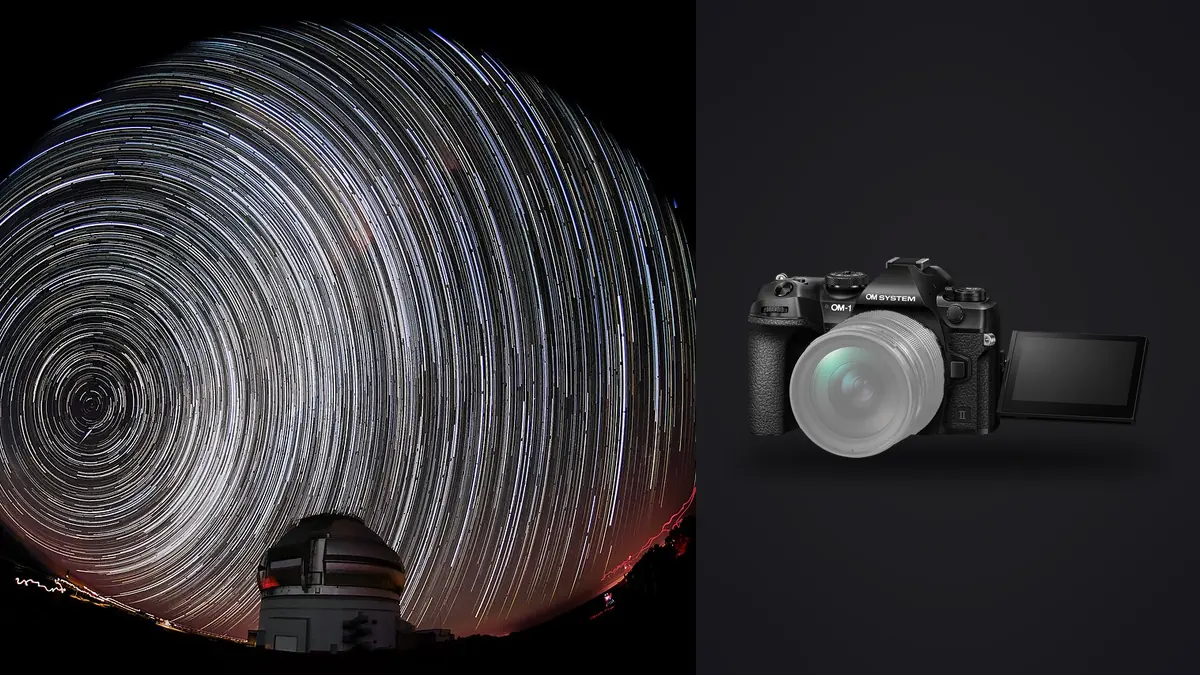
I switched to the OM-1 Mark II from a full-frame body about eight months ago, mostly for the weight saving on hiking trips, and I wasn't sure the smaller sensor would hold up once the sun went down. It does, but not in the way the marketing copy implies. Stacking is not optional with this camera the way it sometimes is with a bigger sensor. It's the difference between a Milky Way frame you're proud of and one you quietly don't post. This is what I've actually learned running it through two dark-sky trips, a few dozen wasted frames, and one very cold night in the Cairngorms where I got the settings wrong and only realized at 2 a.m.
Why the Sensor Size Changes Your Stacking Math
The OM-1 Mark II carries the same 20.4-megapixel stacked BSI Live MOS sensor as the original OM-1, in a Micro Four Thirds body. That sensor is genuinely fast to read out, which is why the camera's autofocus and burst rates are so good, but the physical pixel size means the noise floor climbs sooner as you push ISO than it would on an APS-C or full-frame sensor with similar generation tech. At ISO 800 it's clean. At ISO 3200 you're seeing chroma noise in the shadows that a full-frame body twice the price wouldn't show yet.
That's not a knock on the camera, it's just the physics of a smaller light-gathering area. The practical consequence for stacking is that you need more frames to hit the same signal-to-noise ratio you'd get from fewer, cleaner frames on a bigger sensor. Where a full-frame shooter might stack 20 subs of the Milky Way core and call it done, I'm usually stacking 40 to 60 with the OM-1 II at a comparable ISO. More frames means more time on location, more battery changes in the cold, and a much bigger culling job afterward, which I'll get to.
Starry Sky AF: Useful, But Don't Trust It Blindly
OM System's Starry Sky AF is a real feature, not a marketing label slapped on ordinary contrast-detect autofocus. It's tuned specifically to lock onto point sources of light against a dark background, and on a clear night with a reasonably bright section of sky it will nail focus faster than I can rack a lens manually with focus peaking. I use it as my first pass every time now.
Where it struggles is thin cloud, heavy light pollution glow near the horizon, or when I'm framing a foreground element that dominates more than half the frame. In those conditions it hunts, or locks onto a satellite or a bright planet instead of true infinity. My routine now is: let Starry Sky AF find focus on a clean patch of sky, then zoom into the EVF at maximum magnification and nudge manually against a bright star to confirm before locking the lens ring with a piece of gaffer tape. That last step sounds fussy but I've lost an entire session to a focus ring that drifted half a millimeter from bumping the tripod while packing lenses.
Live Composite Is Not the Same Thing as Star Stacking
This trips up a lot of people moving to OM System gear, myself included at first. Live Composite is a genuinely clever in-camera mode: it takes a base exposure, then keeps taking exposures at the same interval and only adds pixels that got brighter than the base frame. You watch the star trails build on the rear screen in real time without the sky glow accumulating the way it would in one long bulb exposure. It's brilliant for star trail shots with a lit foreground, and I use it constantly for that.
But it is not what most people mean by "star stacking" in an astrophotography context. Star stacking, the kind this article is mostly about, means shooting a series of short, identical exposures where the stars stay as pinpoints, then aligning and averaging those frames in dedicated software afterward to cancel out random sensor noise while keeping the signal. Live Composite bakes its result into a single JPEG or RAW in camera and can't be un-baked. If you want a clean, noise-reduced Milky Way image with sharp stars, not trails, you still need to shoot a sequence of short subs and stack them yourself in something like Sequator, DeepSkyStacker, or Starry Landscape Stacker. The OM-1 II doesn't do that part for you.
My Actual Field Workflow
Here's roughly what a session looks like once I'm set up and the sky is dark enough to work with:
First, a single test exposure at high ISO to check framing and roughly judge the histogram, usually 6400 ISO for a few seconds just to see what's there on the back screen. Then I calculate the real exposure time using the actual focal length of the lens (not a full-frame equivalent) against the pixel pitch of the sensor, because star trailing is a function of true focal length and true pixel size, not the crop-adjusted number most people quote from full-frame rules of thumb. On the 8-25mm PRO at the 12mm end, I land around 8 seconds before trailing becomes visible at 100% crop.
Then I shoot the actual stack: same exposure time, same aperture, same ISO, for 40 to 60 frames back to back, with the intervalometer set to zero gap so I'm not wasting dark sky time. I don't bother with dark frame subtraction in camera for this because the stacking software handles hot pixel removal better than the camera's long-exposure noise reduction, which would also double my time on target for no real benefit.
Settings by Subject
These are the parameters I actually shoot with the OM-1 Mark II, not theoretical numbers. Your dark-sky quality and lens choice will shift these, but this is a reasonable starting point.
| Subject | Lens | Single Exposure | Frame Count | ISO | Notes |
|---|---|---|---|---|---|
| Milky Way core, wide nightscape | 8-25mm f/1.8 PRO at 12mm | 8 sec | 40-60 | 1600 | Untracked, stack for noise only, stars stay as points |
| Star trails with foreground | 12-40mm f/2.8 PRO II | Live Composite, 30 sec base | Runs until trail length looks right, usually 60-90 min | 400 | Single in-camera file, no post-stacking needed |
| Deep sky target on a star tracker | 150-400mm f/4.5 PRO | 45 sec | 80-120 | 800 | Requires an equatorial tracker, dither slightly between subs |
| Fast-moving sky (aurora, meteor burst) | 8-25mm f/1.8 PRO | 3-4 sec | 15-20 | 3200 | IBIS steadies handheld framing between shots, not the exposure itself |
The Part Nobody Warns You About: Culling 60 Nearly Identical Frames
Shooting the stack is the fun part. Going through 50 or 60 RAW files that all look like slightly different black rectangles with dots on them, at 11 p.m., with cold fingers, is not. And it matters more than people think, because a single bad sub, one with a plane trail through it, a gust of wind that shook the tripod for half a second, or condensation starting to fog the front element, will drag down the whole stack if you don't catch it before you feed everything into the stacking software.
This is where I've actually changed my process. I used to scroll through every frame on the camera's rear screen at 2 a.m., which is how I miss things. Now I dump the card straight into imagic and let its local sharpness scoring flag the frames that are objectively softer than the rest of the batch, which is almost always the wind-shake or focus-drift ones. Because the whole run of 60 frames looks nearly identical to the eye, imagic's duplicate and burst clustering is genuinely useful here too: instead of eyeballing every single sub, it groups the near-identical exposures so I can review one representative from each cluster and spot-check for satellite trails or plane lights rather than opening all sixty individually. If you haven't seen how that kind of automated culling actually works under the hood, this breakdown of AI photo culling covers the sharpness and clustering logic in more depth than I will here.
One thing that matters at a genuinely dark site: there's usually no signal. I've been on hilltops with zero bars trying to sort a night's shoot before driving home, and the fact that imagic runs entirely offline with no cloud upload step is not a nice-to-have there, it's the only reason the workflow functions at all. The RAW files off the OM-1 II aren't huge by full-frame standards, but sixty of them is still several gigabytes I have no interest in trying to push over a hotspot connection.
From Cull to Final Stack
Once I've thrown out the obvious rejects, the survivors go into Sequator for the wide nightscape stacks (it handles sky-and-ground composites well) or DeepSkyStacker for anything shot through the tracker on the 150-400mm. Neither of these does culling, they just align and average whatever you feed them, so garbage frames in means a slightly softer, slightly noisier stack out. Doing the sorting first in imagic before the stacking software ever sees the files has cut a genuinely annoying step out of my evening, and it means I'm not discovering a plane trail baked into my final stack the next morning.
After the stack is flattened into a single 32-bit TIFF, I bring it back into imagic for the actual edit. This is where the apply_my_style preset earns its keep: I trained it on a batch of my own previously finished night-sky edits, so it applies my usual contrast curve and color balance for stars and Milky Way structure automatically, rather than me rebuilding the same edit from scratch on every new stack. It's not magic, it still needs a manual pass on local contrast and any light pollution gradient, but it gets me most of the way there in seconds instead of the twenty minutes I used to spend matching a previous edit by eye.
Cold Weather Realities
A few things I've learned the hard way with this specific body. Battery life drops noticeably below freezing, plan on two spare batteries for anything past a two-hour session in genuinely cold conditions, and keep the spares in an inside pocket rather than your camera bag. The IP53-rated weather sealing has handled light drizzle and heavy dew without complaint on both trips I've used it for, but dew on the front element is still a real problem on humid clear nights, a simple lens wrap heater solved that for me faster than any amount of wiping ever did. And the dual UHS-II card slots are worth using properly here: I write RAW to both cards simultaneously during a long stacking session, because losing a card with sixty carefully shot subs on it after a three-hour drive to a dark site is not a mistake I want to make twice. See the OM System OM-1 Mark II camera page for full specs on the sensor and card slots referenced above.
Frequently Asked Questions
Do I actually need a star tracker to get good stacked results from the OM-1 Mark II?
No, not for wide Milky Way and nightscape work. Untracked stacking of short exposures (under 10 seconds on a wide lens) works well and is what most of my published shots use. A tracker becomes worth the extra setup time once you're reaching for longer focal lengths, past roughly 100mm equivalent, where untracked exposures get too short to gather enough signal per frame.
How many frames should I be shooting for a clean stack on this camera?
For wide nightscapes I shoot 40 to 60 frames given the sensor's noise floor at typical ISOs. Fewer than 30 and the noise reduction from stacking starts to feel marginal at ISO 1600 or higher. If you're shooting at ISO 800 or lower with a tracker, you can get away with closer to 20 to 30 frames.
Can I just use Live Composite instead of shooting a stack for the Milky Way?
Not if you want pinpoint stars. Live Composite is built for trails and long-duration light accumulation with a static or lit foreground. Anything longer than your no-trail exposure limit will start elongating stars within the composite. Use Live Composite for trail shots, use a separate short-exposure stack for sharp-star Milky Way images.
Is the Micro Four Thirds sensor a real limitation for serious astrophotography stacking?
It changes the workflow more than it limits the result. You'll shoot more frames and lean harder on stacking to get clean shadows than a full-frame shooter would, but the tradeoff is a genuinely portable kit, strong in-body stabilization for handheld work between subs, and a fast-reading sensor that doesn't choke the buffer during a long sequence. For hiking to remote dark-sky locations, that tradeoff has been worth it for me.