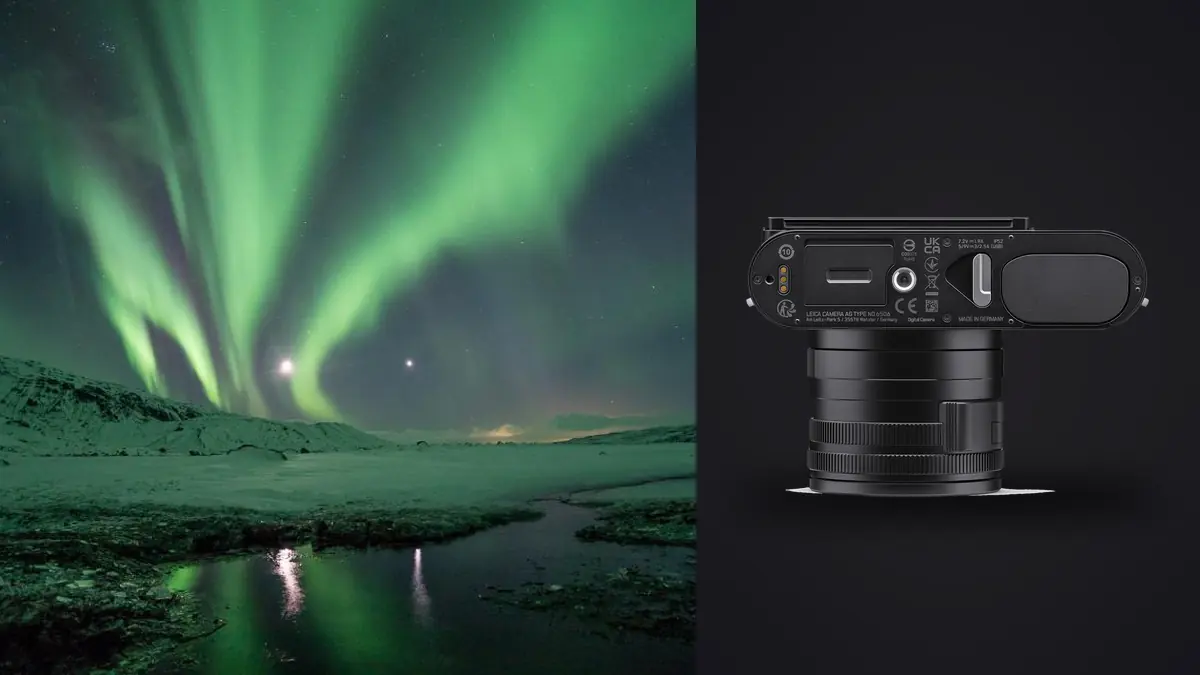
The Leica Q3 is not a camera anyone would design specifically for astrophotography. It has one lens, a 28mm Summilux that you can't swap for a 14mm ultra-wide or a fast 85mm for star clusters, and no astro-specific modes buried in a menu somewhere. What it does have is a genuinely fast fixed aperture, a very high-resolution full-frame sensor, and a rear screen good enough to check focus at 2 a.m. without guessing. After several nights out with one under a properly dark sky, here's what actually matters if you're pointing this particular camera at the stars.
A Fixed 28mm Lens Is the First Decision You're Making
Every astro session with the Q3 starts with the same constraint: you're shooting 28mm, full stop. That's a real decision for the genre, not a minor inconvenience. A 28mm field of view is wide enough to bring in a horizon, a tree line, or a rock formation alongside the Milky Way core, which makes the Q3 genuinely good at the kind of nightscape shot where the foreground matters as much as the sky. It is not wide enough to swallow a huge arc of the galactic band the way a 14mm or 16mm can, and it offers nothing at all for lunar close-ups, planetary detail, or isolating a nebula, all of which need focal length the Q3 simply doesn't have.
If your astro interest leans toward wide environmental shots (Milky Way over a coastline, a lit tent under a star field, aurora with a recognizable foreground), the 28mm framing works in your favor. If you're chasing tighter compositions or deep-sky targets, this is the wrong tool regardless of how good the glass is, and no amount of cropping the 60-megapixel file fully makes up for the missing reach.
What f/1.7 and the 60-Megapixel Sensor Actually Do for You at Night
The Summilux's f/1.7 maximum aperture is the real reason the Q3 is worth discussing for this genre at all. Compared to the f/2.8 zooms a lot of landscape photographers already own, f/1.7 lets in roughly two and a half stops more light. In practical terms, that means you can hold ISO around 3200 to 4000 where a slower lens would push you to 12800 or higher for the same shutter speed, and that difference shows up directly in how much noise reduction your stars can survive before they start looking mushy.
The sensor is where the trade-off shows up. At 60.3 megapixels on a full-frame chip, the Q3's pixel pitch works out to roughly 3.8 microns, which is tight for a full-frame sensor and means each individual photosite is gathering less light than on a lower-resolution body. In daylight this is invisible. At ISO 6400 and above, pushed to 100%, I see chroma noise creeping into shadow areas of the sky earlier than I did on a 24-megapixel camera I used to shoot with. The practical fix is to shoot at full resolution and downsample in post, or to stack multiple frames (more on that below), rather than relying on in-camera high-ISO performance alone. There's no in-body stabilization on the Q3, only optical stabilization in the lens, and for anything on a tripod at night you want that switched off. It has nothing to correct on a static camera, and leaving it engaged occasionally introduces a very faint softness on long exposures as the stabilizer settles.
Getting Focus Right When You Can't See Anything Through the Finder
Autofocus does not work reliably on stars with this camera, and I stopped trying after the first night. The Q3's hybrid AF hunts against a point source of light in near-total darkness, occasionally locks, and then loses it again as soon as you recompose. Manual focus is the only dependable method, and the Q3 is at least built for it: the lens has a proper focus ring with a distance scale, focus peaking you can overlay on the EVF, and a 5.76-million-dot viewfinder that's sharp enough to actually judge a peaking outline against a starfield rather than guessing.
One quirk worth knowing before you're standing in a field trying to figure it out: the focus ring's hard stop past the infinity mark is not true infinity. Like most Leica Q lenses, the actual infinity focus point sits just short of where the ring physically stops. Racking all the way to the stop and calling it done will give you slightly soft stars. The reliable method is to zoom the EVF or rear screen in on a bright star or distant light at 5x or 10x magnification, turn the ring until the point is as tight as it gets, and then leave it. I also check focus again after 30 to 45 minutes if the temperature is dropping fast, since the lens barrel contracts slightly in the cold and can shift focus just enough to matter at 60 megapixels.
Exposure Settings and the Trailing Math for a 28mm, 60MP Sensor
The old "500 rule" (divide 500 by your focal length to get a safe shutter speed before stars start trailing) was never designed with a 60-megapixel sensor in mind, and it shows. At 28mm it suggests you can expose for almost 18 seconds. On the Q3's pixel-dense sensor, that number is optimistic by a wide margin, because trailing becomes visible at the pixel level well before it's visible on a lower-resolution file at the same print size.
| Method | Basis | Max shutter speed (28mm, f/1.7) | Notes |
|---|---|---|---|
| 500 Rule | 500 ÷ focal length | ~17.9 seconds | Ignores sensor resolution entirely, too generous for this body |
| NPF Rule | (35 × f-number + 30 × pixel pitch) ÷ focal length | ~6.2 seconds | Accounts for the Q3's roughly 3.8-micron pixel pitch |
| Field-tested (100% crop) | Visual check on the rear screen at max zoom | 6 to 8 seconds | What I actually shoot to before pinpoint stars start to elongate |
In practice I land somewhere between the NPF number and my own eyes: 6 seconds is safe, 8 seconds is usually fine, and past 10 seconds I can see slight elongation on tight crops even though it's invisible at normal viewing size. I also rarely shoot wide open at f/1.7 for star points specifically, because the Summilux, like most fast wide-angle lenses, shows some coma and astigmatism in the corners at maximum aperture, stars near the edge of frame smear into little wings instead of staying round. Stopping down to f/2 or f/2.2 cleans that up noticeably while costing very little in exposure time.
Two Ways to Shoot This Camera for Astro
Because you're stuck at one focal length, the Q3's astro workflow really comes down to two different capture strategies depending on what you're after: a clean single (or lightly stacked) Milky Way frame, or a long star-trail sequence. The settings, frame count, and total time on location are genuinely different for each.
| Goal | Aperture | ISO | Shutter | Frames | Total time |
|---|---|---|---|---|---|
| Single Milky Way frame | f/2 | 6400 | 6s | 1 | <1 minute |
| Noise-reduction stack (static sky) | f/2 | 3200 | 6s | 15-20 | 2-3 minutes |
| Star trail sequence | f/2.8 | 800 | 30s per frame | 120-240 | 1-2 hours |
For the noise-reduction stack, dropping ISO to 3200 and shooting 15 to 20 near-identical frames to average in stacking software gets me a genuinely cleaner result than pushing a single frame to ISO 12800 and hoping noise reduction software can save it. For a star trail sequence, I drop ISO down to 800 and shoot dozens to hundreds of 30-second frames back to back, each one short enough that the sensor doesn't build up excessive dark-frame noise, then stack them additively later. The trade-off is obvious: a trail sequence eats an hour or two of battery and card space for one final composite, and I've killed a battery around frame 180 more than once.
Triggering the Shutter Without Introducing Shake
The Q3 doesn't have a physical remote release port, so for hands-off triggering you're relying on the 2-second self-timer for single frames, or the Leica FOTOS app over Bluetooth and WiFi for remote shutter control from a phone. The self-timer works fine for single Milky Way frames where you're not in a hurry. For long star-trail sequences, I've found the app connection occasionally drops in cold weather when the phone's battery performance dips, which is annoying mid-sequence. A basic wired intervalometer isn't an option here the way it is on cameras with a standard remote port, so if you're planning a serious trail sequence, budget extra time to babysit the connection rather than assuming you can walk away for two hours unattended.
Sorting Two Hundred Nearly Identical Frames the Next Morning
A single night out chasing star trails or shooting a noise-reduction stack easily produces 150 to 250 RAW files that look, at a glance, almost identical. Going through that by eye the next day is tedious and error-prone, you're squinting at tiny thumbnails trying to spot the three frames where a plane crossed the sensor or focus drifted from the cold. This is where I actually use imagic on these shoots: its duplicate and burst clustering groups a 200-frame trail sequence into a handful of visual clusters instead of 200 separate thumbnails, and the local sharpness scoring flags the handful of frames where focus shifted or a gust of wind nudged the tripod, both real problems on long unattended sequences at 60 megapixels where softness is easy to miss on a laptop screen. If you haven't looked at how that kind of automated sorting actually works, this breakdown of AI photo culling covers the mechanics in more depth.
Because these shoots often happen well outside phone signal, at a dark sky site or a remote overlook, imagic processing everything locally without uploading to the cloud matters more than it would for a studio session. I've come back from a weekend with no signal at all and still had the full set sorted before I got back to a hotel with WiFi. Once I've picked and graded the one frame I'm happiest with from a session, I run imagic's apply_my_style preset against the rest of that night's files, since it's trained on my own past edits rather than a generic look, it gets the white balance and contrast curve on the remaining frames close enough that I'm only doing small touch-ups instead of grading two hundred files individually. For anyone regularly working through large night-shoot batches, these workflow tips are worth a look alongside whatever culling tool you use.
Where the Q3 Comes Up Short for This Genre
Honesty matters more than enthusiasm here. The lack of interchangeable lenses is the biggest limitation, full stop, there is no way around it if you want anything tighter than 28mm. There's also no built-in intervalometer for stills, which means you're leaning on an app connection that isn't always rock solid in cold conditions. Long-exposure noise reduction, when enabled, roughly doubles your shot time by taking a matching dark frame after every exposure, which is fine for a handful of single shots but becomes a real problem across a 200-frame trail sequence, so I turn it off and handle noise reduction in the stack instead. Battery life drops noticeably in cold weather, and on one January night I burned through two batteries in under two hours of continuous 30-second exposures. None of this makes the Q3 a bad camera. It makes it a camera built primarily for street and travel work that happens to be capable enough at night to be worth bringing along, rather than a purpose-built astro tool.
A Night Out With the Q3
The clearest test came on a cold, cloudless night at a high-elevation overlook with almost no ambient light pollution. Temperature dropped from around 8°C at sunset to just under freezing by midnight. I set up on a tripod, dialed the lens to f/2, focused manually on a bright star at 10x magnification in the EVF, and locked it there with a strip of gaffer tape across the ring (an old habit from other manual-focus lenses, and cheap insurance against an accidental bump). For the Milky Way core shots I ran ISO 3200, 6-second exposures, and fired off 18 frames for a noise-reduction stack, done in under two minutes. Then I switched to ISO 800, 30-second exposures, and let the FOTOS app trigger frame after frame for close to 90 minutes for a trail sequence over the same rock formation, checking the connection every 15 minutes or so out of habit more than necessity. By the time I packed up I had 94 trail frames and two small stacked sets, all sorted into clusters within a few minutes once I got back to a laptop. The single-frame shots held up well printed large; the trail composite needed the full sequence to look convincing, which is exactly the trade-off this camera makes you plan around rather than something it hides from you.
Frequently Asked Questions
Can the Leica Q3's fixed lens really work for Milky Way photography?
Yes, within a specific style. The 28mm field of view is well suited to wide nightscapes where you want a visible foreground alongside the galactic core, and f/1.7 gives you a real light-gathering advantage over most zoom lenses used for the same purpose. What it won't do is get you a tightly framed shot of just the core or anything resembling a telephoto composition, since there's no way to change focal length on this body.
Do I need to turn off image stabilization for star trails on the Q3?
Yes. The Q3 uses optical stabilization in the lens rather than in-body stabilization, and on a locked-down tripod there's no camera shake for it to correct. Leaving it active for long static exposures occasionally introduces a very faint softness as the stabilizer mechanism settles, so switching it off before a night session is worth the ten seconds it takes.
What ISO should I use for star stacking with the Q3?
For a noise-reduction stack of a static sky, ISO 3200 with a 6-second shutter and 15 to 20 frames gives a cleaner final result than pushing a single frame to ISO 12800 or higher. For star trail sequences, dropping to ISO 800 with 30-second frames keeps individual exposures cleaner and lets you shoot far more frames before battery or card space becomes the limiting factor.
Is the Leica Q3 worth buying just for astrophotography?
Not on its own. If wide-field nightscapes and star trails are your only interest, an interchangeable-lens body with a dedicated wide astro lens will generally outperform the Q3 for less money. The Q3 makes more sense if you already want it as a walkaround travel and street camera and simply want it capable enough at night to justify carrying just one body on a trip, rather than as a dedicated astro purchase.