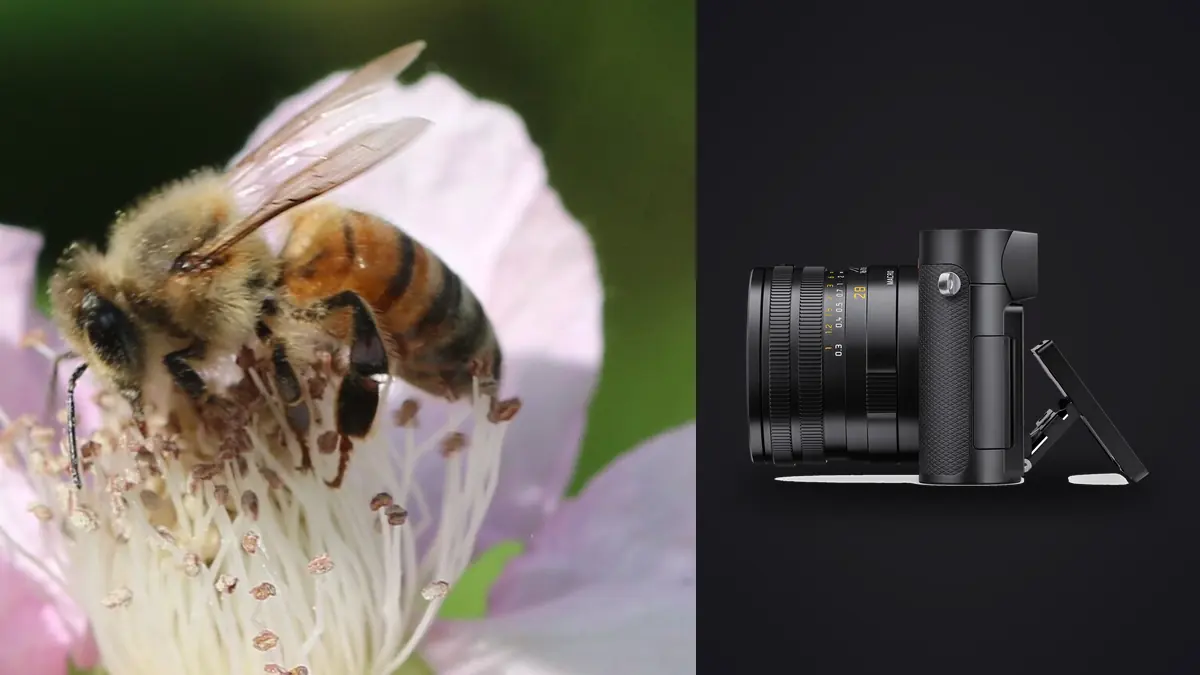
Every summer I get some version of the same message: someone saw a tight, blurred-background shot of a bee or a jumping spider online, checked the EXIF, saw "Leica Q3," and asked whether the fixed 28mm lens is secretly a macro lens. It isn't, not in the strict sense photographers use that word. The Q3 has a macro setting built into the collar around the lens barrel that pulls the close-focus limit down to roughly 17cm from the sensor plane, giving a maximum reproduction ratio around 1:6.7. That's a real close-focus capability, not a marketing footnote, but it's nowhere near the 1:1 you'd get from a dedicated 100mm macro lens on an interchangeable-lens body. What the Q3 actually offers insect photographers is a different bargain: a 60-megapixel sensor with enough resolution headroom to crop your way toward a macro look after the fact, in a body small enough that you'll actually carry it on a walk instead of leaving the "real" macro kit at home. This is about how that bargain plays out in the field, where it holds up and where it doesn't.
What "macro" actually means on this camera
Leica's spec sheet lists the macro range at roughly 17 to 30cm measured from the sensor plane, engaged by twisting the collar at the base of the lens until it clicks into the macro detent. At the closest point in that range, maximum reproduction ratio is about 1:6.7. If you're used to thinking in magnification terms from a dedicated macro lens, that number undersells how modest the actual result is: 1:6.7 means the patch of world filling your 36mm-wide sensor at minimum focus is around 240mm across, roughly the footprint of a hardback book lying flat. A honeybee is maybe 15mm long. At true closest focus with the macro collar engaged, that bee occupies a small fraction of the frame, not the frame-filling close-up most people associate with the word "macro." A 100mm lens doing genuine 1:1 puts a subject the width of your sensor, 36mm, so a bee at 1:1 already fills close to 40 percent of the frame width. The Q3 isn't playing that game.
What it is doing is giving you a genuinely useful close-focus distance on a fast, sharp fixed lens, at a working distance that still matters. Subject-to-sensor is 17cm at minimum, but because the lens body and hood add roughly 10cm of their own, your actual working distance from front element to bug is closer to 8 to 10cm. That's close. Close enough that plenty of insects will move before you get there, which is really the whole story of shooting bugs with this camera: the optics get you part of the way, technique and the sensor's resolution do the rest.
Using the crop modes to buy extra reach
Because the macro ratio alone won't fill a frame with anything smaller than a large moth, the feature that actually makes insect work viable on the Q3 is the digital tele-converter, the crop framings in the menu that simulate 35, 50, 75, and 90mm fields of view by cropping into the 60.3-megapixel sensor. Engage the macro collar and a crop mode together and you get the closest thing the Q3 has to a longer macro lens: the crop narrows the frame around the subject while the physical macro focus keeps you at minimum working distance, so a bee or hoverfly that only occupied a sliver of the uncropped frame now fills a meaningfully larger part of it.
The tradeoff is resolution, and it's a real one. Here's roughly what each setting costs you, and where I've found it actually earns its keep.
| Crop setting | Approx. output resolution | Where it actually helps |
|---|---|---|
| Full frame, macro engaged | ~60 MP | Environmental shots showing the insect in habitat, and your safety frame if a crop mode misframes the subject |
| 35mm crop | ~39 MP | Slightly tighter without giving up much resolution; a good default for anything perched and reasonably calm, like a resting damselfly |
| 50mm crop | ~19 MP | Noticeably tighter framing for mid-size subjects (bumblebees, larger beetles), still plenty of resolution for a full-page print |
| 75mm crop | ~8 MP | Useful when a subject won't tolerate you at 10cm, jumping spiders especially, but fine detail starts softening under this much crop |
| 90mm crop | ~6 MP | Maximum reach the camera offers; treat it as a web-and-social setting, not something you're printing large |
One thing worth knowing: shoot DNG rather than JPEG and the crop is recorded as metadata rather than baked into the file, so you can open the raw later and pull back toward the full 60-megapixel frame if the in-camera crop turned out wrong for that particular shot. I shoot DNG for exactly this reason on bug walks. You choose the framing standing in the garden, half-guessing how the insect will pose, and you get to choose again at the desk with the actual result in front of you.
Getting close without the subject leaving first
Bugs don't care about your lens hood, they care about your shadow and the sudden movement of you getting into position. Temperature matters more than gear here: cold, overcast mornings before 9am, with dew still on the grass, insects are torpid enough that you can usually reach the full 8 to 10cm macro working distance without them moving. By midday on a hot day, forget it, you'll be relying on the crop modes and a longer standoff distance instead.
The approach sequence I use is roughly this: spot the insect from two or three meters, decide which crop mode you'll probably need, close half the distance in one smooth motion rather than stop-start (stop-start reads as predator behavior to a lot of species), then creep the final stretch in small increments, checking the tilting rear screen held low rather than raising the camera to your eye, which cuts a silhouette that spooks plenty of insects faster than the lens itself does.
Jumping spiders specifically respond to being loomed over, more precisely to a large shape appearing above them, so approaching from a slightly lower angle than head-on gets you closer before they either freeze (good, they'll often hold a pose staring back at the lens) or leap. Dragonflies and damselflies perched on a favorite stem will often return to the exact same spot within a minute or two if you spook them off it, so the better move once you've lost one is to back off, hold still, and wait rather than chase. Butterflies feeding on a flower head are usually easier approached from the side than dead-on, since head-on puts your shadow and shape right across their field of view.
Depth of field falls apart fast at these distances
Even at a modest 1:6.7 ratio, depth of field at minimum focus is thin enough to catch people off guard the first time they try it. Wide open at f/1.7 with the macro collar engaged, usable sharpness on a bee's head might run a couple of millimeters, not enough to hold both eyes and the base of an antenna at anything but a flat, face-on angle. Stopping down helps, but the Q3's fixed 28mm optic means you're fighting the physics of a wide lens working at close range, and diffraction starts softening files noticeably past about f/8 on this sensor's pixel pitch.
In practice I shoot most insect macro on the Q3 somewhere between f/5.6 and f/8. It's a compromise: wide enough to avoid diffraction eating the resolution advantage the crop modes depend on, narrow enough to get slightly more of the subject in focus than wide open gives you. It still won't hold an entire dragonfly sharp front to back at minimum working distance in a single exposure. If you want everything in focus in one frame, either back off (less magnification, more depth of field, worse crop-mode math) or accept that eyes and the nearest wing edge is the realistic target for that shot.
One habit that helps more than any aperture choice: get the sensor plane parallel to the flattest plane of the subject. A bee's head and thorax shot face-on, rather than at a three-quarter angle, keeps far more of it inside a thin plane of focus than the same aperture manages at an angle.
Handholding asks more of the stabilization than usual
The Q3 stabilizes through the lens (there's no in-body stabilization on this camera, just optical stabilization in the barrel), and that system is tuned for the angular shake you get at normal shooting distances. At macro range the shake that matters most is different: small forward-and-back and side-to-side movements of your own hand translate into much larger apparent movement of the subject in frame, because you're magnifying a physical shift by the same factor you're magnifying the subject. Optical stabilization does less for that kind of shake than it does for ordinary handholding.
Practically, that means shutter speed matters more at macro range than the stabilization rating suggests. I keep shutter speed at 1/500 or faster for handheld insect work whenever there's enough light, even on a completely static subject, because it's my own hand movement I'm compensating for, not the bug's. On a tripod or monopod the calculation changes and you can drop shutter speed and lean on stability instead, but insects rarely wait around for a tripod to get leveled, so most of my usable frames from any given walk are handheld anyway.
Light without a macro flash rig
The Q3 doesn't have the hot-shoe macro flash ecosystem built around it that a mirrorless system camera does, and I've mostly stopped trying to force one. Direct flash at 8 to 10cm working distance is also more likely to blow out a small, reflective subject (a lot of beetles and flies have genuinely shiny exoskeletons) than it is to help. What works better in my experience is choosing time of day and angle instead of adding light: early morning sidelight is softer and rakes across texture, wing veins, the fuzz on a bee's thorax, in a way overhead midday sun flattens out completely.
Overcast days are underrated for this. Even light means you're not fighting blown highlights on a shiny thorax while trying to hold shadow detail in the same frame, which lets you shoot a stop or two wider without asking the aperture to fight both diffraction and exposure at once. If you want extra fill on an overcast day, a small reflector, or even a white index card held in your off hand, bounces enough light into the working distance to lift shadows without the harsh falloff of a flash that close.
Focus stacking, and the burst problem it creates
The Q3 has a focus bracketing function tucked in the menu, a set number of frames captured at incrementally different focus distances that you can stack afterward for genuinely deep focus on a static subject. It's more useful for flowers and anything pinned or motionless than for a bee that's going to shift position between frame three and frame twelve. For anything actually alive and mobile, I don't bother with bracketing, I bracket by shooting fast instead: burst mode at the fastest available frame rate, firing through a two or three second window while the insect holds roughly still, then picking through afterward for the one or two frames where focus landed exactly where I wanted it.
That approach solves the focus problem and creates a sorting problem. A single decent approach to a dragonfly can leave you with 40 or 50 nearly identical frames: same insect, same background, same crop, differing only in whether the eye or the wingtip is the sharpest point in the frame. Going through that by eye on a laptop screen at normal zoom is how you end up picking the wrong one, the frame that looks sharp at thumbnail size but is actually a half-step off where depth of field was thinnest.
This is the part of the workflow where I actually rely on imagic rather than my own judgment. It scores each frame in a burst for local sharpness and clusters the near-duplicates together automatically, an approach explained in more detail in how AI photo culling works, so instead of scrubbing through 50 frames guessing which nailed focus on the compound eye, I get the burst grouped with the sharpest candidates already surfaced. For macro work specifically, where the gap between a keeper and a wasted frame is a fraction of a millimeter of focus shift, imagic's duplicate detection has caught things I missed by eye more than once, usually late in a shoot when I'm tired and just clicking through frames on autopilot.
Editing without wrecking the detail
Once the burst is culled down, the actual edit on insect macro is usually restrained. These files already have a lot going on optically (thin depth of field, sometimes visible chromatic fringing at f/1.7 on high-contrast edges like a wing vein against sky), and heavy sharpening or clarity tends to exaggerate exactly the wrong things, haloing along antennae, oversharpened compound-eye facets that start to look artificial. I lean on the same core adjustment for most insect sets: pull midtone contrast down slightly to hold detail in the shiny parts of the exoskeleton, then a light, local sharpening pass rather than a global one.
Because I edit these in batches after a shoot, I run imagic's apply_my_style preset across the culled set first, since it's trained on my own past macro edits rather than a generic preset built for portraits or landscapes, and it gets the starting point close enough that most frames only need small individual corrections after. It also matters to me that this, the culling and the preset application both, happens locally on the laptop with the files never leaving the machine. Insect walks for me are usually a few hundred frames in an afternoon, and I don't want that much raw data sitting in a cloud upload queue before I've even had a look at it myself. For anyone doing this kind of high-volume culling regularly, some of the batching habits in this workflow piece apply directly to macro bursts too.
Frequently Asked Questions
Can the Leica Q3 shoot true 1:1 macro of insects?
No. The built-in macro range tops out around 1:6.7 magnification, roughly a sixth of true 1:1. It's a genuinely useful close-focus mode, not a substitute for a dedicated macro lens if a frame-filling single-insect portrait is the goal. Most of what reads as "macro" in Q3 insect shots online is that close-focus distance combined with a digital crop mode, or a post-crop in editing, using the sensor's 60 megapixels to simulate reach the optics alone don't provide.
How close can I actually get before insects fly off?
It depends far more on species and temperature than on the camera. Cold, early-morning insects will often tolerate the Q3's roughly 8 to 10cm working distance without flinching. The same species at 2pm on a warm day might bolt at 30cm. Jumping spiders and hoverflies tend to be the most forgiving of a close approach if you move slowly and keep your shadow off them; dragonflies and butterflies vary more by individual than by species.
Should I use the crop modes in camera, or crop later from the full 60MP file?
If you're shooting DNG it mostly doesn't matter, since the crop is stored as metadata and the full sensor data survives, so you can decide the framing later with the actual result in front of you instead of guessing in the field. If you're shooting JPEG only, the crop is baked in, so it's worth staying a little conservative in camera (35 or 50mm rather than jumping straight to 90mm), since you can't undo an overly tight crop after the fact the way you can with raw.
Is the Q3 worth carrying alongside a dedicated macro setup?
For anyone doing serious insect macro as a primary genre, not really, a 100mm macro lens on a system camera will out-resolve and out-magnify the Q3 at true close range every time. Where the Q3 earns its place is as the camera you actually have with you on a walk that wasn't planned as a macro outing, small enough to carry daily, fast enough at f/1.7 for everything else you'll shoot that day, with just enough close-focus capability to come home with something usable if a good subject happens to show up.