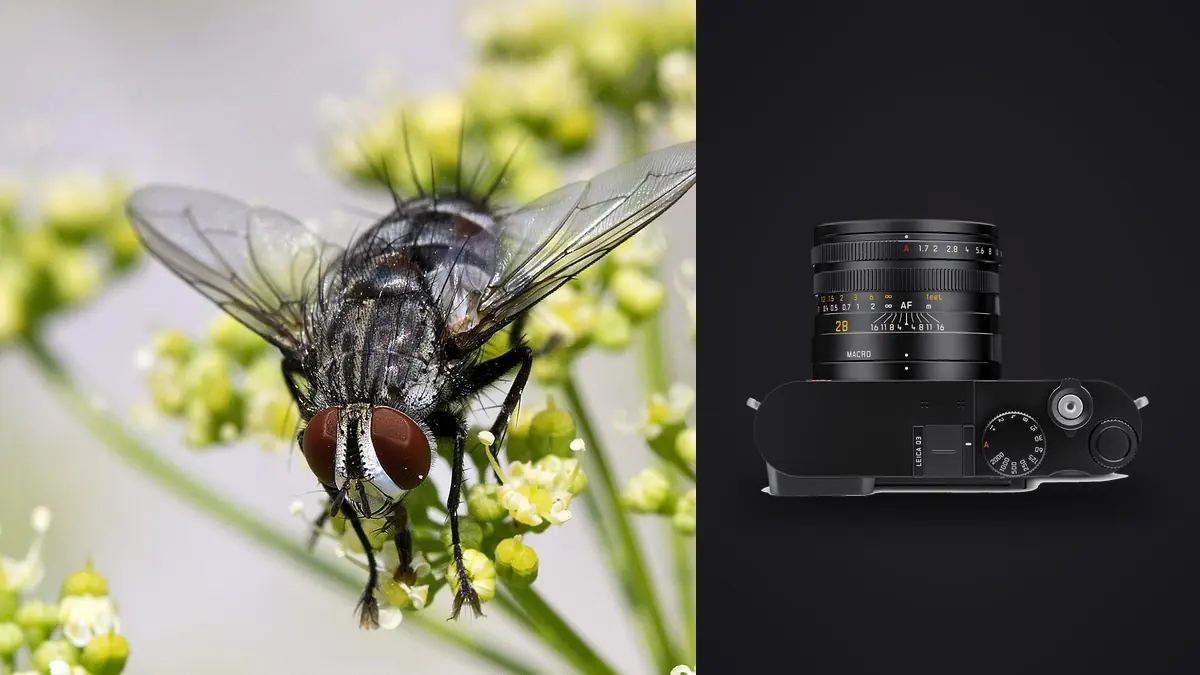
The first time I tried to photograph a damselfly with the Leica Q3, I ended up with eleven frames of empty reeds and one frame where the damselfly's wingtip was in the corner, out of focus, because it had already flown off before the shutter fired. That's the honest starting point for this piece. The Q3 is a phenomenal camera for street work, landscapes, and environmental portraits, and its 28mm Summilux lens resolves detail that makes a 60-megapixel file genuinely worth the storage space. It is not, however, a macro lens in the way a 100mm f/2.8 macro is a macro lens, and treating it like one on your first pond-side outing will lead to a lot of frustration.
This isn't a camera review in the usual sense. I've spent a few seasons trying to make the Q3's built-in macro mode work for bees, dragonflies, and the odd praying mantis, and what follows is what actually happened: the real magnification numbers, the working distance that makes or breaks a shot, and the shooting and editing workflow that got my keeper rate up from "almost nothing" to something I'd actually post.
What "Macro Mode" Actually Means on the Q3
Twist the focus ring on the Q3's lens barrel past the normal AF/MF range and it clicks into a dedicated macro zone, the same mechanism Leica used on the Q2 but tuned to focus closer. In that macro zone, the Q3 will lock focus down to roughly 17cm measured from the sensor plane, which works out to something like 10cm between the front element and your subject once you account for the length of the lens barrel. Leica's own literature quotes a magnification ratio of about 1:6.7 (roughly 0.15x) at that distance, which is a real improvement over the Q2's 27cm / 1:10 macro spec, but it is nowhere near the 1:1 (1.0x) reproduction ratio you get from an actual macro lens.
Where the Q3 gets clever, and where a lot of marketing copy gets slightly misleading, is the interaction between macro mode and the camera's in-camera digital crop modes. The Q3 can simulate 35mm, 50mm, and 75mm fields of view by cropping into the center of the 60-megapixel sensor before writing the JPEG (the DNG still records the full frame). Stack the 75mm crop on top of macro focus and Leica advertises an effective magnification approaching 0.6x. That number is real in the sense that your final framed image looks tighter, but it's happening because you're cropping pixels, not because the lens is physically magnifying the subject any more than it was at 0.15x. If you shoot RAW and crop yourself in post, you get the identical result, just with the option to change your mind about the crop later.
How that stacks up against dedicated macro options
To put those numbers in context, here's how the Q3's macro mode compares with the close-focus options most insect photographers actually reach for:
| System | Max magnification | Working distance at closest focus | What it's realistically good for |
|---|---|---|---|
| Leica Q3 macro mode (no crop) | ~0.15x (1:6.7) | ~10cm from front element | Flowers, still insects, environmental close-ups |
| Leica Q3 macro + 75mm digital crop | ~0.6x effective framing | ~10cm (unchanged) | Tighter crop of the same shot, no extra working room |
| 100mm f/2.8 macro lens (full-frame) | 1:1 (1.0x) | ~15-30cm | Dragonflies, butterflies, most live insects |
| 60mm macro lens (APS-C/MFT body) | 1:1 (roughly 1.5-2x equivalent) | ~4-8cm | Static or slow subjects; live insects often bolt |
| Clip-on diopter (e.g. Raynox DCR-250) on the Q3 | ~0.5-0.8x | ~8-12cm | Cheap way to close the gap without a new body |
The pattern that jumps out is working distance, not just magnification. A 100mm macro lens lets you sit 20-30cm from a dragonfly at 1:1. The Q3, even in macro mode, wants you within about 10cm of the subject to get anywhere near a usable magnification. That single fact shapes almost everything else about shooting insects with this camera.
The Working Distance Problem
Ten centimeters is closer than most insects will tolerate a lens barrel moving toward them. Bees and hoverflies working a lavender spike will often let you get surprisingly close if you approach slowly and keep your shadow off them, but dragonflies and damselflies, the insects that reward macro attention the most, tend to lift off well before your front element gets inside 15cm. I've had far better luck with insects that are cold, just after sunrise when they're still sluggish from the overnight temperature drop, or with subjects that are feeding and momentarily locked in place.
The fixed 28mm focal length compounds this. Even at the minimum working distance, a 28mm lens simply doesn't compress a small subject the way a longer macro lens does. A dragonfly at 10cm through a 28mm lens still occupies a modest portion of the frame compared to the same dragonfly at 25cm through a 100mm macro. What you get instead is closer to an environmental macro shot: the insect plus a good amount of the leaf, stem, or flower it's sitting on. Some photographers find that framing more interesting than a tight fill-frame portrait. If you're chasing the kind of shot where a fly's compound eyes take up the whole frame, the Q3 alone won't get you there without heavy cropping.
Where the Macro Mode Actually Earns Its Keep
None of this means the mode is useless, it just has a narrower lane than the marketing suggests. It's genuinely good for flowers with insects shown in context, where you want to show a bee or beetle as part of a garden scene rather than isolated against a blurred background. The 28mm angle of view keeps enough of the surroundings in frame that the shot reads as a place, not just a specimen.
It also works well for basking insects on rocks or leaves in early morning light, when low body temperature keeps them still long enough for a careful approach, and for larger, slower subjects generally: praying mantises, larger beetles, caterpillars, and moths at rest respond far better to the Q3's working distance requirements than fast fliers do. And it's genuinely useful for close-focus product-style shots of things like dew on a spider's web or seed pods, where the subject isn't going anywhere and you can take your time dialing in focus manually.
Field Technique That Actually Helps
A few adjustments made a real difference to my keeper rate. First, aperture: wide open at f/1.7 the depth of field at 10cm is measured in millimeters, so I stop down to somewhere between f/5.6 and f/9 for anything I want to look sharp along its whole body. Past about f/11 on a 60-megapixel full-frame sensor, diffraction starts softening detail enough that you can see it at 100 percent, so there's a real ceiling on how far stopping down helps.
Second, focus method: autofocus hunts more than I'd like at macro distances, especially against busy foliage, so I lean on manual focus with focus peaking turned up and a high-contrast peaking color, then rock my body forward and back slightly to find critical focus rather than turning the ring. Third, shutter speed and burst mode. Insects move in small, fast twitches even when they look still, wings buzz, antennae flick, so I shoot in bursts and expect to throw most of the frames away. The Q3's mechanical shutter tops out at 1/2000s, which is enough for a resting insect but not for frozen wingbeats; the electronic shutter reaches much higher speeds but can introduce rolling shutter distortion if the subject or camera moves quickly, so I only reach for it on stationary subjects in bright light.
Fourth, the tilting rear screen, new on the Q3 (the Q2 didn't have one), turns out to be more useful for insect work than I expected, since a lot of the best subjects are low to the ground and a waist-level or ground-level shooting angle without lying in the dirt makes a real difference to how many attempts you get before your knees give out.
Using the 60-Megapixel File as a Second Lens
Because the Q3's sensor produces such large files (DNGs typically land between 75 and 90MB), there's real headroom to crop after the fact instead of relying entirely on the in-camera crop modes. A shot that looks like a modest close-up in the viewfinder can often be cropped down to a much tighter frame in post and still hold up at normal viewing sizes or web resolution, effectively giving you extra reach you didn't have optically. It's not a substitute for real magnification, since you're not resolving detail the lens never captured, but it does mean a slightly-too-wide macro attempt isn't necessarily a wasted frame the way it would be on a lower-resolution sensor.
The Part Nobody Mentions: What Happens After the Shoot
Here's the workflow reality of shooting insects this way: a single afternoon at a pond can produce four or five hundred frames, and because you're working at minimum focus distance with a narrow depth of field, a large fraction of them are near-misses where focus landed on a wing edge instead of the eye, or the insect moved a centimeter between the shutter opening and closing. Going through that manually, frame by frame, at 100 percent zoom, is the part of macro photography nobody warns you about before you start.
This is where I actually lean on imagic rather than doing it by eye. Because it scores sharpness locally on the actual pixels rather than relying on camera-reported focus points, it catches the difference between the three frames in a burst where the insect's eye is genuinely crisp and the two on either side where it's a fraction soft, which matters a lot more in macro work than in general photography since the margin for "in focus" is so much smaller. It also clusters near-duplicate burst frames automatically, so instead of scrolling through eleven visually similar shots of the same damselfly one at a time, I'm looking at one representative thumbnail per cluster with the sharpest frame already flagged. If you haven't compared how different culling approaches handle burst-heavy shoots like this, this breakdown of how AI photo culling works covers the mechanics in more detail than I'll get into here.
Because all of that runs locally rather than uploading hundreds of 80MB DNGs somewhere first, the culling pass on a big macro session doesn't turn into an overnight wait, which matters when you want to see the same afternoon's shots before the light and your memory of the scene fade. For the edit itself, I built a preset from a batch of insect shots I was already happy with using the apply_my_style feature, so new sessions land close to my usual color and contrast treatment for foliage and insect coloration without redoing that work frame by frame. It's not a substitute for judgment on the tricky shots, but it clears out the repetitive baseline adjustments fast. If your macro sessions are producing similarly bloated card dumps, these workflow tips are a reasonable starting point for trimming the review process down.
A Cheap Way to Close the Gap: Clip-On Diopters
If 0.15x isn't cutting it and a second camera body isn't in the budget, the Q3's 49mm filter thread accepts standard clip-on close-up filters. A Raynox DCR-250 or similar diopter screwed onto the front element pushes the effective magnification up toward 0.5-0.8x, at the cost of an even shorter working distance and a much thinner slice of usable depth of field. It's a genuinely useful stopgap for someone who already owns a Q3 and wants to try tighter insect work before deciding whether it's worth carrying a second lens system. I keep one in a jacket pocket for exactly this reason, it weighs almost nothing and screws on in a few seconds.
Frequently Asked Questions
Is the Leica Q3's macro mode true 1:1 macro?
No. At its closest focus distance of roughly 17cm from the sensor, the Q3's optical magnification is around 0.15x (1:6.7). The 0.6x figure Leica sometimes quotes only applies when you stack that with the in-camera 75mm digital crop, which tightens the framing by cropping the sensor rather than by any additional optical magnification.
Can the Q3 realistically photograph small, fast insects like bees and dragonflies?
It can, but with real constraints. The roughly 10cm working distance at closest focus is tight enough that fast fliers often move before you get there. Slower or cold-blooded subjects, such as basking dragonflies at sunrise, resting moths, or larger beetles, are far more workable than insects in active flight or mid-foraging.
Do I need extension tubes or a macro adapter for the Q3?
The Q3 has a fixed, non-interchangeable lens, so traditional extension tubes aren't an option. A clip-on close-up filter, such as a Raynox DCR-250 diopter, threaded onto the 49mm front filter thread is the practical way to push magnification higher without changing bodies.
Does the 60-megapixel sensor make up for the lack of true macro magnification?
Partially, and only for output purposes. The extra resolution gives you room to crop in post without the image falling apart at normal viewing sizes, which helps rescue a slightly-too-wide frame. It doesn't add optical detail the lens never resolved in the first place, so it's a workaround for framing, not a substitute for real magnification on very small subjects.