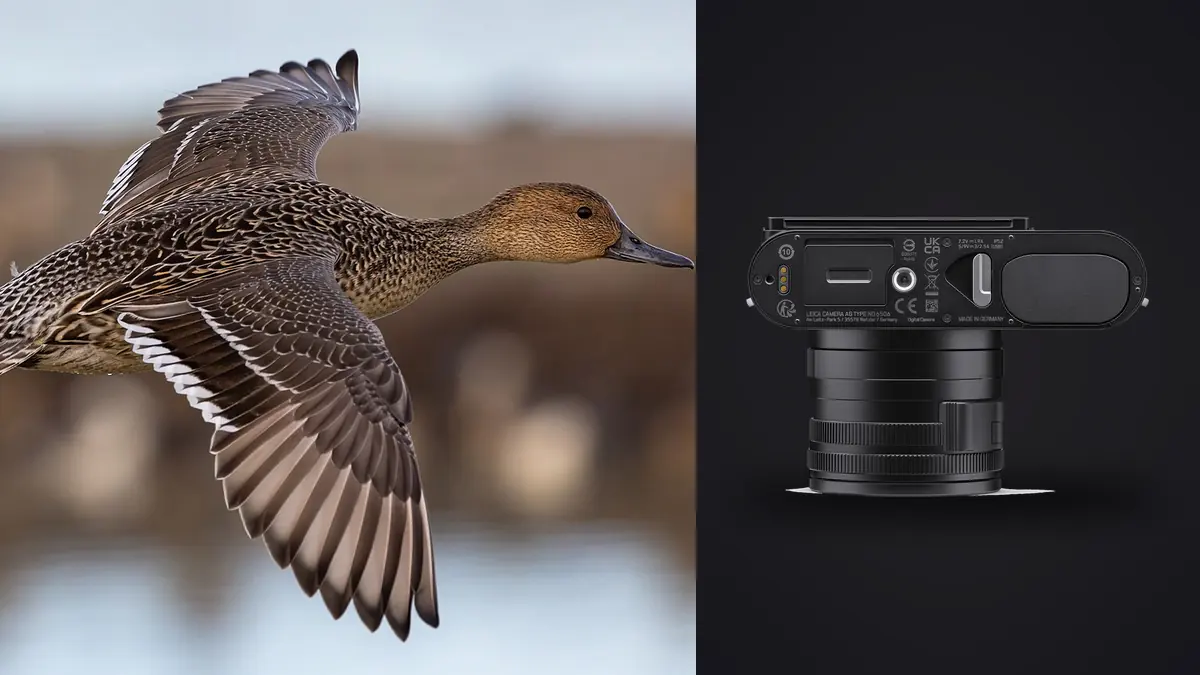
The Leica Q3 combines a 60.3 megapixel full-frame sensor with a fixed 28mm f/1.7 lens. That is an appealing tool for environmental storytelling, but it does not turn into a long wildlife lens through resolution or a digital crop. Small birds at safe distances will occupy a small part of the frame, and moving closer can disturb the behavior the photograph should respect.
This Lens and Location Guide defines the honest wildlife role for the Q3: animals within a meaningful habitat, flight shown as part of a landscape, authorized work from hides, and larger or habituated subjects approached within established rules. It also explains when the fixed 28mm view is the wrong tool and a telephoto system should be selected instead.
Set a realistic subject scale for 28mm
At ordinary wildlife distances, a 28mm lens records context. A bird may become a shape within sky, wetland, cliff, or canopy rather than a feather-detailed portrait. That can be a strong picture when habitat, weather, migration, or human proximity is the subject. It is a poor fit when the assignment requires diagnostic plumage, a tightly framed raptor, or reliable identification of distant individuals.
Make a scale test before travel. Photograph an object of roughly known size at the expected distance, then crop to the delivery ratio and dimensions. Examine actual pixels, not only a fit-to-screen preview. If the result cannot support the required subject detail, change the brief, location plan, or camera system.
The Q3's digital crop options preview tighter fields and may produce useful derivatives, but they do not change lens perspective, working distance, aperture, or the number of photons falling on a small distant subject. Treat them as framing aids and output choices, not optical reach.
| Scene | 28mm role | Decision |
|---|---|---|
| Bird over a wide wetland | Flight within habitat and weather | Viable when the environment carries meaning |
| Small songbird across a field | Tiny subject with little identifying detail | Use a telephoto system for a portrait |
| Large animal from an approved vehicle | Environmental frame at regulated distance | Viable only without approaching or leaving the vehicle |
| Zoo or rehabilitation center | Close contextual study under staff rules | Confirm publication and welfare restrictions |
| Feeder or nest | Potentially close but highly sensitive | Avoid disturbance, baiting, and nest disclosure |
Choose places where proximity is already managed
A public hide, raised boardwalk, safari vehicle, boat operated under wildlife rules, or viewing platform can create close opportunities without a photographer inventing an approach. Ask the reserve or guide which positions, windows, and group sizes are allowed. Remain within the structure and do not extend arms, tripods, or cameras into an animal's route.
Urban parks can hold birds accustomed to people, but habituation does not remove welfare obligations. Keep normal public distance, avoid surrounding an animal, and do not use food or calls to pull it toward the lens. Local regulations may prohibit feeding even when other visitors do it.
Accredited zoos, sanctuaries, and rehabilitation facilities can suit a short-lens educational story when staff approve the work. Confirm whether photography, flash, commercial publication, and behind-the-scenes areas are permitted. Do not describe a captive setting as wild or omit barriers in a way that misrepresents the circumstances.
For large mammals, never leave a vehicle or trail to make the animal fill the frame. Follow species-specific distances and ranger instructions. If the 28mm composition looks empty at the safe boundary, the answer is a wider habitat image or another lens, not a closer approach.
Scout behavior without changing it
Learn feeding times, tide cycles, migration windows, prevailing wind, and common travel routes from reliable local sources. Observe from a distance before selecting a camera position. Repeated alarm calls, freezing, crouching, false departures, nest avoidance, or attention fixed on the photographer are reasons to increase distance or leave.
Do not use playback, bait, scent, drones, or habitat alteration simply to overcome a short lens. Such methods can change energy use, predation risk, territorial behavior, or human association. Rules vary by species and land manager, and an allowed technique may still be inappropriate for the situation.
Nests, dens, roosts, and dependent young require a particularly high threshold. Avoid trampling a path, touching cover, or publishing precise coordinates. A wide photograph that reveals a nest location can create more risk than a telephoto portrait with no recognizable landmark.
Build the frame around habitat layers
With a small subject, the background and foreground become the composition. Look for repeated reeds, shoreline curves, cloud layers, tree openings, reflections, or human structures that explain the animal's environment. Keep bright gaps and heavy objects away from the likely flight line.
Choose camera height without leaving durable ground. A low position can place a bird against distant water or sky, but lying near a shore may damage vegetation, enter nesting areas, or expose the photographer to tide. A platform or path at a slightly higher angle is the correct position when it protects the site.
Use the 28mm perspective deliberately. A close foreground can lead toward a distant flock, and a large sky can communicate migration or weather. Do not crop every image until the habitat disappears; if a tight animal portrait is the goal, the project has outgrown the lens.
Map flight paths before selecting autofocus
Birds often follow repeatable lines between water, perches, feeding areas, and roosts. Watch several passes without the camera. Note entry direction, altitude, turns, backdrops, and the point where the subject is largest without crossing a restricted area. Stand where a missed pan cannot swing the camera into another visitor.
A wide lens makes acquisition easier but leaves the subject small. Use a defined focus zone around the expected path and begin tracking before the best background. Subject detection may help, yet it can choose a nearby person, branch, or larger bird. Keep a conventional area mode ready and test it against the actual habitat.
Pre-focus can work when a bird crosses a fixed gap or a larger animal uses an established path. Choose enough depth for natural route variation. Never place markers, food, or obstacles to force the subject through the focus plane.
Leave space in front of flight and include the environmental feature that gives the frame purpose. A centered speck in empty sky rarely benefits from the Q3's wide view. A bird entering layered cloud, clearing a ridge, or crossing a human boundary can.
Select shutter behavior for wings and background
A fast shutter can freeze wing detail, while a slower pan can turn the landscape into motion and keep the subject recognizable. Stabilization reduces camera shake but does not freeze wings. Set speed from the intended rendering and subject size, then allow ISO to rise within the delivery tolerance.
The Q3 provides mechanical and electronic shutter options with different limits. Electronic capture can be quiet but may distort fast motion or band under artificial lighting. Mechanical operation may be more predictable for some movement. Test the specific subject speed and light rather than selecting a mode only because it is silent.
Use short sequences around the clean part of the flight. A very wide frame does not become stronger because it exists in dozens of nearly identical versions. Watch behavior between bursts and lower the camera when others need the viewing window.
Plan weather, water, and public-space safety
Weather sealing is not permission to expose the camera carelessly. Use a cover that leaves the fixed lens and controls accessible, dry the front element, and protect the single SD card. At coasts and wetlands, salt spray can reduce contrast before droplets are obvious.
Check tide, wave, river, ice, heat, lightning, and wildfire conditions from official sources. Keep an exit route and turn back before weather removes it. Do not look through the viewfinder while walking near cliffs, roads, water, or animals.
Respect platform capacity and other observers. A small camera gives no right to monopolize a window. Avoid blocking spotting scopes, guide groups, or accessibility spaces. Share sightings without broadcasting sensitive locations.
Use close-focus ability for habitat details
A complete wildlife story can include tracks, feathers found legally in place, plants, water texture, damaged habitat, signage, and conservation work. The Q3's close-focus mode can record contextual details, subject to its aperture behavior and working distance. Do not collect specimens or move evidence for a cleaner arrangement.
Switching to close focus changes the lens state and may alter the available aperture range. Confirm focus and exposure after the change, then return the lens to its normal position before distant action. A missed flight because the camera remained in macro mode is a planning failure, not an autofocus problem.
Photograph people involved in conservation only with permission and accurate captions. Safety equipment, research tags, and handling protocols should remain visible when they explain legitimate work rather than being cropped into a misleading scene.
Keep DNG selection tied to ethical context
Copy the SD card to two verified locations before formatting. Preserve timestamps and field notes about captive status, viewing structure, distance rule, species uncertainty, and sensitive coordinates. Restrict location metadata where publication could expose a nest or threatened animal.
imagic desktop can scan supported DNG folders before local analysis, group similar frames, and assign culling statuses without deleting originals. Automated scores cannot establish species, welfare, wild status, or the significance of habitat. A distant but informative frame may matter more than a closer image of ambiguous origin.
Reselecting re-ranks stored scores and does not reanalyze. Check freshness and reanalyze stale photos when needed. Style application requires a learned profile, and export applies saved edits to new files. Avoid edits that fabricate proximity or remove barriers in a way that changes the truth of the scene. Related selection guidance is under Workflow and Editing.
The Leica Q3 is not a general replacement for a wildlife telephoto. It becomes useful when the project values habitat, managed proximity, small-kit access, and an honest wide perspective. If those conditions do not serve the subject, choosing another tool is the responsible plan. That choice protects both the animal and the credibility of the finished story.
Frequently Asked Questions
Can the Leica Q3 photograph birds in flight?
It can record birds in flight, especially as part of a wider habitat scene. It is not an efficient choice for tightly framed small birds at normal ethical distances.
Do the Q3 crop modes provide telephoto reach?
They provide tighter framing by using a smaller part of the sensor. They do not change optical magnification, camera distance, perspective, or subject behavior.
How close should a Q3 photographer get to wildlife?
Remain within official species and site rules, then increase distance whenever behavior changes. If the subject is too small from the safe position, make an environmental frame or use a telephoto system.