The room doesn't care about your megapixel count
I switched from a Z7 II to a Z6 III last winter, mostly for video, and expected the resolution drop to bother me on interior jobs. It hasn't, and that surprised me enough that it's worth explaining why. Architectural and interior work punishes different things than most other genres. A wedding camera needs to nail focus on a moving face in bad light. A landscape camera needs resolution and dynamic range for a print that might get blown up to four feet wide. An interior camera needs something else entirely: a viewfinder you can trust for manual focus, a sensor that survives a bright window and a dim hallway in the same frame, and a body that won't die on you during a six-hour walkthrough with a client standing behind you asking when you'll be done with the kitchen.
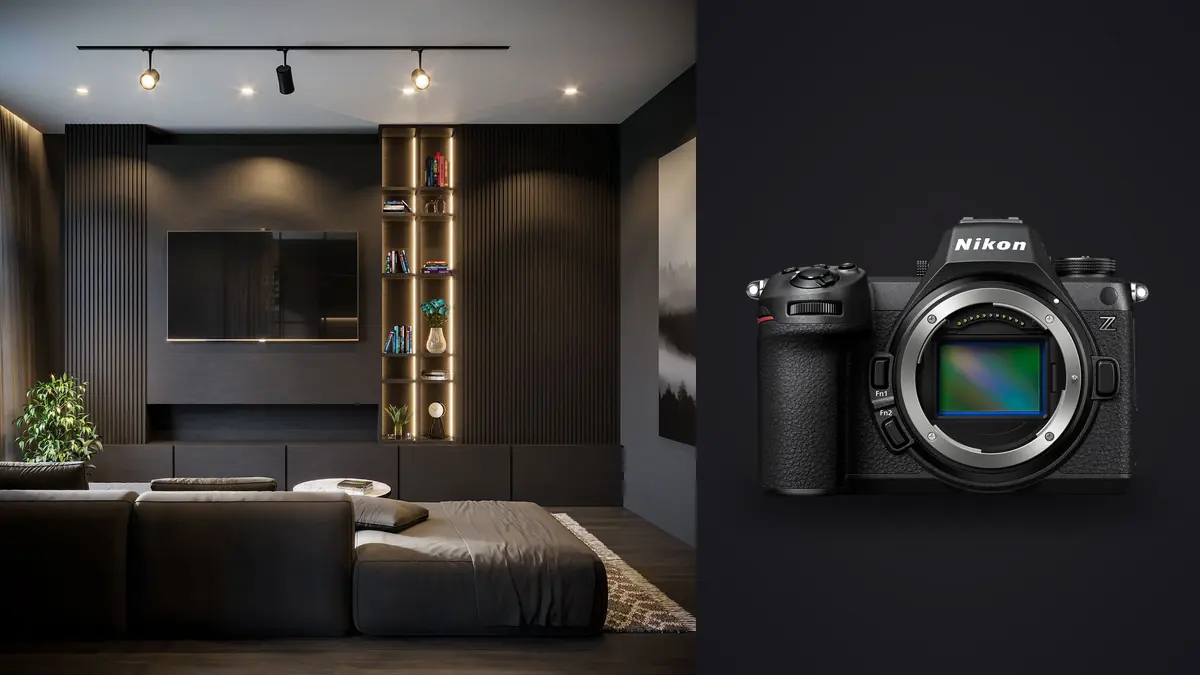
The Z6 III turns out to be built around exactly that list, even though Nikon didn't market it that way. It's positioned as the video-and-speed body in the lineup, sitting between the Z7 II and the Z8, but a lot of what makes it good for run-and-gun video also makes it good for standing still in someone's dining room with a tripod and a tilt-shift lens.
The partially stacked sensor: a real tradeoff, not just a spec sheet line
Nikon calls the Z6 III's 24.5MP sensor "partially stacked," which is marketing language for a chip that's stacked enough to kill most rolling shutter and banding under flicker-prone LED lighting, but not fully stacked like the sensor in the Z8 or Z9. The honest tradeoff is dynamic range at base ISO. Independent lab tests and my own raw files both point to something in the neighborhood of 11 to 11.5 stops of usable range at ISO 100, which is a step down from the closer-to-12-stop performance of the older Z6 II sensor and noticeably behind the Z7 II.
For most photography that difference is academic. For interior work with a bright window in frame, it isn't. I've had to go back to bracket-and-blend on shots I could have pulled from a single raw file on the older body, particularly south-facing rooms at midday with sheer curtains that blow out fast. The upside is that the Z6 III recovers shadows cleaner at higher ISO than either of those older cameras, so the tradeoff nets out roughly even once you're shooting anything above ISO 800, which happens constantly in occupied homes where you can't always kill the ambient light or wait for golden hour.
The practical fix, and the one I actually use on jobs, is exposure bracketing set to 3 or 5 frames with a stop and a half of spacing, blended later. The Z6 III's buffer handles that without complaint even in 14-bit lossless raw, which wasn't a given on my old body once the card started filling up.
The viewfinder is the upgrade that actually matters for tilt-shift work
This is the part of the Z6 III that gets underrated in most reviews because most reviewers aren't manually focusing a shift lens on a bookshelf twelve feet away. The 5.76-million-dot EVF with a 4,000-nit peak brightness is genuinely a different tool than what came before it. Architectural photographers who shoot tilt-shift primes, the Nikkor Z 24mm f/3.5 PC being the obvious one in this mount, live or die by how confidently they can judge focus and shift in the viewfinder rather than chimping the rear screen after every adjustment.
With the older EVF I'd routinely pull up the rear LCD to double check a shift correction because the finder image felt slightly soft at the edges. With the Z6 III I stopped doing that within the first week. Focus peaking is more legible against patterned surfaces like tile grout or wood paneling, which is exactly where peaking tends to fall apart on lower-resolution finders. It's a small thing that saves real time across a shoot day, and time is the actual budget on most interior jobs since you're usually paying for access to a space, not for camera gear.
Electronic level accuracy is the other half of this. Converging verticals are the single most common complaint clients have about interior photos, and a body-level indicator that's actually trustworthy to a fraction of a degree, paired with a shift lens or a lens correction pass afterward, is what separates photos that look intentional from photos that look like snapshots of a nice room.
Mixed light, big windows, and where the ISO ceiling actually sits
Interiors rarely give you one light source. You've got daylight through the windows, warm tungsten in the lamps, cool LED downlights the electrician installed last year, and maybe a client's phone flashlight because they're standing in a hallway with no fixture at all. Getting white balance right in camera is mostly a lost cause here, which is why I shoot raw exclusively on these jobs and don't worry too much about nailing WB on site beyond getting it close enough that skin tones and wood floors don't look sickly on the back screen.
Where the Z6 III earns points is in usable ISO range once the light gets thin. Basements, stairwells, north-facing rooms in winter, these all push you past ISO 3200 more often than architecture photographers like to admit, especially if you're avoiding flash to keep reflections off glossy floors and glass. The Z6 III holds detail and color at ISO 6400 well enough that I'll use it without much hesitation, something I wasn't comfortable doing on the higher-resolution body. That's the direct payoff of the pixel size that comes with a 24.5MP full-frame sensor versus a 45MP one: bigger photosites, better light gathering per pixel, less noise at a given ISO.
Lenses that actually earn their keep on interior jobs
The body is half the kit. For interiors specifically, the lens choice does more to determine whether a room looks inviting or looks like a wide-angle fisheye distortion exercise. Here's what I actually reach for, roughly in order of how often they come out of the bag on a residential or commercial interior job.
| Lens | Type | Best for | Approx. street price |
|---|---|---|---|
| Nikkor Z 14-24mm f/2.8 S | Ultra-wide zoom | Tight bathrooms, small bedrooms, entryways | ~$2,300 |
| Nikkor Z 14-30mm f/4 S | Ultra-wide zoom | General walkthrough coverage, lighter travel kit | ~$1,300 |
| Nikkor Z 24mm f/3.5 PC | Tilt-shift prime | Correcting converging verticals without cropping | ~$2,200 |
| Nikkor Z 24-70mm f/2.8 S | Standard zoom | Vignette details, furniture, material close-ups | ~$2,300 |
| Nikkor Z 20mm f/1.8 S | Wide prime | Dim rooms and ambient-only shots without flash | ~$1,050 |
The 14-24mm gets more use than the shift lens on most residential jobs simply because small rooms don't leave you room to back up. But when a client wants the kind of clean, catalog-straight verticals you see in high-end real estate marketing or design magazine spreads, the PC 24mm is worth the manual-focus workflow and the price tag. It's also the lens that most rewards the Z6 III's viewfinder upgrade, since you're doing all your composition and focus checking through the finder rather than autofocus.
Where the Z6 III actually sits against the rest of the Z lineup
People ask me whether they should just buy the Z7 II for the extra resolution, or jump to the Z8 for the speed. Here's how I'd actually lay it out for someone shooting architecture and interiors specifically, not landscapes or sports.
| Camera | Resolution | Base ISO dynamic range | Viewfinder | Approx. price (body only) | Best fit for interiors |
|---|---|---|---|---|---|
| Nikon Z6 III | 24.5MP | ~11-11.5 stops | 5.76M-dot, 4,000-nit EVF | ~$2,500 | Best all-rounder; strong for mixed video/stills contracts and tilt-shift work |
| Nikon Z7 II | 45.7MP | ~11.5-12 stops | 3.69M-dot EVF | ~$2,000 (discounted) | Best when clients need large prints or heavy perspective-crop corrections |
| Nikon Z8 | 45.5MP (stacked) | ~10.5-11 stops | 3.69M-dot, 120fps EVF | ~$3,800 | Best for high-volume pros who also need speed for commercial/event crossover |
The Z7 II is still, in my opinion, the sharper tool for a photographer who only shoots stills and only shoots interiors, because that extra resolution buys you real headroom when a heavy perspective correction crop is needed for a magazine spread. But it's an older body now, the buffer is smaller, and the EVF is noticeably behind the Z6 III's. The Z8 is the better all-rounder on paper, but the price gap is hard to justify unless you're also billing for commercial video or sports-adjacent work where the extra speed pays for itself. For someone building a mixed practice around residential real estate, interior design portfolios, and the occasional walkthrough video for a client's listing, the Z6 III is the one I'd actually recommend buying with your own money.
From card to client: taming the bracket avalanche
The unglamorous part of architectural photography is what happens after the shoot. A single-family home walkthrough with bracketed exposures in every room, a handful of detail shots per space, and a few tilt-shift variations while you're figuring out the right shift amount can easily produce 400 to 600 raw files by the end of the day. Multiply that by a commercial interior job with a dozen spaces and you're staring down a card dump that takes longer to sort than it took to shoot.
This is where I lean on imagic rather than clicking through Lightroom's grid view frame by frame. Its local sharpness scoring catches the soft frame in a bracket set (a slight tripod nudge, a gust from an open door) before I waste time color-grading something I'll throw out anyway, and because it clusters bursts and near-duplicate exposures automatically, a five-frame HDR bracket collapses down to one representative thumbnail instead of five identical-looking entries competing for attention in the grid. If you haven't dug into how that kind of clustering actually works under the hood, we cover the mechanics in how AI photo culling works.
The other piece that's specific to this kind of work is client confidentiality. A lot of interior jobs, especially pre-listing real estate shoots or unreleased commercial design projects, come with an informal or explicit expectation that images don't touch a server anywhere before the client has approved them. Because imagic processes everything locally on the machine rather than routing files through the cloud, that's never a conversation you have to have with a client. It's just true by default.
Once the culling pass is done, the "apply_my_style" preset trained on my own past edits gets me most of the way to a consistent look across a full property set without hand-grading forty near-identical living room shots one at a time, which matters more than it sounds like on a same-day turnaround. If your bracket-and-blend workflow feels slower than it should be, the general tips in 10 tips for a faster photo workflow apply just as well to a 500-frame interior shoot as they do to anything else.
Frequently Asked Questions
Is 24.5 megapixels really enough resolution for architectural print work?
For most real estate marketing, design portfolios, and even double-page magazine spreads, yes. Print resolution requirements are lower than most photographers assume, and 24.5MP comfortably covers a full-bleed magazine page at standard print DPI. Where it gets tight is if a client wants a heavy crop after the fact to fix a composition mistake, or a large-format print for a lobby wall beyond about three feet wide. If that's a regular part of your business, the Z7 II's extra resolution is worth the tradeoff.
Does the Z6 III need a tilt-shift lens, or can lens correction software handle verticals?
Software correction (in Lightroom, Photoshop, or Nikon's own NX Studio) handles moderate vertical convergence well and is what most working photographers use for the bulk of a job. A tilt-shift lens still wins when you need to preserve full resolution at the edges of the frame without stretching pixels, or when the convergence is severe enough that software correction starts introducing visible distortion in straight lines near the frame edge. I use software correction for maybe 80 percent of shots and reach for the PC 24mm for the hero images.
How does the Z6 III handle high-contrast window light compared to older Nikon bodies?
Slightly worse at base ISO than the Z6 II or Z7 II, due to the partially stacked sensor's dynamic range tradeoff described above, but better at higher ISO. In practice this means exposure bracketing is more of a default habit than an occasional fallback when you're shooting rooms with large windows in daylight. Three-frame brackets at a stop and a half apart cover almost every window-lit interior I've shot with this body.
Is the Z6 III worth it over a used Z6 II for someone starting out in interior photography?
If budget is the deciding factor, a used Z6 II with a 14-30mm f/4 S is a perfectly capable starting kit and will save real money. The Z6 III earns its higher price mainly through the viewfinder (a genuine difference for manual tilt-shift focusing), a deeper buffer for bracket-heavy shooting, and 6K video for clients who want a walkthrough clip alongside stills. If you're not shooting video and not using manual-focus tilt-shift lenses yet, the upgrade matters less than most marketing suggests.