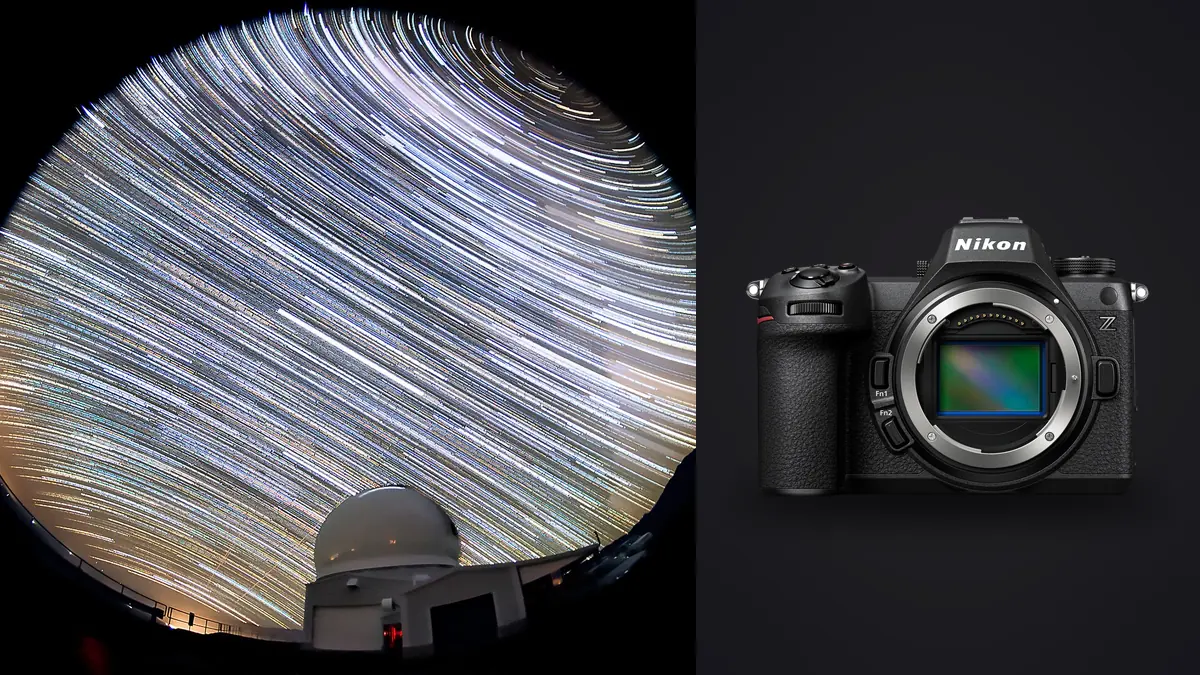
I bought the Nikon Z6 III mostly for video work, then took it out to a dark sky site on a whim and ended up rewriting my entire astro workflow around it. The partially stacked sensor Nikon put in this body isn't marketed as an astro tool, but the readout speed and the low-light autofocus turned out to matter a lot more for star stacking than I expected. This is what I've learned after about a dozen sessions with it, ranging from a driveway shoot fighting Bortle 6 skies to a three-night trip to a proper dark site where the Milky Way core cast shadows.
Why the Sensor and AF Matter More Than You'd Think
Star stacking lives or dies on two things: how clean your individual subframes are, and how consistent they are with each other. The Z6 III's 24.5MP partially stacked BSI sensor reads out faster than the previous Z6 II, which mostly gets talked about for video rolling shutter, but it also means less banding and more consistent black levels frame to frame when you're firing off sixty or eighty exposures in a row. I noticed this most in the shadow regions of stacked files. Where my old Z6 II produced some horizontal banding that DeepSkyStacker's dark-frame calibration would only partially clean up, the Z6 III files came out noticeably flatter straight off the card.
The other surprise is the autofocus. Nikon rates the low-light AF sensitivity down into deep negative EV territory with a fast lens attached, and while I still manual focus for anything serious, I've started using autofocus with a bright star as a starting point before switching to manual fine-tuning. It gets you close enough in a couple of seconds instead of the usual minute of squinting at a magnified live view. That alone saves real time on a cold night when your fingers are already fighting the focus ring.
Dialing In Settings Before the Sky Goes Dark
Focus, done properly
Set the lens to manual focus once you're close. Pick the brightest star you can find, zoom the rear screen in to at least 50x using the magnifying glass button (not just pinch-zoom, the dedicated zoom function gives you a cleaner readout), and nudge the focus ring until the star collapses to the smallest, tightest point it can be. On the Z6 III's screen this is genuinely easier than it was on the Z6 II because the panel is brighter and the star doesn't wash out at high magnification the way it used to. Tape the focus ring down once you're locked. I use a strip of gaffer tape across the barrel and onto the lens hood so a stray glove can't bump it mid-sequence.
Exposure settings for stacking, not for a single hero shot
This is where people coming from single-exposure Milky Way shooting trip up. For stacking you want a shorter exposure and more frames rather than one long exposure pushed to the edge of star trailing. On a static tripod with a 20mm lens I shoot 8 seconds at f/2.8, ISO 3200, rather than the 15-20 seconds you'd use for a single frame. Shorter exposures mean tighter star points across the whole stack and fewer frames lost to a gust of wind or a passing satellite. If you're on a star tracker, you can push individual exposures to 60-120 seconds at a much lower ISO, which changes the math considerably (more on that in the table below).
Turn off Long Exposure Noise Reduction. It's tempting to leave it on since it sounds like it should help, but it doubles your time between frames (the camera takes a matching dark frame after every light frame) and you're going to build your own dark frame library anyway. Also disable Auto ISO, shoot 14-bit lossless compressed RAW, and set white balance to a fixed Kelvin value, something like 3800-4200K works well for Milky Way cores. Leaving white balance on auto causes a subtle color shift between subframes that stacking software struggles to fully reconcile, and you'll see it as a faint color gradient in the final stack.
Building the Subframe Sequence
The Z6 III's built-in interval timer shooting is what I use to fire the sequence, rather than an external intervalometer. Set the interval slightly longer than your exposure time (for an 8 second exposure I use a 9 second interval) so there's a small buffer for the buffer to clear and the mechanical vibration to settle if you're not on electronic front-curtain shutter. Set the number of shots high. I typically aim for 60-100 light frames per target when untracked, and closer to 30-40 when on a tracker since each frame is capturing so much more signal.
Once the lights are done, cap the lens and shoot 20-30 dark frames at the identical exposure, ISO, and temperature (this matters more than people think, sensor temperature drifts through the night, so shoot darks right after the lights while the sensor is still at roughly the same temperature). I also shoot a set of flat frames the next morning using a white t-shirt stretched over the lens and pointed at a bright overcast sky, which cleans up vignetting and any dust motes that would otherwise show up as a fixed dark spot in every single stacked frame.
Battery life is worth planning around. The Z6 III chews through power faster in cold weather and with interval shooting running the sensor continuously, so I run it off a USB-C power bank via the camera's PD charging port for anything longer than about 90 minutes. Dew is the other quiet killer of a session, a small USB dew heater band around the lens barrel has saved more sessions than I can count once the temperature drops below the dew point.
Culling Before You Ever Open Stacking Software
Here's the part nobody warns you about until you've done it once: an 80-frame stacking sequence leaves you with 80 nearly identical RAW files, and a meaningful chunk of them are unusable. Wind shake on frame 34. A satellite trail cutting straight through frame 51. Focus drift because the temperature dropped and the lens barrel contracted slightly over two hours. Scrolling through all of that at 100% zoom on a laptop screen at a dark site, at midnight, with cold hands, is miserable.
This is honestly the part of my workflow that changed the most once I started running the sequence through imagic before touching DeepSkyStacker. It scores focus and sharpness locally on the actual pixel data rather than eyeballing thumbnails, so a frame with subtle star trailing from a gust of wind gets flagged even when it looks fine at a glance. It also groups sequential burst-style frames, which is exactly what a 90-shot interval sequence looks like to a clustering algorithm, so I can flip through clusters instead of individual files and pull the two or three genuinely soft ones out of each group. Because it runs entirely offline, I can do this culling pass in the tent or in the car on the drive home with zero signal, which matters more than it sounds like it should when you're shooting somewhere genuinely dark (those places rarely have decent cell coverage).
If you want the broader argument for why this beats manual review, this piece on how AI photo culling actually works covers the mechanics in more depth. For astro specifically, the payoff is that DeepSkyStacker's rejection algorithm works better with a smaller, cleaner input set than a huge pile that includes obviously bad frames it has to auto-reject anyway.
Tracked vs. Untracked: What Actually Changes
The exposure math shifts a lot depending on whether you're running a star tracker. Here's roughly what I use as a starting point for a 20mm-24mm wide field lens at f/2.8, adjusted after a few test frames on-site.
| Setup | Exposure per frame | ISO | Frames for a solid stack | Total integration |
|---|---|---|---|---|
| Untracked, light-polluted (Bortle 6-7) | 6-8 sec | 3200-6400 | 80-120 | 10-16 min |
| Untracked, dark site (Bortle 3-4) | 10-13 sec | 2000-3200 | 50-80 | 9-17 min |
| Tracked, light-polluted | 30-60 sec | 800-1600 | 25-40 | 15-40 min |
| Tracked, dark site | 90-180 sec | 400-800 | 15-25 | 25-75 min |
The pattern worth noticing is that as you add tracking and darker skies, you need fewer frames but each one carries more signal, and total integration time doesn't actually change all that much between untracked-dark-site and tracked-light-polluted. If you don't own a tracker yet and are wondering whether it's worth the money before your next trip, an untracked dark-site session with a fast wide lens gets you surprisingly close to tracked results in a bright city, which is a decent reason to prioritize driving somewhere dark over buying gear first.
Stacking Software That Actually Plays Nice with Z6 III Files
I run DeepSkyStacker for anything with a tracker involved (it handles the star-alignment math better for longer subs with more visible stars), and Sequator or Starry Landscape Stacker for untracked wide-field shots with a foreground, since those two handle the sky-versus-ground masking without you fighting layer masks by hand afterward. Both read the Z6 III's NEF files natively at this point, though I'd still recommend converting to DNG first if you're on an older stacking software version, since NEF support tends to lag a few months behind a new camera release.
Once the stack is done and I'm into color grading, this is where I lean on imagic's apply_my_style feature. I've spent enough nights processing Milky Way shots that I have a consistent look I go for (a specific way of pulling the core warm without blowing out the surrounding star field), and having that trained on my own past edits means a fresh stack from a new location lands close to my usual grade before I do any manual adjustment. It's a small thing but it saves a lot of back-and-forth slider work compared to starting from a flat stacked TIFF every time.
Mistakes I've Made So You Don't Have To
Shooting single exposures too long on a static tripod and calling it a stack. Ten frames at 25 seconds each isn't a stack, it's ten trailed star photos averaged together, and you can see the elongation in the final result if you look closely at the corners. Forgetting to reset white balance after a portrait session earlier that day and shooting an entire astro sequence at 5600K, which is salvageable in post but adds an extra hour of color correction I didn't need. And once, shooting a full 90-minute sequence with the tripod on a soft patch of ground that shifted slightly over the course of the night, which threw off star alignment badly enough that DeepSkyStacker rejected almost a third of the frames. Check your footing on grass or sand the way you'd never think twice about on pavement.
Frequently Asked Questions
Does the Nikon Z6 III need a star tracker for good stacked results?
No, but it changes what's achievable. Untracked wide-field stacking with this camera at a genuinely dark site produces clean, detailed Milky Way images. A tracker mainly buys you longer single exposures and fewer total frames needed, which matters more once you're trying to resolve fainter nebulosity or shoot narrower fields of view where star trailing shows up faster.
How many subframes should I actually shoot for a Milky Way stack?
Somewhere between 40 and 100 for untracked wide-field work, depending on sky darkness and how much noise reduction you want the stack to buy you. More frames give diminishing returns past a certain point, roughly doubling your frame count only gains you about 1.4x cleaner shadows, so 80 frames instead of 40 is worth it but 160 instead of 80 usually isn't for a typical Milky Way shot.
Should I use the mechanical or electronic shutter for astro sequences?
Electronic front-curtain shutter for anything on a tripod, since it removes shutter shock without the full rolling-shutter tradeoffs of pure electronic shutter at these exposure lengths. Full electronic (silent) shutter is fine too for static night sky work since nothing in the frame is moving fast enough for rolling shutter artifacts to show up.
Is the high ISO noise on the Z6 III good enough that I can skip dark frame calibration?
You can skip it and still get usable results, the sensor is genuinely clean at ISO 3200-6400, but you'll leave detail on the table. Dark frame calibration removes fixed-pattern noise and hot pixels that ISO performance alone doesn't touch, and it takes maybe fifteen extra minutes with the lens cap on while you're packing up gear anyway.