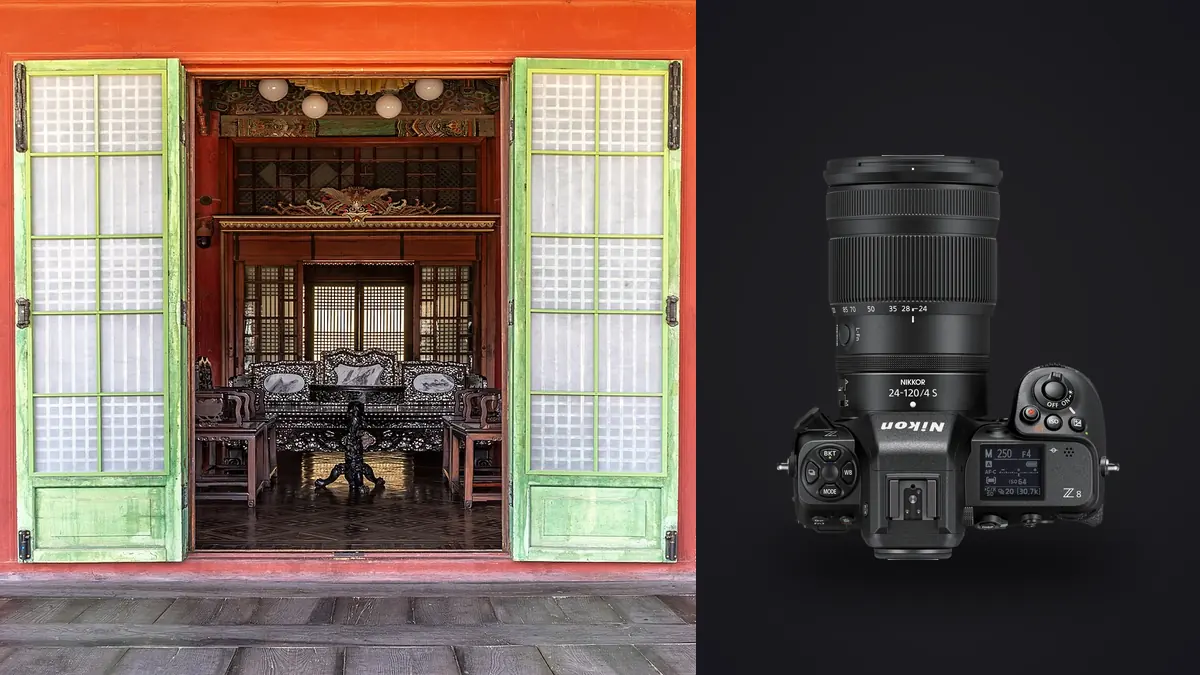
Architectural photography is easier when the location plan determines the lens plan, not the other way around. A Nikon Z8 can record substantial detail, but it cannot move a wall, restore a blocked viewpoint, turn off an unknown lighting circuit, or grant roof access. The productive questions are practical: where can the tripod stand, what must remain vertical, when does the sun reach each facade, and which views explain the design?
This Lens and Location Guide treats the camera as one part of a measured visit. It concentrates on focal-length roles, access, orientation, light, support, and coverage rather than presenting one equipment list for every building. Exact fields of view depend on lens and camera position, so verify compositions with a scouting tool or the actual lens before the commissioned session.
Translate the brief into a coverage map
Ask what the photographs need to prove. An architect may prioritize circulation, material junctions, and the relationship between old and new work. An interior designer may need color, furniture groupings, and finish detail. A property listing may require clear spatial orientation. Those aims produce different camera positions even inside the same room.
Turn the answer into a shot map rather than a loose checklist. Mark exterior elevations, approach views, key thresholds, room-to-room relationships, hero interiors, details, and any occupied scenes. Note which frame depends on direct sun, open shade, twilight, or a lit interior. Put access constraints and people requirements beside each view.
Classify every proposed image as essential, supporting, or optional. Essential frames get protected time and a fallback position. Supporting views complete the visual sequence. Optional views are explored only after the assignment is secure. This prevents an attractive but secondary detail from consuming the only clean-light window for a facade.
Confirm the required aspect ratios before scouting. A horizontal editorial spread, vertical cover, square portfolio tile, and wide website banner place different pressure on the same viewpoint. Mark where text or a page fold may sit, and protect that negative space during capture. When one view must serve several crops, plan a looser master frame plus a composition optimized for the most important use instead of assuming one file will solve every layout.
Scout camera positions before choosing focal lengths
Stand where a viewer should understand the space, then note walls, columns, furniture, traffic, landscaping, and reflective surfaces that constrain the tripod. A wider lens is not always the solution to a tight room. Moving into a corner may exaggerate nearby objects, reveal unwanted ceiling, and make distant features too small. Sometimes a stitched view, a doorway position, or a more selective composition communicates the design more honestly.
Measure or estimate the working distance at key positions. Record ceiling height, doorway width, balcony depth, and exterior setback where those dimensions affect support or lens choice. Take phone reference frames only as scouting notes, not as proof that a final camera and lens will see identically.
Check whether the ground is level and whether the chosen position blocks an exit, public path, or working area. Identify vibration from timber floors, traffic, lifts, machinery, and air systems. A theoretically ideal viewpoint is not useful if it cannot be occupied safely or long enough for a careful exposure sequence.
Give each lens a defined role
An ultra-wide lens can describe a constrained interior, but it also expands near-to-far relationships and makes edge objects dominant. Use it when that spatial emphasis supports the design, not merely to fit everything. Keep important furniture and people away from stretched edges, hold the camera level when verticals matter, and leave room for later perspective correction.
A moderate wide angle often gives a calmer description of a room or facade. It can balance context with believable proportions and may reduce the corrective crop compared with a more extreme lens. A normal lens is useful for elevations from adequate distance, layered views through openings, and material relationships. A short telephoto can isolate facade rhythms, compress aligned structures, or remove a cluttered foreground.
Perspective-control lenses add shift and, on suitable models, tilt. Shift can move the frame while the camera remains level, preserving more usable pixels than a large software correction. Tilt changes the focus plane and requires deliberate testing. Confirm mount compatibility, aperture control, metering behavior, physical clearance, and any adapter limitations for the exact lens and Z8 configuration before relying on it.
Plan verticals, viewpoint, and correction together
Converging verticals are caused by camera orientation, not by a lens being wide. Pointing upward makes parallel building lines approach one another in the image. Keeping the sensor plane vertical avoids that convergence, though the composition may then include too much ground and too little roof. Shift, a higher camera position, greater distance, or a controlled crop can solve different parts of the problem.
Decide in advance how much software correction is acceptable. Strong transformation removes edge area and redistributes detail, so compose with a safety margin. It can also expose asymmetry in a building that was hidden by convergence. The goal is not mechanically perfect verticals in every frame; it is a coherent representation that distinguishes optical distortion, camera perspective, and the structure's actual geometry.
Use the Z8's level and grid as aids, then verify against reliable architectural lines. Floors and old walls may not be level, and a single decorative edge can mislead. Compare several references across the frame. Make a second interpretation when a deliberately upward view conveys height better than a corrected elevation.
Schedule exteriors by orientation and surroundings
Plot the building orientation and expected sun path for the date. A front elevation may receive direct light only briefly, while an adjacent tower can cast a moving shadow. Trees, cranes, seasonal foliage, parked vehicles, and neighboring glass can alter the useful window. Scout near the intended time when possible.
Front light describes color and facade organization clearly but can flatten relief. Side light reveals texture and depth while increasing contrast. Backlight can separate translucent materials and atmosphere, though it may complicate flare and exposure. Overcast light reduces hard shadow and can suit material accuracy, but a gray sky may not support every exterior story.
For twilight, work backward from the desired balance between sky and interior illumination. Confirm when building lights can be turned on, whether automated blinds move, and who controls signage. Arrange access before public opening or after closing if people and vehicles must be managed. Never assume that a security or facilities team has been told about the photography.
Audit interiors for mixed light and reflections
List every source: windows, practical lamps, overhead fixtures, display lighting, emergency signs, and spill from adjacent rooms. Ask which fixtures may be switched or dimmed and whether doing so changes the design intent. Mixed color can communicate a real atmosphere, but it makes neutral surfaces and connected panoramas harder to keep consistent.
Record a neutral reference in each materially different light state. If a window view matters, plan a time when interior and exterior brightness can be reconciled without making the room look artificial. Bracketing can preserve options, yet it does not correct moving curtains, people, leaves, or reflections. Control the scene first and use multiple exposures only where they solve a defined tonal problem.
Walk the room looking through the camera for reflections of tripod legs, crew, bright windows, and the photographer. Glass, polished stone, dark screens, taps, and metal fittings reveal objects that are easy to miss with the naked eye. Plan flags, a remote trigger, a different camera height, or a later retouching note. Do not move permanent or safety-related objects without permission.
Match support and camera height to the drawing
A stable tripod with a head that allows precise leveling is more valuable than maximum height in many interiors. Choose a working height that relates to the room and furniture. Too high can show tabletops but flatten seating; too low can make ordinary counters loom. Keep a consistent height across connected views unless the narrative requires a deliberate change.
Bring a remote release or use a camera delay to avoid movement. Extend thicker leg sections first, keep the center column restrained, and protect floors with appropriate feet or pads. On a vibrating surface, wait for footsteps, lifts, or traffic cycles. Stabilization and tripod use can interact differently by lens and mode, so follow Nikon and lens guidance and test the active configuration.
For elevated views, use approved platforms and support designed for the load. Do not improvise with furniture. A small step in camera height can clear a railing or align a facade, but safety and site rules outrank composition. Include setup and movement time in the schedule.
Prepare a capture and file plan for each view
For every essential frame, specify a clean base exposure, any tonal bracket, focus variant, people layer, and lighting variation. Avoid making every possible combination by habit. More files do not compensate for a weak camera position, and excessive variants can hide a missing hero frame during review.
Synchronize the camera clock, choose a consistent RAW setting, and separate scouting, final, detail, and lighting-test frames with slates or voice notes. The Z8 records Nikon NEF files, which imagic lists among its supported RAW formats. If local culling is part of the plan, secure verified copies first, then scan the directory before analysis. Rejection in imagic changes status and does not delete the source.
Architecture demands manual judgment beyond sharpness. A technically strong frame can still contain a shifted chair, an unlit practical, a reflection, a misaligned blind, or the wrong artwork. Use automated scoring only for an initial technical pass. The camera hardware guides provide related system context, and the blog index collects broader planning and workflow articles.
Carry a location planning sheet
- Brief: audience, required views, usage, orientation, and delivery shape.
- Access: contacts, keys, permits, parking, lifts, safety, and public restrictions.
- Light: orientation, sun window, twilight time, controllable fixtures, and backup day.
- Viewpoint: working distance, camera height, obstructions, vibration, and reflective surfaces.
- Lenses: intended role, filter or hood needs, correction strategy, and verified compatibility.
- Scene: cleaning, furniture plan, styling responsibility, people, vehicles, and signage.
- Files: RAW choice, cards, duplicate copies, naming notes, and coverage markers.
Send the practical parts of this sheet to the relevant producer or site contact. A confirmed lighting circuit and access window are often more important than carrying another lens.
Frequently Asked Questions
What is the best Nikon Z8 lens for interiors?
There is no universal focal length. Choose from the room dimensions, intended viewpoint, edge relationships, and acceptable perspective correction, then verify the composition at the actual location.
Should architectural verticals always be perfectly parallel?
No. Parallel verticals suit many descriptive views, but an intentional upward perspective can communicate scale. The important point is to make the choice deliberately rather than leave a small accidental lean.
Does exposure bracketing replace lighting control?
No. Bracketing can extend tonal options, but it cannot remove unwanted color mixtures, moving objects, flare, reflections, or poor placement. Organize the scene and light before adding exposures.