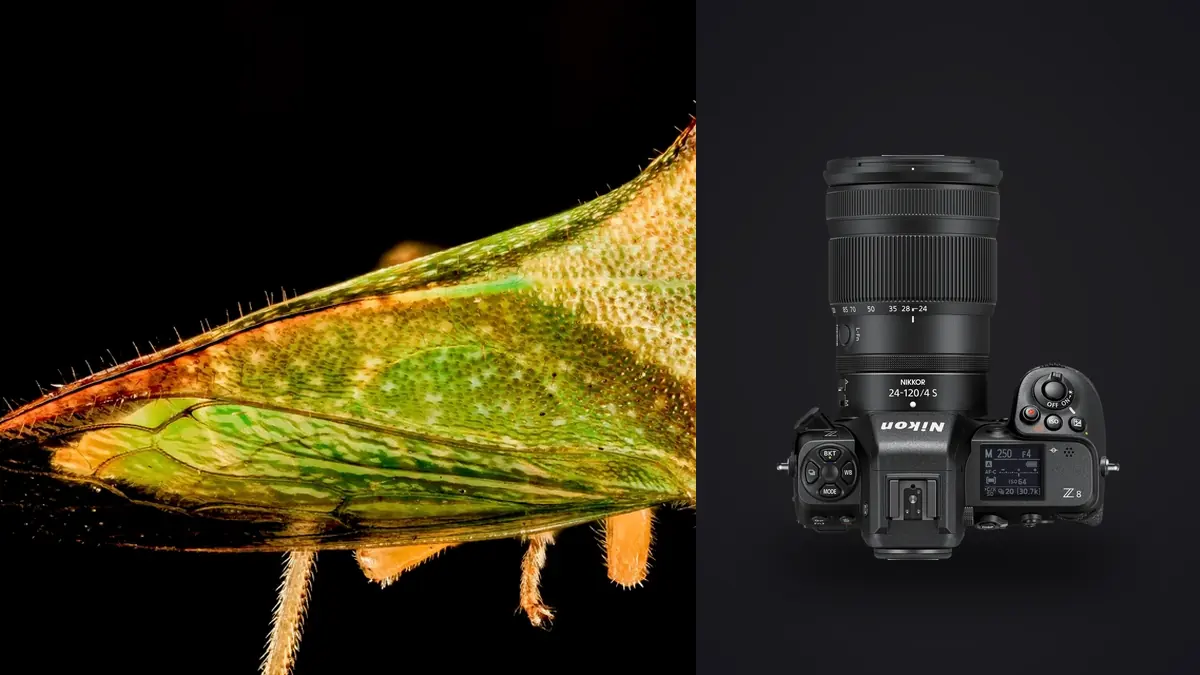
Macro insect photography begins with habitat, temperature, wind, and subject behavior, not magnification alone. The Nikon Z8 can record detailed NEF files and offers focus-shift tools, but a technically elaborate setup is useless if the lens forces an unsafe approach or the location moves faster than the subject can be photographed.
This Lens and Location Guide assigns clear roles to short and long macro lenses, then connects those roles to gardens, meadows, woodland edges, wetlands, and controlled indoor work. The aim is a responsible field plan that protects the subject, keeps backgrounds intentional, and distinguishes a single live-insect frame from a static focus stack.
Start with the subject and its microhabitat
Choose a subject group before packing. Butterflies resting on tall stems, ground beetles under cover, dragonflies near open water, and tiny insects on leaf undersides create different working distances and safety issues. Learn the basic seasonal and daily behavior from a reliable natural-history source. Do not move protected species, damage host plants, or disclose a sensitive colony merely to simplify a frame.
Scout the site without a large bag first. Note where paths end, which plants are within legal reach, where the sun enters, and how wind passes through the vegetation. Check whether kneeling would crush adjacent growth or obstruct a public trail. A promising subject on the far side of water, a fence, unstable scree, or private land is not a usable camera position.
Temperature affects activity. A cool early period may offer still subjects and dew, while warmer conditions can produce feeding, flight, and mating behavior. That is not permission to chill, restrain, bait, or repeatedly disturb an insect. Build the schedule around natural behavior and leave when avoidance, wing movement, or repeated escape indicates stress.
Record the plant species, perch height, background distance, prevailing wind, and direction of useful light. Those notes are more actionable than a generic pin on a map. Keep exact coordinates private when revealing them could harm the habitat.
Choose between short and long macro working distance
| Lens type | Best fit | Main tradeoff |
|---|---|---|
| Short macro lens | Copy work, fungi, static details, accessible flowers | Very close camera position can shade or disturb insects |
| Long macro lens | Skittish insects and low-angle field work | Greater size, narrower background, and harder handholding |
| Standard lens with close-focus ability | Environmental details and larger subjects | May not reach true macro reproduction |
| Wide close-focus lens | Small subject shown within habitat | Requires a close approach and careful edge control |
| Adapted specialty optic | Defined studio or scientific need | Compatibility, support, and workflow must be tested |
The NIKKOR Z MC 50mm f/2.8 and NIKKOR Z MC 105mm f/2.8 VR S represent two useful native approaches. The shorter lens can be compact and practical for controlled details, but reaching high reproduction puts the front of the setup near the subject. The longer lens provides more physical clearance at comparable framing, although actual working distance still changes with focus and hood use.
Working distance is not the same as focal length or minimum focus distance. Measure from the front of the lens or hood to the subject at the intended reproduction, with any diffuser attached. Confirm that the space leaves room for light and does not place equipment into a web, burrow, flower, or flight path.
A longer macro lens does not eliminate disturbance. A large hood, diffuser, tripod, or photographer can still block light and movement. Approach from a direction that leaves an escape route, pause between steps, and stop if the subject repeatedly repositions because of the camera.
Use location depth to design the background
Macro backgrounds are shaped by small changes. A leaf ten centimeters behind the subject may become a solid field of color, while a bright gap in foliage can create a hard disk at the edge of a wing. Inspect beyond the subject before setting the camera. Move laterally or lower the viewpoint to place a distant, even area behind the important outline.
Do not cut living stems or rearrange habitat for a cleaner frame. A loose, already fallen leaf may sometimes be moved where rules allow, but an honest location often includes imperfect texture. Use viewpoint, aperture, and subject-to-background separation first. Remove litter only when it is safe, legal, and does not conceal evidence relevant to documentary or scientific use.
At high reproduction, depth of field becomes narrow even at moderate apertures. Place the sensor plane as parallel as practical to a butterfly wing, beetle back, or other important surface when a single frame must carry detail. If the head and body sit at different depths, decide which feature matters instead of expecting every plane to become sharp.
Scout wind at stem height, not head height
A meadow can feel calm while thin stems oscillate continuously near the ground. Watch the actual perch for several minutes. Sheltered woodland edges, the lee side of a hedge, or a dense patch of vegetation may be more useful than an open field with prettier light. Wind direction also determines whether a diffuser or reflector can be held safely without striking plants.
Use faster shutter speeds for a moving subject and accept a higher ISO when necessary. Stabilization can reduce camera movement, but it cannot stop a flower or antenna moving through the focus plane. A short sequence may catch a pause, although indiscriminate bursts create many nearly identical files and can distract from observing behavior.
For static plant details, a small support can steady the camera without enclosing the subject. Keep tripod legs on durable ground and within the permitted path. Never clamp a protected plant or pin an insect's perch. If natural motion prevents the intended technical study, return under calmer conditions.
Shape light without turning the set into a hazard
Open shade provides gentle contrast and stable color, while low-angle sun can reveal wing texture and translucent edges. Direct midday light may create reflective hotspots on shells and deep shadow under a body. Choose the time and orientation before adding equipment. A white card or compact diffuser can soften contrast only if it can be positioned without touching habitat.
Small flash can freeze motion and restore color at working apertures, but the result depends on distance, modifier size, ambient balance, and species sensitivity. Keep output and repetition conservative, avoid firing continuously at the same subject, and stop if behavior changes. Follow rules in reserves, exhibits, and research settings, where flash may be prohibited.
Test for shiny reflections on leaves and insect surfaces. A minor change in flash angle can move a highlight off the eye or wing. Cross-polarized techniques require specialized filters and substantial light loss, so they are better planned for controlled, non-sensitive subjects than improvised in a fragile field location.
Separate live capture from static focus stacking
The Z8 can automate focus-shift sequences, but the camera produces component files rather than a finished stack. Suitable stacking software is required afterward. This technique is most reliable for a motionless subject, stable camera, still background, and controlled light. A live insect breathing, grooming, or moving its antennae can create discontinuities that no step count solves.
For a stack, focus slightly ahead of the nearest required detail, choose an interval based on aperture and magnification, and leave enough frames to pass the farthest plane. Make a conservative test and inspect it before committing. More frames increase processing and motion risk; too few leave gaps. Record a slate or hand frame between sequences so components are not mixed.
Use a rail when a fixed reproduction ratio and precise framing matter, but understand that moving the entire camera changes perspective and framing differently from changing focus internally. Pick one method for a sequence. Do not place a rail or tripod where it blocks an insect's route or requires vegetation to support the equipment.
Prepare the Z8 for close field operation
Assign a focus mode for moving subjects and a separate manual or pinpoint setup for static details. Magnified live view helps confirm eyes and texture, but the rear display can encourage awkward posture near the ground. An angled screen, knee protection, and a stable stance reduce accidental movement into the habitat.
The Z8 uses an electronic shutter, so test artificial grow lights or indoor exhibit lighting for banding. In natural light, select shutter speed from subject motion rather than the apparent stability of the camera. Check highlights on reflective surfaces and watch RGB channels when saturated flowers surround the insect.
Keep the sensor covered during lens changes, particularly around dust, pollen, sand, or mist. The Z8's CFexpress Type B and SD card slots can be configured for backup or separation; confirm the chosen behavior with test files. Carry a simple rain cover, lens cloth, and sealed bag for a wet camera, but never leave plastic or cleaning material at the site.
Plan an ethical route and a clean exit
Work from durable paths and previously disturbed ground. Ask the land manager about access hours, collection restrictions, tripods, lighting, and commercial use. Nature reserves may permit casual photography while requiring approval for staged, scientific, or paid work. Private gardens need the owner's consent even when visible from a road.
Create a route with several possible microhabitats instead of pressuring one subject to deliver every frame. Start with a wider habitat view, move to behavior at a respectful distance, and attempt high magnification only when access and behavior permit it. Note any vulnerable nests, webs, or host plants so the return path avoids them.
Before leaving, count caps, cards, clips, tissues, and supports. Replace only objects that were moved with permission, and do not publish an exact location for rare subjects. A technically excellent image is not worth trampling the conditions that made it possible.
Review NEF sequences with biological context
Copy both cards, verify the copies, and preserve sequence order before formatting. Group files by subject and attempt, not merely by visual similarity. A frame with a clean wing may belong to a different behavior sequence than the nearby portrait, and a stack component should not be evaluated as a standalone composition.
imagic desktop can scan supported NEF folders, analyze them locally, group related files, and set culling statuses without deleting originals. Scan must happen before analysis. Automated scores cannot decide whether a behavior is significant, identify a species, or merge a focus stack, so retain manual control over those choices.
Reselecting changes the ranking of stored scores rather than scoring pixels again. Use freshness checks and reanalyze stale files when an old assessment appears wrong. A style operation needs a learned profile, and export renders stored adjustments to new JPEG or TIFF files while the RAW remains untouched. Other computational methods are collected under AI and Technology.
The useful Z8 macro kit is therefore defined by the habitat: enough working distance, a background-aware viewpoint, light that can be controlled responsibly, and support that stays off vulnerable ground. Resolution and automation help only after those location decisions are sound.
Frequently Asked Questions
Is the 105mm macro always better than the 50mm on the Nikon Z8?
No. The longer lens can provide more clearance for skittish subjects, while the shorter lens may suit copy work, static details, and compact indoor setups. Choose from working distance and location access.
Can the Nikon Z8 create a finished focus stack in camera?
The camera can record a focus-shift sequence, but the component files still need compatible stacking software. Subject and background motion can make a live-insect stack unsuitable.
What time of day is best for insect macro photography?
Cool, calm periods can make some insects less active, while warmer periods reveal different behavior. Scout the species and habitat, then work without chilling, restraining, or damaging the subject.