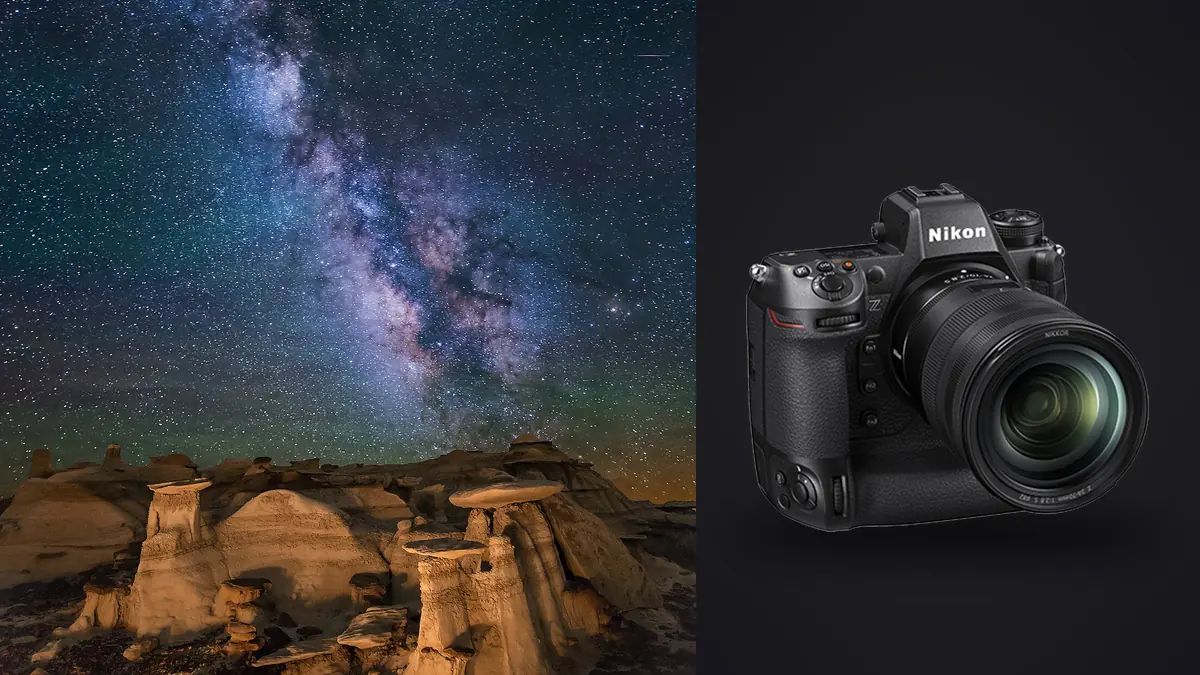
The first time I ran a full star trail sequence on the Z9, I came home with 214 frames and a headache. Not because the camera struggled, it didn't, but because I'd never had to think about what 45.7 megapixels does to a stacking workflow before. On my old D750 a soft frame from a gust of wind was hard to spot at a glance. On the Z9, at full resolution, every twitch, every satellite streak, every frame where dew had started creeping onto the front element shows up the moment you zoom in. That resolution is a gift for the final stacked image and a genuine problem for the culling step that happens before it.
This isn't a spec sheet rundown. It's what actually changes when you point a Z9 at the night sky and try to build a clean stacked image out of dozens or hundreds of exposures, plus the parts of the process that eat more time than the shooting itself.
Why the Z9's sensor changes the stacking math
The Z9 uses a stacked CMOS sensor with no mechanical shutter at all. For daytime sports that's mostly a story about blackout-free viewfinder feed and insane burst rates. For astro it matters for a quieter reason: there's no shutter mechanism to wear out or introduce vibration over a sequence of 200+ exposures, and the electronic shutter means there's genuinely zero shutter shock to worry about even on the shorter sub-exposures you'd use for a star trail composite.
The resolution has a less obvious effect. A lot of the exposure-time guidance that gets passed around for wide-field astro (the "500 rule," or its 300 and 400 variants) was worked out on lower-resolution sensors. At 45.7 megapixels, the pixel pitch on the Z9 is small enough that stars will show visible elongation at shutter speeds those older rules still call safe, at least once you're viewing at 100% or printing large. I stopped trusting the 500 rule on this body and started using the NPF rule instead (PhotoPills has a calculator built in), which factors in pixel pitch, aperture, and focal length rather than just focal length alone. In practice that usually means shaving two or three seconds off whatever the old rule told me for a given lens.
Card write speed matters more than people expect too. Running an interval timer sequence for star trails means the buffer has to keep clearing between frames without introducing gaps in timing, because a gap shows up as a visible break in the trail once you stack. Both card slots on the Z9 take CFexpress Type B, and using a fast card in the primary slot keeps the interval consistent even at short gap times.
Nailing focus before the sequence runs, not during it
Autofocus is not part of this workflow. Even with the Z9's subject detection, there's no "star" subject mode, and hunting in near-total darkness wastes battery and frames. What works is manual focus with the rear screen's magnification: point at the brightest star or planet in the frame, punch in with the zoom button (I go to the maximum magnification, not the halfway step), and turn the focus ring until the point of light collapses to its smallest, tightest size. Focus peaking helps confirm it but I don't trust it alone at night, the magnified view is the real check.
The Z9's 4-axis tilting rear screen earns its keep here. For low-angle foreground compositions, shooting from ankle height with a starry sky above, being able to tilt the screen up without lying in wet grass to check framing is a small thing that saves real annoyance across a two-hour session. The illuminated buttons on the back and top plate are worth mentioning too, they're not a headline feature but changing ISO or interval settings without a headlamp glaring off the LCD and killing your night vision matters more than it sounds like it should.
Once focus is set, tape the ring or switch to manual-only if your lens has a control ring that can drift with temperature changes. A telephoto or zoom that creeps half a millimeter over a two-hour cooling session will soften your last fifty frames in a way that's easy to miss until you're deep into stacking and wondering why the second half of the sequence looks mushier than the first.
The noise reduction settings that quietly wreck a stack
Two in-camera settings need to be off before you start, and getting this wrong is the single most common mistake I see from people new to stacking on Nikon bodies.
Long exposure noise reduction takes a dark frame after every exposure and doubles your time between shots. For a single long exposure that's a reasonable trade. For a sequence you intend to stack in software, it's actively harmful, it halves your total imaging time for no benefit, since dedicated stacking applications build their own noise model from the light frames themselves (or from separate dark frames you shoot once at the end). Turn it off.
High ISO noise reduction is the trickier one. Nikon bodies have a documented history of what astrophotographers call the "star eater" effect, an in-camera process that can mistake small, bright, isolated points (which is exactly what a faint star looks like against a dark sky) for hot pixels and suppress them. Whether the Z9 exhibits this as strongly as older bodies like the D810 or D850 is genuinely debated in astro forums, and I've seen inconsistent reports depending on exposure length. My approach: set it to Off, always, and do all noise reduction in post using the stacking software's own averaging (which is more effective than in-camera NR anyway once you're combining dozens of frames).
One setting worth exploiting rather than avoiding: the Z9's sensor has a second, cleaner gain stage that kicks in somewhere in the ISO 500 to 800 range. Rather than defaulting to a round number like ISO 1600, I test a couple of frames at ISO 800 first. On a lot of my sequences it's given noticeably cleaner shadows than pushing to 3200 and pulling exposure back down in post.
Exposure recipes for four different stacking projects
The right exposure length, ISO, and frame count depend entirely on what you're building. These are the settings I've landed on after a season of trial and error with this body, not universal truths, but a real starting point.
| Project | Single exposure | ISO | Frames | Total time on target | Lens pairing |
|---|---|---|---|---|---|
| Untracked Milky Way core (noise-reduction stack) | 10-13 sec at f/2 | 3200 | 25-35 | ~8 minutes | 20mm f/1.8S or similar fast wide prime |
| Tracked Milky Way / faint nebulosity | 90-120 sec at f/4 | 800 | 15-20 | 30-40 minutes | 24-70mm f/2.8 at 35-50mm |
| Star trail composite | 20-25 sec at f/4 | 1600 | 180-240 | 90-120 minutes | 14-24mm f/2.8 |
| Meteor shower wide field | 15-20 sec at f/2.8 | 2500 | 150+ (2 sec gap) | 2-3 hours | 20mm f/1.8S |
The untracked Milky Way stack is the easiest entry point and the one I'd recommend to anyone trying this on the Z9 for the first time. You're not fighting tracking errors, just shooting a burst of short exposures at an aperture and ISO combination that keeps stars round, then letting the stacking software's alignment and averaging do the noise reduction work that a single frame at ISO 3200 can't manage on its own.
The star trail row deserves a note: with 180+ frames at full resolution, you're generating something like 12 to 15 gigabytes of raw files for a single composite. That volume is exactly where the next stage of the workflow starts to matter more than the shooting itself.
Culling the sequence before it ever reaches stacking software
Here's the part nobody warns you about before you try star trail or meteor shower stacking for the first time: a 200-frame sequence at 45.7 megapixels is not something you review comfortably by clicking through thumbnails one at a time at 11pm with cold fingers. And within that sequence there's always junk. A plane crosses three frames. A gust moves the tripod legs half a millimeter on frame 94. Dew starts fogging the front element around frame 150 and every subsequent frame is slightly softer than the last. If those frames go into your stack unfiltered, you get a visible discontinuity in the trail or a soft patch in your averaged Milky Way shot that's maddening to track down after the fact.
This is where I actually use imagic rather than my usual raw browser. Its focus scoring runs locally against the actual pixel data rather than relying on camera metadata, so it flags the frames where dew or a tripod nudge dropped sharpness even when the difference isn't obvious at thumbnail size. For an interval timer sequence where 95% of frames are visually near-identical, the duplicate and burst clustering groups them so I'm reviewing clusters instead of scrolling through 200 flat files trying to spot the four that are actually different. And because dark-sky sites tend to mean no signal at all, everything runs on the machine with no upload step, which matters more than it sounds like when you're trying to cull a card at a rural campsite with zero bars. If you haven't used AI-assisted culling on a sequence like this before, it's worth reading through how AI photo culling actually works to understand what the sharpness scoring is doing under the hood before you trust it on a stack you can't reshoot.
What I don't do is let culling replace a visual check entirely. Software can tell you a frame is soft; it can't always tell you a satellite streak is cosmetically a problem in a stack that's about noise reduction rather than trails. I cull for sharpness and duplicates first, then do one visual pass looking specifically for streaks and plane trails in whatever remains.
From cull to final stack: picking software and finishing the edit
To be clear about what imagic does and doesn't do here: it's a culling and editing tool, not a stacking engine. The actual alignment and combination of dozens of subs into one frame still happens in dedicated software. For untracked Milky Way stacks I use Sequator, it's free, handles star-versus-foreground masking reasonably well, and doesn't need a steep learning curve. For star trails specifically, StarStaX does one job and does it fast. DeepSkyStacker and Starry Landscape Stacker both have their fans for more demanding tracked sequences, and if you're serious about deep sky work beyond wide-field Milky Way shots, PixInsight is the eventual destination even though the learning curve is real.
Once the stack is flattened into a single TIFF, that's when I bring it back into imagic for the actual edit. The feature that's saved me the most time over a season of shooting is apply_my_style, the AI preset trained on my own prior edits rather than a generic filter. I spent a few nights early in the year getting the color balance right on a Milky Way core (the exact blend of warm foreground and cool core that I actually like, which took a while to settle on), and now every new stacked frame from a fresh night out gets that same treatment applied automatically as a starting point instead of me rebuilding the grade from scratch each time. It's not magic, I still tweak individual frames, but starting from something close to my own established look instead of a neutral baseline saves real time across a trip where you might come home with stacks from four or five different nights. Worth noting too that it's a one-time purchase rather than another monthly subscription stacked on top of whatever stacking software you're already paying for, which matters if you're already running Sequator, StarStaX, and a raw editor separately (details on pricing if you're curious how that compares to what you're using now).
Gear notes from actually doing this in the cold
The EN-EL18d battery is rated for a lot of shots under CIPA testing, but that number assumes normal temperatures. On a freezing night with the screen active for focus checks and an interval timer running for two hours, I've seen real-world capacity drop noticeably below the rated figure. I carry a spare battery in an inner jacket pocket, body heat keeps it from losing charge as fast as one left in a bag.
If you're pairing the Z9 with a star tracker for the tracked row in the table above, payload capacity is worth checking before you buy. The body alone is around 1340 grams, and a fast wide prime adds another 400 to 800 grams depending on the lens. That puts you comfortably within the rated payload of something like a Star Adventurer GTi or SkyGuider Pro for wide-field work, but if you're stepping up to a 70-200mm for a tighter framing on a nebula, check the tracker's specs again, that combination gets heavy fast and undersized trackers show it as drift in longer subs.
On lens choice, fast wide primes with well-controlled coma matter more for astro than they do for almost any other genre. A lens that's tack sharp in the center for daytime work can smear stars into little wings in the corners wide open. I stop down slightly from wide open on most of my astro lenses (f/2 rather than f/1.8, f/2.8 rather than f/2.2) specifically to tighten up corner star shapes, even though it costs a bit of light.
Dew is the quiet killer of long sequences in humid climates. A cheap USB dew heater band around the lens barrel, powered off a battery bank, has saved more sequences for me than any camera setting has.
Frequently Asked Questions
Do I need to turn off long exposure noise reduction on the Z9 before stacking?
Yes, for any sequence you plan to combine in stacking software. Leaving it on doubles the time between exposures because the camera takes a dark frame after every light frame, and that dark frame data is redundant once your stacking software builds its own noise model from the sequence. The only case for leaving it on is a single, one-off long exposure you're not stacking.
Will the Z9's high ISO noise reduction remove faint stars?
It's a real risk, inherited from Nikon's broader "star eater" reputation on earlier bodies, though how strongly it affects the Z9 specifically is still debated among astrophotographers. The safe approach is to set high ISO NR to Off and handle noise reduction entirely in post through the averaging that stacking naturally provides, rather than trusting an in-camera algorithm that wasn't designed with star fields in mind.
Do I actually need a star tracker, or is the Z9's sensor good enough without one?
For wide-field Milky Way shots stacked from short exposures, no, the untracked recipe in the table above produces genuinely clean results without one. A tracker earns its cost when you're chasing longer single exposures for fainter detail (nebulosity, tighter framing on specific targets) where a stationary tripod would trail the stars well before you'd gathered enough light.
How many sub-exposures does a clean Milky Way stack actually need?
Diminishing returns set in faster than people expect. Going from 10 frames to 25 makes a visible difference in shadow noise. Going from 25 to 60 makes a much smaller one, and you're mostly trading battery life and card space for a marginal gain. I settled on 25 to 35 frames as the point where the improvement stops being worth the extra shooting time for most untracked wide-field shots.