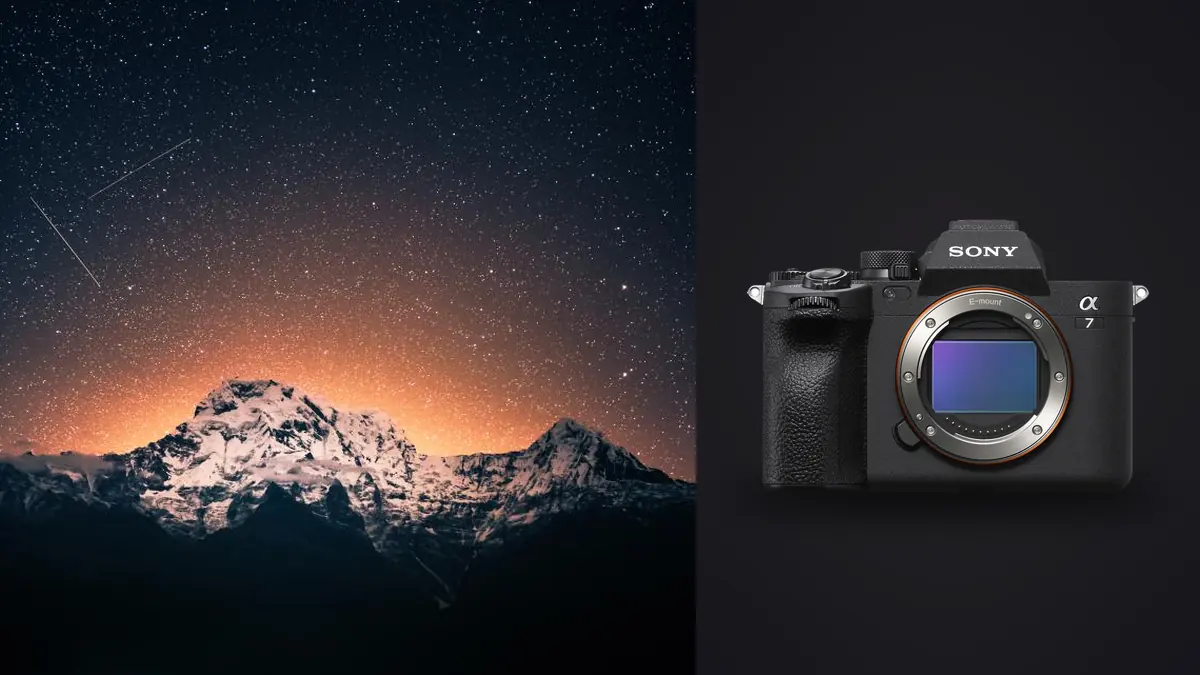
The Sony A7 IV was never marketed as an astrophotography camera. Sony built it as a hybrid stills-and-video body for wedding shooters and event photographers, and most of the marketing copy talks about autofocus tracking and 4K video, not faint galactic cores. That's exactly why I get asked about it so often by people planning their first night under a dark sky: they already own one, and they want to know if it's worth dragging out to the desert or the mountains instead of buying something purpose-built for the job.
Short answer: yes, with a few caveats worth knowing before you drive two hours to a dark site and waste the night on avoidable mistakes. The 33-megapixel sensor isn't the cleanest full-frame chip Sony has ever made for high ISO work (that's still arguably the A7S III), but it's more than capable once you're stacking a series of shorter exposures instead of leaning on one brutal ISO 6400 frame. What actually trips people up isn't the sensor. It's RAW format choice, focus in the dark, and not having a plan for how the fifty-plus frames from a single night get turned into one usable image.
The RAW Format Decision Nobody Mentions in the Spec Sheet
Sony cameras have a history that astrophotographers know well and most other photographers have never heard of: the "star eater" issue. Older Sony bodies applied an in-camera noise reduction pattern to long exposures shot in the compressed RAW format, and that pattern happened to smear or delete faint point sources, which is a polite way of saying it ate real stars out of the frame. It showed up most aggressively on exposures past roughly 3.2 seconds under certain settings, and it's part of why older A7-series bodies have a mixed reputation among the astro crowd despite being excellent all-around cameras otherwise.
The A7 IV addresses the practical side of this by finally offering lossless compressed RAW as a third option alongside the older lossy compressed and fully uncompressed formats. Lossy compressed is still the default sitting in the menu, and it's still the format most likely to show star-eater artifacts on long single exposures. For star stacking specifically, I shoot lossless compressed RAW almost every time. File sizes land somewhere between the two extremes, usually 15 to 25 percent smaller than uncompressed on a typical night sky frame, and you avoid the destructive averaging that comes with the lossy option. Uncompressed is the safest choice in theory, but on a night where you're capturing 30 subs for one target plus darks and flats, the card space and write times add up fast, and I haven't found the difference in star retention worth it once you're past four-second frames anyway.
Untracked Wide Field vs a Star Tracker
Most A7 IV owners doing night sky work fall into one of two camps, and the settings for each are different enough that mixing them up leads to disappointing files.
Fixed Tripod, No Tracker
If you're shooting a Milky Way arch with a foreground (a rock formation, a cabin, a person holding a headlamp), you're stuck with the rule that governs every untracked astro shot: the sky moves and your sensor doesn't. On a 14mm lens I can usually get away with a 13-second exposure before star trailing becomes visible at normal viewing distances, using the NPF rule rather than the older and less accurate "500 rule." Push past 15 seconds on anything wider than 20mm and pinpoint stars start to smear at the pixel level, especially once you're cropping in during editing. I shoot these at ISO 3200 on the A7 IV, wide open or one-third stop down from the lens's maximum aperture, and I stack 20 to 30 frames to knock the noise floor down without needing to push ISO any higher.
On a Star Tracker
Once you add a tracker (I run a Star Adventurer GTi, though the older mechanical Star Adventurer works fine too), the exposure ceiling opens up dramatically because the mount is compensating for Earth's rotation. This is where the A7 IV's sensor actually gets to show what it can do. I drop ISO down into the 800 to 1600 range, which sits close to the sensor's native dual-gain switch point, and I stretch individual subs to 90 or even 120 seconds on a wide lens. Longer subs mean fewer frames needed to hit the same total integration time, which means less time spent on tracking corrections and dew management, and more time for the mount to actually behave itself.
| Setup | Lens / Focal Length | Single Exposure | ISO | Subs to Stack | Best For |
|---|---|---|---|---|---|
| Fixed tripod, no tracker | 14-24mm wide prime | 10-13 sec | 3200 | 20-30 | Milky Way arch with a foreground element |
| Star tracker, wide lens | 24-35mm | 90-120 sec | 800-1600 | 15-25 | Milky Way core detail, faint dust lanes |
| Star tracker, telephoto | 135mm f/1.8 GM | 180-240 sec | 800 | 25-40 | Deep sky targets: Andromeda, Orion Nebula, Pleiades |
Nailing Focus When You Can't See Anything Through the Viewfinder
Autofocus is useless out there, full stop, and the A7 IV's excellent subject tracking doesn't help you when the subject is a pinpoint of light half a degree across. Switch the lens and body to manual focus before you leave the car. The feature that actually matters here is Bright Monitoring, buried in the shooting mode menu, which brightens the live view feed enough that you can see the horizon and rough in composition even under a new moon sky. Once you're close, punch in with the focus magnifier (I map it to a custom button, it's too useful to dig for in a menu at 11pm), find the brightest star or planet in frame, and turn the focus ring until it collapses to the smallest, tightest point you can get.
Two things catch people out here. First, the infinity mark on your lens barrel is not trustworthy, especially on lenses that focus past infinity by design or that shift focus slightly as the barrel cools in dropping temperatures. Check focus again about twenty minutes into a session once the lens has settled to ambient temperature. Second, if you're shooting a foreground element in the same frame as the sky, decide before you start whether you're doing a single wide-open focus compromise or a genuine focus-stacked blend, because racking focus mid-sequence will wreck a star stack.
Building the Stack: Lights, Darks, Flats, and the Software That Combines Them
The actual mechanics of star stacking are simple even if the terminology sounds intimidating. You're combining multiple "light" frames, the actual exposures of the sky, to average out sensor noise, which is essentially random from frame to frame, while the real signal (starlight) stays consistent and reinforces itself. A stack of 25 frames doesn't just look less noisy, it genuinely recovers more real signal than any single frame in the set could, assuming the stars are aligned properly between frames.
For wide-field Milky Way work I use Sequator on Windows, mostly because it's free, handles star alignment plus separate sky and ground blending in one pass, and doesn't demand a steep learning curve. For tracked deep sky targets I lean on DeepSkyStacker for the initial calibration and alignment, then finish contrast and color work elsewhere. Mac shooters doing similar wide-field work tend to land on Starry Landscape Stacker instead, which handles the sky-versus-ground masking a little more gracefully in my experience.
Don't skip calibration frames even though they add tedium to an already long night. Darks are exposures shot with the lens cap on, same shutter speed, ISO, and sensor temperature as your lights, and they map out the fixed-pattern noise and hot pixels specific to your sensor on that particular night. Flats correct for vignetting and dust spots, shot by pointing the lens at an evenly lit surface (a t-shirt stretched over the front element works, or a light panel) at the same aperture and focus as your lights, but with exposure adjusted for a mid-gray result. Skipping flats is the single most common reason I see amp glow or vignetting survive into a "finished" stacked image.
Culling the Subs Before They Ever Reach a Stacking Program
Here's the part of the workflow nobody talks about enough. A single night of tracked deep sky shooting on the A7 IV can easily produce 150 to 300 frames once you count lights, darks, flats, and the test exposures you fire off while you're still dialing in composition and tracking accuracy. Feeding a stacking program every frame you shot, including the ones where the tracker hiccuped or a gust of wind nudged the tripod mid-exposure, doesn't average out to a better result. It drags the whole stack toward mediocre. Garbage subs dilute good ones.
I run everything through imagic before it ever touches Sequator or DeepSkyStacker. The sharpness and focus scoring catches the subs where something moved during a 90-second exposure, star trails too subtle to spot at a glance in a thumbnail grid but obvious once you're pixel-peeping a finished stack. And because I usually fire off a handful of near-identical test frames while adjusting framing before committing to the real sequence, the duplicate and burst clustering groups those together instead of leaving me to scroll through forty almost-identical frames of the same patch of sky one at a time. Since it processes everything locally with no upload step, it also works fine at a dark site two hours from the nearest cell signal, which matters more than people expect until they've tried to cull four hundred RAW files on a laptop with a hotspot burning through a metered data plan.
Once a target is stacked and edited, I'll also run the same kind of culling pass on the trip's foreground and wide shots, then use apply_my_style to carry the color grade from my finished astro edit across the rest of that night's single-exposure frames, so a gallery from one trip doesn't end up with three different color treatments depending on which image I happened to edit first.
A Few Practical Notes From Actual Nights Out
Cold drains the NP-FZ100 battery faster than the spec sheet suggests, especially with Bright Monitoring running continuously and the interval timer keeping the shutter active for an hour or two straight. I carry three batteries for any serious session and keep the spares in an inside jacket pocket, not the camera bag, because a battery that's dropped to near-freezing loses a meaningful chunk of its usable capacity even before it's mounted. Dew is the other silent killer of a night that started clear. A cheap USB dew heater band wrapped around the lens barrel, powered off a battery pack, has saved more sessions for me than any camera setting has.
One setting worth knowing about: the A7 IV's built-in Interval Shoot Function, tucked into the shooting menu rather than a separate app, handles the actual sequence capture without an external intervalometer, and you can set shot count, interval, and even an AE tracking sensitivity if sky brightness shifts across a long session near twilight. It's not flashy, but it's one less accessory to keep charged and dew-proofed in a bag. Between sequences on a longer trip, I'll also skim through what's accumulated on the cards using a couple of the workflow habits I rely on for any high-volume shoot, mainly so I know before I break down the tripod whether a target needs another twenty minutes of subs or if I already have enough to work with.
Frequently Asked Questions
Do I actually need a star tracker, or can I get good results stacking untracked frames?
You can get genuinely good Milky Way images stacking untracked frames, especially wide-field shots under 24mm where trailing is less obvious and short exposures keep noise manageable across a large stack. Where a tracker earns its cost is deep sky targets like nebulae or galaxies, where you need exposure times long enough that no untracked frame could stay pinpoint sharp, tracked or not.
Is the A7 IV's 33-megapixel sensor noisier than the older A7 III for night sky work?
Per pixel, yes, slightly, because the photosites are smaller on the higher resolution sensor. In practice, once you downsample a 33-megapixel stacked image to match a typical output size, or view both cameras' results at the same print or screen resolution, the difference is small enough that I wouldn't buy or sell either camera on this basis alone. Stacking multiple frames matters far more to your final noise level than which of these two sensors you started with.
What's the real difference between stacking and just shooting one long exposure?
A single long exposure at high ISO accumulates both signal and noise in one shot, and once it's noisy, there's no separating the two after the fact. Stacking multiple shorter exposures lets software identify what's consistent between frames (the stars) and what's random (sensor noise), then average accordingly. You end up with a cleaner result than a single exposure of equivalent total time could ever produce, and you avoid trailing since each individual sub stays short.
Can I skip flat frames if I'm only sharing images online at smaller sizes?
You can get away with it more often at smaller output sizes, but vignetting and dust motes tend to show up exactly when you least expect them, usually after you've already stretched the image's contrast and midtones during editing, which is precisely what makes those defects visible in the first place. Flats take five extra minutes at the end of a session. I've never regretted shooting them, and I've regretted skipping them more than once.