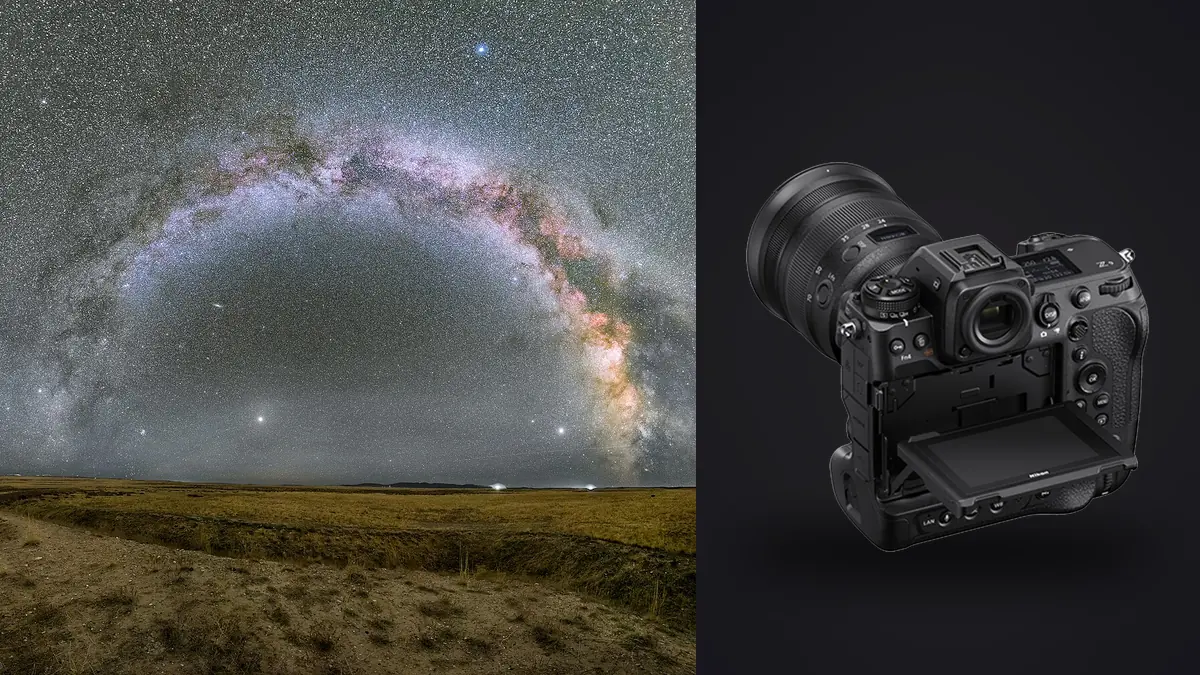
Star stacking with a 45.7-megapixel body sounds like it should just work better because there's more resolution to throw around. In practice the Z9's sensor changes the math in ways that catch people off guard the first time they try it, mostly because the exposure lengths and ISO choices that worked fine on a 24MP camera start showing soft, slightly trailed stars at 100% on this sensor. None of that is a flaw in the camera. It's just a resolution problem that a lot of "how to shoot the Milky Way" advice online doesn't account for because it was written against older gear. This is the workflow I've settled on after a few dozen nights with the Z9, from lens selection through to what actually happens to those RAW files once I'm back at a laptop.
Why the Z9's Shutterless Design Actually Matters Here
The Z9 was Nikon's first flagship without a mechanical shutter at all. For most photography that gets talked about in terms of blackout-free viewfinder shooting and silent operation, but for star stacking specifically it removes a wear concern that people don't usually think about. A serious stacking session is 200 to 600 individual sub-exposures, often shot back to back on an interval timer. Do that four times a month and you're racking up tens of thousands of shutter actuations a year from this one hobby alone. On a DSLR or an SLR-style mirrorless body with a mechanical shutter rated for two or four hundred thousand cycles, that's a real chunk of the shutter's rated life spent purely on frames nobody will ever look at individually. On the Z9 there's no mechanical curtain to wear out, so that concern disappears entirely.
The other piece is the stacked CMOS sensor's readout speed, which keeps rolling-shutter skew out of the picture even on the rare occasion something moves through frame (a low satellite, a meteor, a plane on approach far off in the distance). It's not why people buy this camera for astro, but it means a passing aircraft light produces a clean streak rather than a warped one, which matters when you're deciding in post whether a frame is salvageable or needs to be thrown out.
Battery life deserves a mention too. The EN-EL18d holds up noticeably better through a five- or six-hour stacking session in cold weather than the smaller EN-EL15-series batteries I was used to on a Z6 II. I've still had a battery drop hard below about minus five Celsius on a long winter session, so I carry a spare in an inside jacket pocket rather than trusting it'll coast through, but it's a real improvement over what I was working with before.
Getting Exposure Right for a 45.7MP Sensor
The Z9's pixel pitch is roughly 4.35 microns, tighter than the 5.9-micron pitch you'd find on a 24MP full-frame body. That tighter pitch means star trailing becomes visible at pixel level noticeably sooner. If you learned the "500 rule" (500 divided by focal length equals your max exposure in seconds) on a lower-resolution camera, those numbers run too long on the Z9 the moment you view a frame at 100% or plan to crop in. I stopped trusting the 500 rule for this camera and now work off a tighter table I've built from actually pixel-peeping test frames in the field.
| Focal length | Z9 (45.7MP) max sub before visible trailing | Same lens on a 24MP body | What I actually shoot at |
|---|---|---|---|
| 14mm | ~8 sec | ~11 sec | 6 sec |
| 20mm | ~6 sec | ~8 sec | 5 sec |
| 24mm | ~5 sec | ~7 sec | 4 sec |
| 35mm | ~3.5 sec | ~5 sec | 3 sec |
| 50mm | ~2.5 sec | ~3.5 sec | 2 sec |
| 85mm | ~1.5 sec | ~2 sec | 1.3 sec |
Those middle-column numbers are the point where trailing starts becoming visible at full resolution, not a hard ceiling. I shoot a bit under them because stacking software aligns on stars, and slightly elongated points make that alignment step less precise across a big batch of subs. Underexposing individual frames is fine here since stacking is the whole point of recovering signal that a single frame can't hold cleanly.
On aperture, I don't shoot most fast primes wide open for star work. Coma shows up hard in the corners at f/1.4 or f/1.8 on almost everything I own, so I close down about a third to a full stop: the Nikkor Z 20mm f/1.8 S goes to about f/2, and the Z 14-24mm f/2.8 S stays at f/2.8 since that's already its sweet spot for corner stars. ISO ends up in the 3200 to 6400 range with the fast primes most nights, climbing to 8000 or higher with the f/2.8 zoom when I need shorter subs. A single ISO 6400 frame off the Z9 looks genuinely rough at 100%, grainy and a bit blotchy in the shadows, but that's expected. Fifty or sixty of those stacked together clean up to something that reads more like a well-exposed ISO 800 frame, because random noise averages down while the actual star signal reinforces itself.
Focus, the Interval Timer, and Keeping Your Night Vision
Autofocus doesn't find stars reliably even with the Z9's low-light AF rating, so I focus manually every time. The routine that works: switch to manual focus, zoom the live view to 100% on the brightest point in frame (Vega, Sirius, Jupiter if it's up), and turn focus peaking off rather than trusting it, since peaking overlays can lie badly on a near-invisible point source and lead you to a false lock. Rack the ring until that point shrinks to its smallest, tightest disk, then leave it. I put a strip of gaffer tape across the focus ring and the lens barrel once it's set so a stray bump in the dark doesn't undo twenty minutes of work.
The Z9's illuminated buttons are a small thing but they matter more here than in daylight shooting, since you can change ISO or check the interval timer menu without a headlamp wrecking your night vision for the next ten minutes. For the actual capture, I use the built-in interval timer shooting rather than a separate remote: set the exposure length, set the interval to about a second longer than the exposure so the buffer has breathing room, and let it run for however many frames the plan calls for. There's no mirror slap to worry about and no need for exposure delay mode, but I still trigger the first frame with a 2-second self-timer just to keep my hand off the body during the very first shutter release.
Card speed is worth planning around. A 45.7MP 14-bit uncompressed NEF runs somewhere around 60 to 90MB depending on scene detail, so a 400-frame session in uncompressed RAW is easily 25 to 35GB. I shoot to a CFexpress Type B card for the write speed during rapid interval bursts and let the SD slot handle a backup copy, then offload both before reformatting anything. And if you're anywhere near the coast or shooting through a big overnight temperature drop, budget for a dew heater strap around the lens barrel. I've lost the back half of a session to a fogged front element more than once before I started using one as standard kit.
Lights, Darks, and Whether You Need a Full Calibration Set
If you're on a static tripod shooting a wide nightscape or Milky Way composition, you generally only need light frames (the actual shots of the sky) and don't need to bother with a full calibration set. If you're working off a tracking mount on a longer lens for something closer to true deep-sky work, dark frames (same settings, lens cap on, shot at the same ambient temperature right after the session) start pulling their weight, since they let stacking software subtract out the sensor's fixed-pattern noise and hot pixels rather than relying on stacking alone to average them away. I shoot a dozen darks after most sessions specifically because the ambient temperature at 1am is going to be different from whatever the sensor sat at driving home, and dark frame calibration only works if it matches the temperature the lights were shot at.
Culling Hundreds of Nearly Identical Frames
This is the part of star stacking nobody warns you about before you do it the first time: reviewing three or four hundred frames that all look almost identical, at 2am, trying to catch the ones that got shaken by a gust, the one with a satellite trail cutting through the frame, or the run of frames near the end where dew had started creeping onto the front element. Doing that by eye in a standard RAW browser is slow and it's easy to miss a soft frame that looks fine at thumbnail size but drags the whole stack down once it's included.
I run these sessions through imagic before they ever hit stacking software. Its local sharpness scoring flags the soft frames automatically, so a sub that got nudged by wind or where focus drifted half a stop over a long session gets caught instead of quietly pulling detail out of the final composite. Because it processes everything on the machine rather than routing RAW files through a cloud upload first, I can start culling a 30GB card the moment I'm back at the laptop instead of waiting on a transfer. It also catches accidental duplicate triggers from a wireless release, which happens more often than I'd like to admit when my hands are cold and clumsy on the remote.
If you want more on how automated culling actually scores a batch of frames rather than just guessing, how AI photo culling works goes into the mechanics in more detail than I will here.
Choosing Stacking Software
Once the bad frames are out, the stack itself comes down to picking software that matches whether you're on a tracker or a static tripod.
| Software | Platform | Cost | Needs a tracking mount? | Best for |
|---|---|---|---|---|
| DeepSkyStacker | Windows only | Free | No, but improves with one | Full calibration workflow, deep-sky targets |
| Sequator | Windows only | Free | No | Fast untracked nightscapes, sky/ground blending |
| Starry Landscape Stacker | Mac only | ~$45 | No | Same job as Sequator for Mac users, strong foreground masking |
| PixInsight | Windows / Mac / Linux | ~$230 one-time | Works either way | Serious deep-sky processing, real learning curve |
| Photoshop Stack Mode | Windows / Mac | Subscription | No | Quick median-blend noise cleanup, not true star-registered stacking |
For untracked Milky Way and nightscape work off the Z9, Sequator (or Starry Landscape Stacker if you're on a Mac) handles the sky-versus-ground blend well enough that I reach for it first. DeepSkyStacker earns its place when there's a proper calibration set involved. PixInsight is the deepest toolset of the group but I'd only point a beginner at it after a season of using something simpler, because the interface alone has a real learning cost before you get to the astronomy part.
Getting a Consistent Look Across a Full Trip
The stacking software gets you a clean composite, but if you're shooting the same location across several nights, or a multi-stop trip where moon phase and humidity change the color cast from one session to the next, matching the grade by hand across dozens of stacked files gets tedious fast. I built out an apply_my_style preset in imagic from a handful of Milky Way edits I was already happy with, and running new batches through it gets me to a consistent starting point (color balance, contrast curve) before I do any scene-specific tweaking. It's not a substitute for finishing each image individually, but it cuts out the repetitive part of matching white balance frame by frame.
For the workflow habits around this that go beyond astro specifically, 10 tips for a faster photo workflow covers a few things I still use on ordinary shoots too.
Frequently Asked Questions
Do I need a star tracker to stack Z9 files, or does a static tripod work?
A static tripod works fine for wide nightscapes and Milky Way shots where the ground stays sharp and the sky is the point of interest. You're limited by the exposure lengths in the table above before trailing shows, which caps how much signal each sub can gather. A tracker lets you run much longer subs because it follows the sky's rotation, which is the difference between a nightscape and true deep-sky imaging, but it also means your foreground blurs unless you shoot it separately and blend it in, which is exactly what software like Sequator and Starry Landscape Stacker are built to handle.
What's the difference between stacking for noise reduction and stacking for star trails?
They use the same raw material (a sequence of short exposures) for opposite purposes. Noise-reduction stacking aligns every frame on the stars and averages them, so the stars stay as points and the noise cancels out. Star trail stacking does the opposite: it keeps every frame's stars in their original position and blends by lightest pixel, so the stars stretch into arcs across the frame as the earth rotates between shots. Sequator and DeepSkyStacker both default to the alignment method; a trails composite usually needs a different mode or a separate tool like StarStaX.
How many subs do I actually need for a clean result?
For a Milky Way composite off the Z9 at ISO 4000-6400, I start seeing real, visible noise improvement by 20 frames and diminishing returns past 60 to 80 for a static-tripod nightscape. Tracked deep-sky work behaves differently since the subs are longer and the target is dimmer, and there people commonly stack into the hundreds. For a typical widefield shoot, 40 to 50 well-focused subs gets you most of the benefit without turning the session into an all-nighter.
Does the extra resolution of the Z9 actually help astro, or is it just more noise to manage?
Both, honestly. The higher pixel count means individual pixels gather less light per exposure, which is why the exposure math in the table above runs tighter than it did on older 24MP bodies, and why single frames at high ISO look noisier at 100% than people expect from a modern flagship. But once you're stacking, that resolution pays off in the final crop: a Milky Way composite that started at 45.7MP still holds up printed large or cropped into after stacking, in a way a 24MP file wouldn't. The tradeoff is real, but it resolves in the composite's favor if you're actually stacking rather than relying on a single frame.