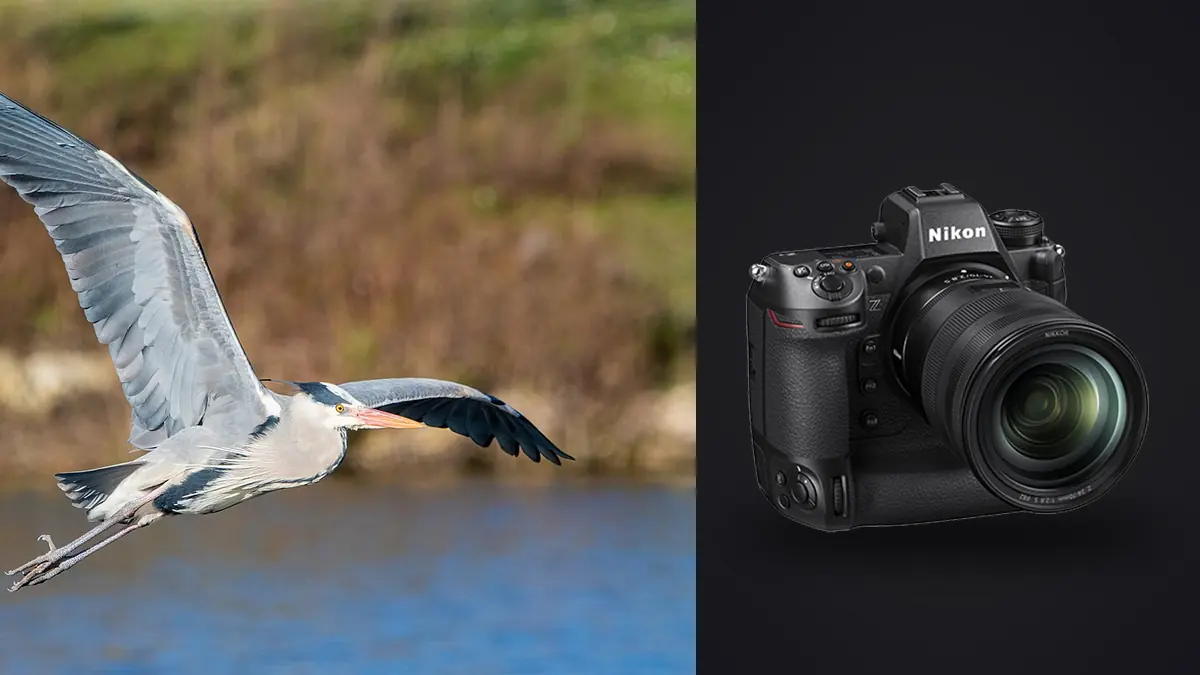
I spent most of last winter on a jetty at the edge of a tidal estuary trying to get clean wingtip separation on wintering ospreys, and the Nikon Z9 is the first body I've used where I stopped thinking about the camera and started thinking about the bird. That sounds like marketing copy, so let me be specific instead. The autofocus doesn't hunt when a bird crosses a cluttered reed line, the buffer doesn't choke mid-pass the way my old DSLR did, and the bird-detection AF genuinely finds an eye at distances where I couldn't confirm focus by eyeball through the viewfinder. None of that means the camera does the work for you. It still needs settings dialed to the actual behavior of the species you're chasing, and most of the generic "best settings" lists I read before I bought mine were wrong for the birds I actually shoot.
The autofocus habits that made the biggest difference
The single change that improved my keeper rate more than anything else was moving off Auto-Area AF and onto 3D-tracking combined with Animal Detection set to birds specifically, not the generic "animal" mode. The Z9's bird-eye detection is trained tightly enough that it will grab an eye on a kestrel hovering against a bright sky, but it gets noticeably less confident once the subject drops below roughly 5-6% of the frame. Below that size I switch to Wide-Area AF (S) with a smaller box and let 3D-tracking take over once the subject grows in the frame during the approach. I know some shooters run Wide-Area AF (L) permanently and just trust the camera to find the bird anywhere in a huge box. That works fine for isolated subjects against open sky. It falls apart the moment there's a second bird, a branch, or a wave crest in the frame, because the camera will happily snap onto the wrong thing with total confidence.
Group-Area AF with bird detection is my go-to for anything flying low over water or coming through a broken tree line, because it gives the tracking system more candidate points to recover with if the primary AF point briefly loses the subject behind an obstruction. I only turn it off for subjects with almost no background clutter, like gulls working a thermal against clear sky, where a single-point or small dynamic-area setup is actually more precise on the exact spot I want (usually the eye, sometimes the leading wing edge on a banking shot).
One setting that gets skipped in a lot of guides: AF-C priority selection under custom setting a1. I run Release priority rather than Focus priority for fast, erratic fliers like swallows and swifts, because in Focus priority the camera will sometimes refuse to fire at all during a hunt, and with a bird moving that unpredictably I'd rather have a slightly soft frame in the sequence than a missed shutter release. For slower, more predictable subjects like herons and large raptors I switch back to a balanced setting, since the extra confirmation costs almost nothing at that speed and the accuracy gain is real.
Settings by scenario, not by a fixed "best practice" list
The table below is built from what I actually run in the field, not a manufacturer spec sheet. Shutter speeds assume you're prioritizing frozen wingtips over deliberate motion blur; drop them a stop or two if you want some wing blur for a sense of motion, which I do occasionally with slower species like herons.
| Scenario | AF-Area Mode | Shutter Speed | Drive Mode | Why |
|---|---|---|---|---|
| Raptor against open sky, high contrast | 3D-tracking, bird detection on | 1/2000-1/2500 | C30 (electronic, pre-capture on) | Detection is most reliable with clean edges; pre-capture saves the wingbeat you didn't quite anticipate |
| Small fast fliers (swallows, swifts, terns) | Group-Area AF, bird detection on | 1/3200-1/4000 | C120 crop, Release priority | Erratic flight needs multiple candidate points; the crop mode's extra reach helps since these subjects are usually small in frame |
| Bird approaching head-on through gap in cover | Wide-Area AF (S) | 1/2000 | C20 full-frame | Detection struggles with partial occlusion; a smaller box lets you manually place it on the visible part of the bird |
| Low pass over water, reflections in frame | 3D-tracking, bird detection on | 1/2500 | C30 electronic | Reflections can pull detection off the real bird; 3D-tracking anchored on the eye recovers faster than Auto-Area |
| Large slow soarer (heron, stork, vulture) | Wide-Area AF (L), bird detection on | 1/1000-1/1600 | C10, Focus priority | Slower wingbeat tolerates slower shutter and lower frame rate; accuracy matters more than speed here |
20fps, 30fps, or 120fps: it's not just "faster is better"
I default to the 20fps full-resolution mode more than either of the faster options, and that surprises people who assume you always want the highest number available. The C30 electronic mode is fantastic for erratic, close subjects where you genuinely need every extra frame to catch peak wing position, but it also multiplies your card fill rate and your editing pile by half again over 20fps, and the DX-crop C120 mode drops you to 11 megapixels, which is fine for social media and rough for anything you might want to print or crop hard. For a typical morning session I'll shoot maybe 60% of my sequences at 20fps, reserve C30 for genuinely difficult erratic subjects, and only reach for C120 when I need the extra reach on something small and distant that I know I'll never print large. Pre-release capture (the buffer that keeps recording the half-second before you fully press the shutter) has been the single most useful feature for flight takeoffs specifically, since the moment a perched bird decides to launch is exactly the moment human reaction time is worst.
The file-count problem nobody mentions until you're living it
Here's the part that doesn't show up in autofocus reviews. A single 8-second burst at 20fps is 160 frames. Do that a dozen times in a morning session and you've got close to two thousand nearly-identical raw files before lunch, most of them differing from their neighbors by nothing more than a wing angle. I used to sit down at night and manually click through every frame comparing wingtip position against wingtip position, and it took longer than the shoot itself. That's the actual reason I moved my culling over to imagic. It runs entirely on my own machine, so I'm not uploading a full day of raw wildlife files anywhere, which matters when you're shooting protected nesting sites and don't want location metadata leaving your laptop. The sharpness scoring catches the frames where the eye is genuinely soft from motion or a hunting AF point, and the burst clustering groups each flight pass together so I'm reviewing "which of these 40 near-identical frames is the sharpest with the best wing position" instead of scrolling a flat filmstrip of two thousand thumbnails looking for the same thing manually.
The other habit that's made a real difference: I trained imagic's apply_my_style preset on a batch of my own finished bird-in-flight edits from last season, the ones with the exposure lift, the slight warmth pull, and the specific contrast curve I use on backlit feather detail. Running new culled selects through that preset gets me to a usable starting point before I've even opened the raws individually, which matters when you come back with four hundred keepers from a good morning and a trip report due in two days. It's not replacing my actual edit, it's just removing the repetitive first pass so I'm spending my time on the frames that deserve it.
Lens pairing and handling notes
Most of my flight work is with the 500mm f/5.6 PF, and I'll say plainly that I prefer it over the 400mm f/2.8 for anything longer than a short session, purely because of weight. Handholding a 2.9kg lens on a body with the Z9's grip depth for three or four hours of tracking erratic fliers is sustainable in a way that a 3.9kg f/2.8 setup isn't for me personally, and fatigue shows up in your pan smoothness before you notice it in your arms. The PF's f/5.6 aperture does cost you a stop of light on overcast dawn starts, which occasionally pushes ISO higher than I'd like on the fastest shutter-speed scenarios in the table above, but the Z9's high-ISO files hold up well enough through 6400 that I don't think about it as a real limitation anymore, certainly not compared to what I was working with on older sensors.
For the 800mm PF I switch to a monopod with a tilt head rather than a gimbal for most flight work, because the extra reach is most valuable for distant, slower subjects (soaring raptors, roosting colonies taking flight at distance) where I'm not whip-panning as hard. For close, fast, erratic passes I go back to the 500mm every time. Reach is not the priority when the bird fills the frame in half a second and is gone.
Custom button layout I settled on
AF-On stays on the back button, unchanged from my old setup, but I moved the AF-area mode toggle to the lens's function button rather than a body control, because on a long lens your left hand is already there supporting the barrel and it's a faster reach than moving your right thumb off the shutter mid-sequence. I also mapped one of the Fn buttons to cycle between my two most-used AF-area modes only (3D-tracking and Group-Area), skipping the full menu of options, since in practice I switch between those two constantly and almost never touch the others mid-session.
Settings I tried and stopped using
I ran Auto Capture (the Z9's motion/distance-trigger feature) for perch-to-flight takeoff shots for about two months and mostly abandoned it for anything except fixed, predictable perches like a known osprey hunting post. It's genuinely useful there, but for general flight work the trigger zone setup takes longer to configure per location than it saves, and I got more keepers just standing ready with pre-release capture active. I also stopped using the highlight-weighted metering mode I'd carried over from landscape work; for birds against bright sky it consistently underexposed the bird itself, and I get better raw data leaving metering on matrix and adjusting exposure compensation manually per lighting condition instead.
Frequently Asked Questions
Is the Z9's bird-eye detection reliable enough to trust fully, or should I still use manual focus points as backup?
It's reliable enough that I trust it as my primary system, but I still keep a manual fallback area mode mapped to a quick-access button for situations detection struggles with: birds partially behind branches, multiple birds close together, or subjects under about 5% of frame size. Treat detection as excellent rather than infallible and you won't get caught out.
Do I actually need the 30fps or 120fps modes for birds in flight, or is 20fps enough?
For most flight photography 20fps full-resolution is genuinely enough, and it keeps your file count and card wear manageable. Reserve the faster crop modes for specific situations: very erratic small fliers, or moments where you need maximum frame density to nail one exact wing position, like the top or bottom of a wingbeat cycle.
What shutter speed actually freezes wingtips on fast fliers without wasting ISO headroom?
For mid-size raptors 1/2000 is usually enough for a clean wingtip. Small, fast species like swallows and swifts need 1/3200 or faster to avoid a soft blur at the very tip of the wing, even though the body itself may look sharp at slower speeds. Large slow soarers can drop to 1/1000-1/1600 without visible wingtip blur because their wingbeat cadence is so much slower.
How do you deal with the sheer number of near-duplicate frames from a single burst pass?
This is the unglamorous part of bird-in-flight photography that nobody warns you about before you buy a high-frame-rate body. I lean on software that clusters each burst together and scores sharpness locally on my machine, which turns a two-thousand-frame day into a manageable review instead of an all-night scroll. Whatever tool you use, the goal is the same: stop comparing every frame to every other frame by eye.
What I'd tell someone buying a Z9 specifically for flight shots
Don't buy it expecting the autofocus alone to fix a weak panning technique or a lens that's too slow for your light conditions. What it will do is remove the excuse of "the camera couldn't find focus in time," because in my experience it almost always can, even in conditions where my old gear simply gave up. The rest, positioning yourself with good light and a clean background, reading flight paths early enough to pre-focus roughly where the bird will be, and actually reviewing your work honestly afterward instead of keeping every frame that's technically in focus, is still entirely on you. If you're weighing whether the upgrade is worth it purely for birds in flight, I'd say yes without much hesitation, but budget mental energy for the workflow side too. A camera this capable of shooting fast will bury you in files just as fast if you don't have a plan for going through them.