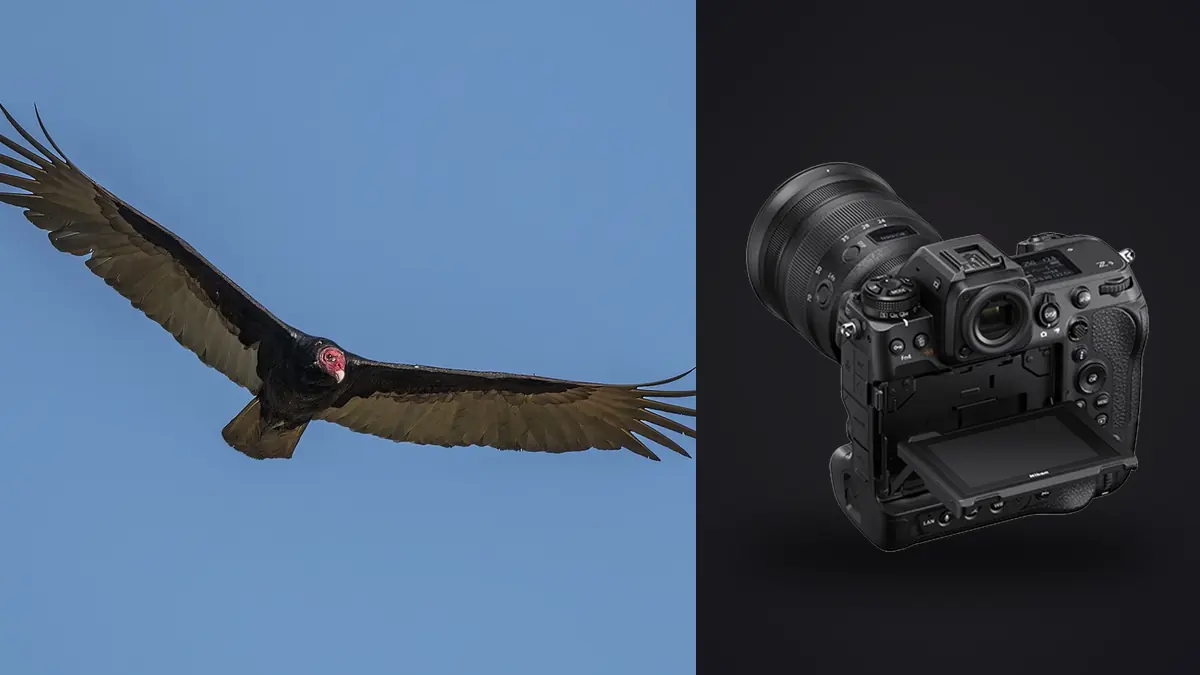
I spent three mornings at a heron rookery this spring trying to get the Z9 to stop hunting on birds crossing in front of reeds, and the fix wasn't in any menu I expected. It was in how I was framing the subject before I ever pressed the shutter button. That's the theme of this whole guide: the Z9 is capable of extraordinary bird-in-flight results, but almost none of that capability shows up automatically. You have to know which of its dozen overlapping autofocus systems to trust for a given situation, and you have to have a plan for the several thousand frames it will hand you by lunchtime.
Why the Z9 Changed the Calculus for Flight Shots
Nikon's F-mount bodies, even the D6, still relied on a fundamentally different focus system for live view versus the optical viewfinder, and birders who used AF-C through the finder were stuck with a fixed set of AF points and a phase-detect module that lost the plot the moment a bird crossed a branch. The Z9 does everything through its stacked sensor, which means the entire frame is one contiguous AF area, and subject detection runs on that same data rather than a bolted-on secondary sensor. In practice that means a kestrel hovering against a mottled hillside gets tracked with the same confidence as one against open sky, because the camera isn't relying on a coarse grid of phase-detect points to hand off between.
The tradeoff nobody mentions in the marketing copy: because there's no mechanical shutter at all, every single frame is read out electronically, and that readout takes time. For most subjects it's irrelevant. For a peregrine in a stoop, or a hummingbird's wings, it occasionally isn't, and I'll get into exactly when that matters below.
Autofocus Setup That Actually Holds Onto Erratic Flight Paths
3D-Tracking Versus Auto-Area With Bird Detection
Nikon ships the Z9 with several AF-area modes, and the temptation is to leave it on Auto-Area AF with Animal Detection turned on and assume the camera will sort things out. That works beautifully for a single bird against sky or water. It falls apart the instant you're photographing a mixed flock of shorebirds wheeling together, because the camera has no way to know which bird you actually want and will happily jump to whichever one has the sharpest edge contrast in that frame.
For flocks, I switch to 3D-Tracking, place the initial focus point on the specific bird I want, and let the tracking box follow it through the frame. This only works if you commit to the placement before the action starts, which means pre-focusing on a bird sitting on the water or a perch and waiting for it to lift off, rather than trying to find and lock a bird already in motion. For a lone raptor working a thermal, Auto-Area with Bird Detection is faster to acquire and I use it almost exclusively.
Back-Button Focus and the Two Fn Buttons You'll Actually Use
I run AF-On for continuous tracking and have the front Fn1 button set to AF-On with a different area mode (Wide-Area AF Large) as a fallback for when a bird ducks behind vegetation and the tracking box grabs a twig instead. Recomposing by releasing back-button focus and hitting Fn1 with the wide box centered on the subject gets you re-acquired in under half a second, which is usually enough to save the sequence. Nikon lets you assign both AF-On and Fn1/Fn2 with independent AF-area mode overrides in the custom controls menu (Custom Setting f2), and if you're not using that, you're leaving a genuinely useful piece of the system on the table.
Frame Rate, Shutter Readout, and Where Rolling Shutter Actually Bites
The Z9's headline number is 20 fps in full-resolution RAW, and 120 fps if you're willing to drop to 11MP JPEG. Neither of those numbers tells you what you actually need to know, which is how much of the frame distorts during readout at each setting and what you're going to do with the files afterward. Here's how the modes break down in practice, based on shooting ospreys, herons, and gulls over about four months with this body.
| Shooting Mode | Frame Rate | File Output | Rolling Shutter Risk | Where I Actually Use It |
|---|---|---|---|---|
| High-Speed Frame Capture+ (C120) | 120 fps | 11MP JPEG | Low (fast partial readout) | Isolating exact wing position on a hummingbird or a bird breaking from a branch |
| Extended High-Speed Frame Capture+ (C30) | 30 fps | 11MP JPEG | Low | Fast raptor stoops where I'll accept JPEG for the keeper frame and re-shoot RAW on the follow-up pass |
| Continuous High Extended | up to 20 fps | 45.7MP RAW (lossless compressed) | Moderate on very fast horizontal motion | Default for flight sequences I intend to crop hard or print large |
| Continuous High | 10 fps | 45.7MP RAW | Low | Gliding gulls, soaring raptors, slower launches from a perch |
| Pre-Release Capture (buffered) | up to 30 fps into buffer | 11MP JPEG | Low | Reactive takeoff shots where the bird moves before I can react |
The rolling shutter issue shows up as a slight skew on wingtips or a lean in a fast-moving background, and it's most visible when you pan hard to track a bird crossing perpendicular to you at close range, like a tern working a shoreline at eye level. At 20 fps full-res RAW the sensor readout is fast enough that I rarely see it in practice, but I did get a visibly sheared wingtip on a peregrine stoop shot where the bird was moving close to 200 km/h relative to the frame. Dropping to the 120 fps crop mode for that specific shot fixed it, at the cost of resolution I didn't need for a web post anyway.
Pre-Release Capture deserves more attention than it gets. Set to C30, the camera continuously buffers up to a third of a second of frames before you fully depress the shutter, so when a heron finally breaks from its stalking crouch, you already have the launch frame even though your reaction time was too slow to have caught it manually. I use this constantly at rookeries where birds sit still for twenty minutes and then leave with no warning.
Lens Pairings That Hold Up in the Field
The Z9's autofocus is only as good as the lens feeding it. I've run this body with the Z 400mm f/2.8 TC VR S, the Z 800mm f/6.3 PF, and a Z 100-400mm f/4.5-5.6 VR S for closer, more erratic subjects, and the differences in how each holds focus on birds in flight are not subtle.
The 800mm PF is the one people ask about most because of its size, and the honest answer is that the built-in teleconverter behavior of the 400mm f/2.8 TC actually tracks faster in continuous AF than the 800mm does wide open, because the 400mm's maximum aperture stays f/2.8 and feeds more light to the AF system before you engage the internal 1.4x. With the internal TC engaged on the 400mm (giving you 560mm at f/4), I still see faster acquisition on a bird breaking cover than I do with the 800mm PF at f/6.3, especially in the last hour of usable light. For anything shot after golden hour proper, that half-stop to full-stop difference in effective aperture changes whether the AF system has enough contrast to grab onto a bird against a dim background at all.
The 100-400mm earns its place for birds that come in close and fast, like swallows over water, where the longer primes simply can't rack focus or reframe quickly enough. It's also the lens I hand to anyone shooting alongside me who hasn't used a 20+ fps body before, because the shorter focal length is more forgiving of imprecise panning.
Exposure Strategy for Birds Against Moving Backgrounds
Manual exposure with Auto ISO is the only mode I use for flight work. Set your shutter speed first (I default to 1/2500s for small fast fliers like terns and swallows, 1/1600s for larger, slower-wingbeat birds like herons and eagles), set your aperture based on how much depth of field you need for a bird against a busy background (f/6.3 to f/8 keeps enough of the bird sharp without turning a cluttered background into total mush that reads as fake), and let Auto ISO float. The Z9's high-ISO files hold up well enough to shoot into ISO 6400 territory in a pinch, though I try to stay under 3200 for anything I intend to print larger than a standard frame.
Exposure compensation matters more here than with most subjects because bird plumage varies so widely in tonal value. A white egret against dark water needs -1 to -1.3 EV or you'll blow the highlights on the feathers every time; a dark cormorant against bright sky needs the opposite treatment. I keep exposure compensation on a dedicated dial position rather than buried in a menu, because you often need to change it mid-sequence as a bird crosses from shadow into open sky.
What a Full Day at 20 fps Actually Does to Your Card and Your Evening
A three-hour morning session shooting ospreys diving, at a mix of 10 and 20 fps RAW, routinely fills 90 to 140GB on my CFexpress Type B card. That's not a hypothetical number, that's what the card reader showed me after four separate outings this season. At 45.7MP with lossless compression, individual RAW files run 55-70MB depending on scene detail, and a five-second burst at 20 fps is a hundred frames, most of which are near-duplicates of the same wingbeat a fraction of a second apart.
This is the part of Z9 ownership that doesn't get discussed enough. The camera is genuinely excellent at capturing the moment, which means it hands you the problem of finding that moment inside four thousand frames that look almost identical. I went through a stretch of culling sessions that ran to two and a half hours per outing, just scrubbing through burst after burst on a laptop screen trying to spot which of thirty near-identical wing positions actually had the eye sharp and the wingtip in a flattering position.
What changed that workflow for me was running the day's card through imagic before I opened anything in an editor. It scores sharpness and focus locally, per frame, so instead of scrubbing through a hundred-frame burst by eye I can sort by the score and go straight to the handful that are actually in focus on the eye rather than the wingtip. It also clusters bursts and near-duplicate frames together, which matters a lot with birds in flight specifically, since a 20 fps sequence of a heron's takeoff is effectively one shot repeated a hundred times with small variations, and you want the tool grouping those rather than making you page through them individually. Everything runs on the machine itself, nothing gets uploaded anywhere, which matters when you're dealing with a few hundred gigabytes of RAW files from a single trip and don't want to wait on an upload before you can start sorting.
If you're coming from a slower body and haven't had to think about culling at this volume before, it's worth reading through how AI photo culling works before your first big Z9 outing, because the mental model of "review every frame" that works fine at 5 fps genuinely does not scale to a body that can produce four thousand frames in a single morning.
RAW Processing Notes Specific to the Z9's Files
Z9 RAW files (both the lossless-compressed and high-efficiency star variants) carry noticeably more shadow recoverability than the D850 files I was shooting three years ago, which matters for backlit bird shots where you've deliberately underexposed to protect highlight detail on white or pale plumage. I routinely pull shadows up 1.5 to 2 stops on a heron's underside without banding showing up, something I couldn't do reliably on the older sensor.
Where the Z9 files need consistent handling is white balance under overcast coastal light, which skews cooler and bluer than the camera's auto setting usually compensates for. I've settled on a manual correction I apply across an entire session's worth of images rather than adjusting shot to shot, since the light doesn't meaningfully change over a two-hour window at a single location. Once I had a season's worth of that correction dialed in, I used imagic's apply_my_style feature to train a preset off a batch of edits I was happy with, so a new card of bird-in-flight RAWs from a similar coastal morning gets a consistent starting point without me manually resetting white balance and a base curve on every single import. It's saved real time specifically on the repetitive part of the edit, the baseline color and exposure matching across a big batch, while leaving the frame-by-frame crop and dodge work to me.
If your current workflow still involves opening every keeper individually before deciding whether it's worth full processing, it's also worth a look at general workflow tightening beyond just culling, covered in these workflow tips, since a lot of the same batching principles apply whether you shot two hundred frames or four thousand.
Frequently Asked Questions
Do I need to shoot 20 fps for every bird-in-flight session, or is that overkill?
For slower subjects like soaring raptors or gliding pelicans, 10 fps is plenty and cuts your card fill rate and culling time roughly in half. I reserve 20 fps for genuinely fast, erratic subjects: terns diving, swallows hawking insects, anything where the wing position changes meaningfully between frames at 10 fps. Defaulting to 20 fps for a perched owl that might eventually fly is how you end up with forty thousand frames you didn't need.
Does adding a teleconverter meaningfully slow down autofocus on moving birds?
Yes, and the effect is bigger than the on-paper aperture loss suggests. The internal 1.4x on the 400mm f/2.8 TC costs you a stop of light reaching the AF system, and in good daylight you won't notice a difference in acquisition speed. In the last 30-40 minutes before sunset, or on an overcast day, I can feel the hunting increase noticeably with the converter engaged, particularly against low-contrast backgrounds like a gray sky or still water. If light is marginal, I'll shoot at native focal length and crop rather than fight slower AF with the converter in.
Is the lack of a mechanical shutter actually a problem for flight photography?
For the overwhelming majority of bird-in-flight scenarios, no, and the tradeoff is worth it: zero shutter shock, no mechanical wear on a part that would otherwise be firing tens of thousands of times a season, and silent operation that matters at close range with skittish subjects. The one place it bites is genuinely extreme relative motion, like a stooping falcon crossing close to the frame edge, where you can get a visible skew on the leading edge of the wing. It's rare enough in practice that I don't think about it except when reviewing a specific fast pass afterward.
How much storage should I actually budget for a multi-day birding trip with this camera?
Based on my own outings, budget roughly 100-150GB per active shooting day if you're working flight sequences at 10-20 fps, less if you're mostly shooting perched birds and occasional flight. For a five-day trip I bring two 325GB CFexpress Type B cards and a laptop with enough free space to offload and cull each evening rather than letting cards fill across the whole trip, since running the day's take through a culling pass nightly keeps the backlog from becoming unmanageable by day three.