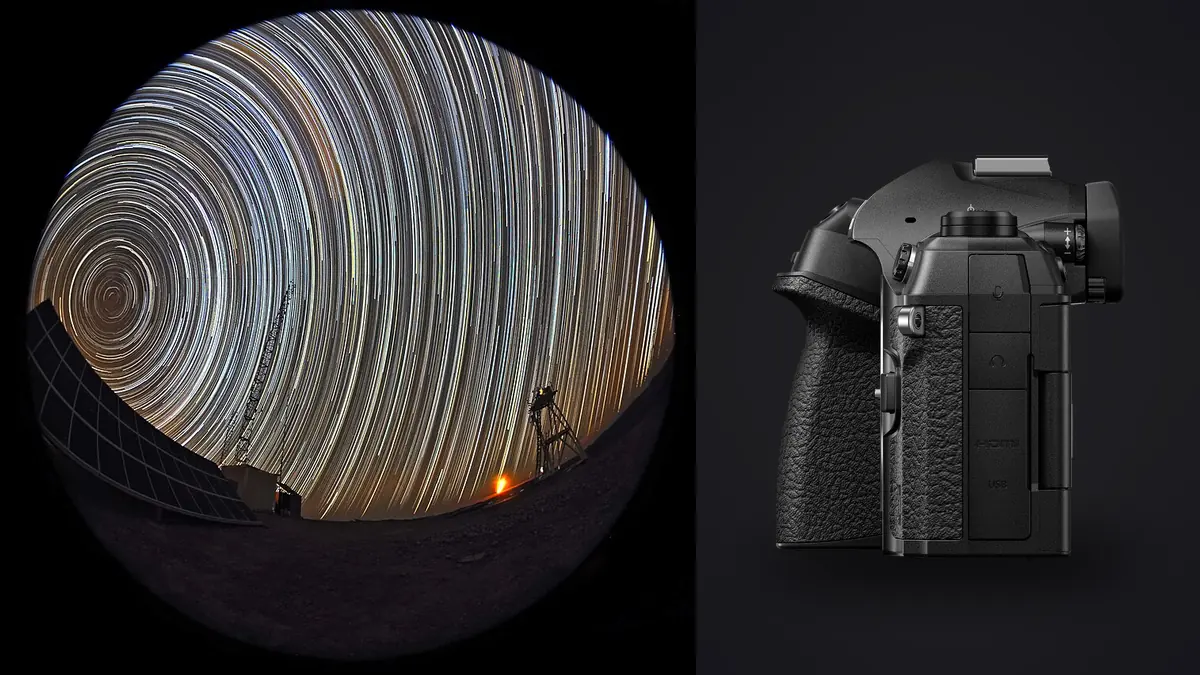
I took the OM-1 Mark II up to just under 2,400 meters in the Dolomites last October specifically to see whether Micro Four Thirds still has a case in astrophotography, an area where full-frame sensors have had the physics advantage for a decade. Smaller pixels mean more read noise relative to signal at high ISO, and a Four Thirds sensor is gathering roughly a quarter of the light a full-frame sensor sees at the same aperture and shutter speed. On paper that should be a losing proposition for shooting stars. In practice, the Mark II's in-camera stacking tools and genuinely useful Starry Sky autofocus closed most of that gap for anyone shooting the Milky Way, star trails, or wide constellation fields rather than deep-sky telescope work.
This isn't a spec sheet regurgitation. It's what actually worked, what didn't, and the settings I landed on after burning through a few frustrating nights of blown focus and gradient banding before I got a workflow that reliably produced usable files.
Why the sensor size question matters less than you'd think
The OM-1 Mark II carries a 20.4-megapixel stacked, backside-illuminated Four Thirds sensor paired with dual TruePic X processors. Stacked sensor architecture means faster readout, which matters for autofocus speed and rolling shutter control during the day, but at night the bigger deal is what OM System built on top of the sensor rather than the sensor itself. Live Composite mode watches the scene and only updates pixels that get brighter than the base exposure, frame after frame, without ever re-exposing the whole image. That means you can build a two-hour star trail over a lit foreground (a cabin porch light, headlamps on a trail, a campfire) without the foreground blowing out the way it would in a single four-hour bulb exposure. I ran a 95-minute Live Composite session over a stone hut in the Fanes valley with a single lantern lit inside, and the trail built up cleanly while the window glow stayed readable in the final frame. That would have been unusable as a straight long exposure.
The tradeoff is that Live Composite is doing real-time additive blending in camera, and the rear screen dims noticeably during long sessions, plus the battery burns faster than a plain bulb exposure would. I went through roughly 40% of a fully charged BLX-1 battery in that 95-minute session with the screen active. Turn the screen off between checks if you're planning anything past an hour.
Starry Sky AF, and where it actually helps
Manual focus-by-eye on a 3-inch screen at f/1.8 has always been the weak link in wide-field night shooting, even with focus peaking and 10x magnification. Starry Sky AF changes that by detecting star points directly rather than trying to contrast-detect on a dark, mostly featureless frame. There are two modes buried in the menu: Speed Priority, which is the default and finishes an AF cycle in under two seconds on a reasonably bright sky, and Accuracy Priority, which does a slower fine scan and is meant for picking out a specific star through a longer lens. I used Speed Priority almost exclusively for wide constellation and Milky Way shots with the 8-25mm f/4 PRO, and it locked focus correctly on the first or second try in maybe 80% of attempts once the sky was properly dark (an hour or more past astronomical twilight). Under a gibbous moon or with light pollution washing out anything but the brightest stars, hit rate dropped hard, and I ended up falling back to manual focus using the star as a live-view target anyway. One real limitation worth flagging: Starry Sky AF and High Res Shot mode can't run together, because High Res Shot disables continuous AF entirely. The workaround is to nail focus with Starry Sky AF first, then switch the mode dial into High Res Shot without touching the focus ring.
Building a star-stacking sequence in the field
For actual stacked exposures (as opposed to Live Composite trails), the routine I settled on after a few wasted nights was:
- Lock focus with Starry Sky AF, then flip the lens or camera to manual focus mode so nothing can hunt or drift mid-sequence.
- Shoot in raw only, mechanical shutter off, electronic first curtain or fully electronic depending on wind (fully electronic on a night with any breeze, since even a whisper of shutter shock shows up at 100% crop on point-source stars).
- Set an interval timer for 20-40 frames at whatever exposure the 500-rule (or the stricter NPF rule, given the smaller sensor's crop factor) allows before star trailing becomes visible. On the 8mm end of the 8-25mm PRO that's around 20-25 seconds before pinpoint stars start to smear at full-resolution crop.
- Shoot a matching set of 15-20 dark frames with the lens cap on at the same ISO, exposure, and temperature immediately after, before the sensor cools or the ambient temperature shifts.
None of the stacking itself happens in camera for this approach. The OM-1 Mark II doesn't have a built-in deep-sky stacking mode the way its High Res Shot handles pixel-shift for static daytime scenes, so the raws come home and go into dedicated stacking software (I use Sequator for quick Milky Way stacks and DeepSkyStacker when I want more control over the alignment algorithm). Where the camera earns its keep is in how clean the individual sub-frames are going in. A crop-sensor camera shooting noisy 25-second subs just gives the stacking software worse raw material to average, no matter how good the software's algorithm is.
Where Micro Four Thirds still loses ground
I'm not going to pretend the sensor size penalty disappears. Shooting ISO 3200 subs side by side against a full-frame body a friend was running that same night, the OM-1 Mark II files needed noticeably more noise reduction in post before they matched, and shadow recovery in the foreground rock and tree silhouettes showed more color noise blotching once pushed. Stacking narrows that gap a lot (averaging 25-30 frames buries a huge amount of the per-frame noise) but it doesn't erase the physics. If your plan is single-shot Milky Way panoramas with minimal stacking, a full-frame body will still out-resolve faint nebulosity and give you cleaner shadows. Where the OM-1 Mark II claws it back is in portability (an 8-25mm f/4 constant-aperture zoom that covers full-frame-equivalent 16-50mm and weighs a fraction of the glass you'd need on a bigger mount) and in the in-body stabilization, rated to 8.5 stops, which lets you get away with genuinely handheld foreground blends at surprisingly long shutter speeds when you're not shooting stars themselves.
| Technique | Best for | Typical OM-1 Mark II settings | Main limitation |
|---|---|---|---|
| Live Composite | Star trails over a lit or moderately dark foreground | ISO 800-1600, base exposure 8-15s, session length 30-120 min | Battery drain, screen must stay usable to monitor |
| Stacked wide-field (external software) | Milky Way core, constellation fields | ISO 1600-3200, 15-25s subs x 20-30 frames, matched darks | No in-camera stacking; needs Sequator/DSS/PixInsight after |
| Single long exposure | Quick grab shots, scouting composition | ISO 3200-6400, 20-25s, single frame | Noisiest result of the three by a clear margin |
| High Res Shot (tripod) | Static foreground detail, not stars themselves | Base ISO, tripod locked, AF pre-set manually | Disables continuous AF, unusable if anything in frame moves |
Sorting the take without losing a night's work to it
A single 30-frame stacking sequence plus 15-20 darks is close to 50 raw files before you've even started on a second composition. Multiply that across a three-night trip and you're looking at several hundred nearly-identical dark frames that all need to be checked for the same three failure modes: a plane or satellite trail cutting through, a gust of wind blurring one sub in an otherwise clean sequence, or focus drift on a frame where the lens ring got bumped. Scrolling through all of that at 100% on a laptop screen at 1am is exactly the kind of tedious sorting work that used to eat the morning after a shoot. I run the take through imagic before it goes anywhere near stacking software, because its sharpness scoring flags the one or two frames in a sequence where wind or a bump softened the stars, and because it runs entirely on the machine (nothing gets uploaded, which matters when you're on a mountain hut's weak wifi anyway). It won't tell you which frame has a satellite trail, that's still a human check, but pulling the objectively soft frames out before stacking means you're not accidentally averaging a blurred sub into 29 sharp ones and dragging the result down. For anyone shooting the same wide-field composition across a whole trip and wanting one consistent look across the set, the apply_my_style preset trained on your own past edits also saves the repetitive part of matching color and contrast across dozens of near-identical night frames, since default AI presets tend to either crush the sky or overcook the foreground on this kind of image. If you're curious how that sharpness scoring actually works under the hood, this breakdown of how AI photo culling works covers the mechanics in more general terms than an astro-specific workflow post would.
A note on weather sealing that actually got tested
The IP53 rating isn't marketing fluff in this context. On the second night of the Dolomites trip, condensation formed on everything as the temperature dropped past freezing after a warm afternoon, and a light snow flurry passed through around 2am while the camera sat on the tripod mid-sequence. It kept shooting. I wiped it down afterward rather than leaving moisture to sit on the mount, but nothing about the session got interrupted, which isn't something I'd have trusted with some of the less-sealed bodies I've used at altitude before.
Frequently Asked Questions
Do I need Starry Sky AF, or is manual focus with live view magnification good enough?
Manual focus with 10x magnification on a bright star still works and is what most astrophotographers relied on before this feature existed. Starry Sky AF is faster and more repeatable across a session where you're refocusing between compositions, but it's a convenience layer, not a requirement. If you're shooting one locked composition all night, nail focus once manually and you'll never need to touch it again.
Can the OM-1 Mark II stack star images in camera the way it does High Res Shot?
No. High Res Shot is a pixel-shift technique for static daytime detail and doesn't work for star fields (it needs continuous AF disabled and a completely motionless scene, and stars technically move across the frame during any multi-second exposure). Star stacking for noise reduction has to happen in dedicated software after the fact. Live Composite is the one built-in feature that does real-time compositing, but it's designed for trails, not stacked noise reduction on a fixed star field.
What ISO ceiling actually holds up on this sensor for astro work?
I stopped pushing past ISO 3200 for anything I planned to stack, and treated 6400 as an emergency-only setting for single grab shots. Above that the color noise in shadow areas gets hard to fully clean up even with modern denoise tools, and stacking 20-30 frames at ISO 1600-3200 consistently beat single frames shot at 6400 for final image quality.
Is the 8-25mm f/4 PRO the right lens for this, or should I look at faster primes?
It's a solid general-purpose choice because the constant f/4 aperture and zoom range cover framing changes without swapping glass in the dark, but a fast prime (f/1.8 or faster) will out-resolve it for pure Milky Way core detail in a single exposure. Given how much stacking multiple sub-frames narrows that gap, I've found the convenience of not changing lenses at 2am outweighs the aperture difference for most nights.