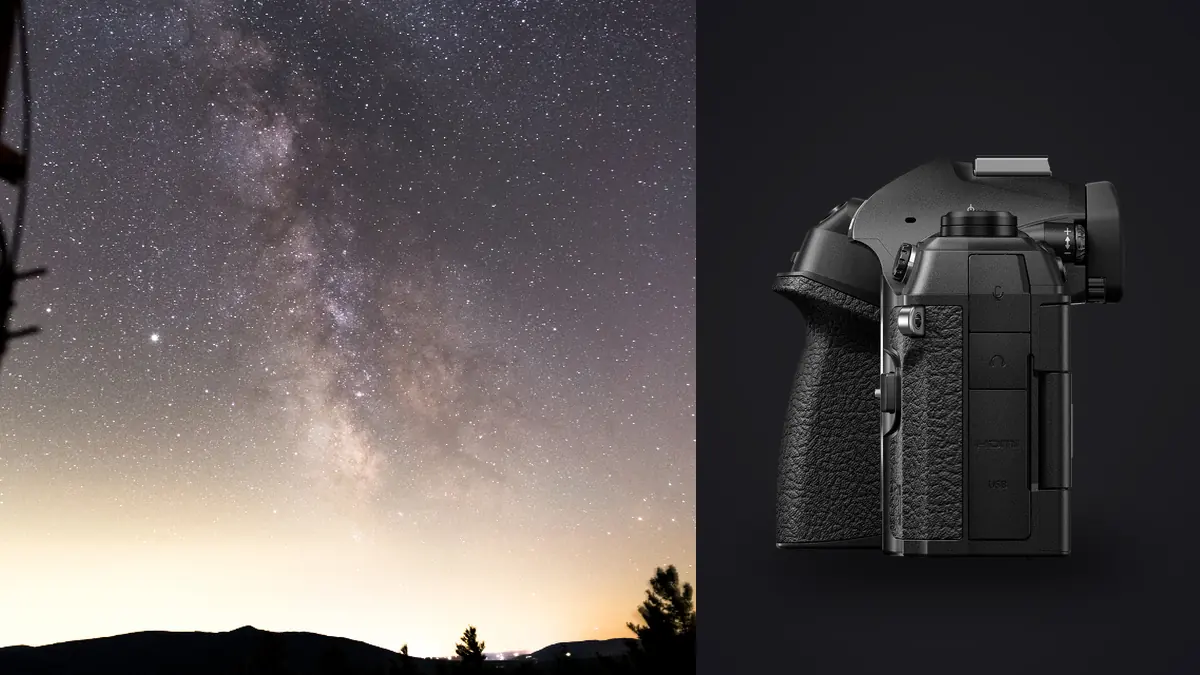
I took the OM-1 Mark II out to a farm track above Wooler in Northumberland last November, mostly to settle an argument. A friend who shoots a full-frame Nikon kept telling me a Four Thirds sensor had no business doing serious night sky work, and I wanted to see for myself before I agreed with him or told him to get lost. Four hours, one dead hand warmer, and about 400 frames later, I had a star trail composite I was genuinely proud of and a much better sense of where this camera earns its keep under a dark sky and where it needs help.
The sensor size question, answered honestly
The OM-1 Mark II uses the same 20.4-megapixel stacked BSI Four Thirds sensor as the original OM-1, not a new sensor. That matters for expectations. A Four Thirds sensor is roughly a quarter the surface area of full frame, and surface area is what determines how much light you physically collect per exposure. At ISO 3200 and up, you will see more visible noise on this sensor than you would on a Sony A7 IV or a Nikon Z6 III shooting the same scene. That's just physics, and no amount of marketing copy changes it.
What the sensor size doesn't determine is how good your final stacked image looks, because stacking is precisely the technique that trades a noisy single frame for a clean composite built from many frames. If you're planning to shoot one 25-second exposure at ISO 6400 and call it a night, the sensor size will bother you. If you're planning to shoot 120 frames and blend them, the per-frame noise mostly washes out in the averaging, and what's left is dictated more by your lens and your polar alignment than by sensor area. I've had cleaner 60-frame stacks off this camera than single frames I've pulled off older full-frame bodies.
The other side effect of the smaller sensor is the 2x crop factor, which cuts both ways. An 8mm lens acts like a 16mm on this body, giving you a genuinely wide field for Milky Way arcs without buying an ultra-wide. But that same crop factor also tightens your depth of field math and your diffraction limit, so f/1.8 native glass behaves closer to f/3.6 in full-frame terms for star point rendering. Budget for faster glass than you'd think you need.
Starry Sky AF and the night vision screen
The feature that actually changed my workflow is Starry Sky AF, which OM System first introduced on the original OM-1 and carried forward here. It's a dedicated autofocus mode built specifically to lock onto pinpoint light sources in near total darkness, something ordinary contrast or even phase-detect AF struggles with because stars simply don't offer enough contrast for a camera to grab onto. There are two flavors: a speed-priority mode that locks fast but occasionally settles on a slightly softer point, and an accuracy-priority mode that takes a beat longer but nails focus more consistently. I default to accuracy for anything I'm planning to stack, since a soft reference frame will show up as a mushy composite no matter how many frames you throw at it. Before Starry Sky AF, my routine was manual focus on a bright star using 10x live view zoom, checking it, nudging it, checking it again, and hoping nothing shifted when I bumped the tripod reaching for my flask. It's not that manual focus doesn't work, it's that it eats fifteen minutes you'd rather spend shooting.
The Mark II also added a red-toned night display mode for the EVF and rear LCD, meant to preserve your night vision while you're chimping exposures or adjusting settings. It sounds like a gimmick until you've spent an hour under a genuinely dark sky and realized how long it takes your eyes to re-adapt after a normal white menu screen. It's a small thing, but on a night where you're also trying to actually see the Milky Way with your own eyes between frames, it's the kind of detail that tells you someone at OM System actually shoots this stuff.
Two things people mean when they say "stacking"
This trips up a lot of people switching into astro work, so it's worth being precise. There are two completely different processes both called stacking, and the OM-1 Mark II handles them in different ways.
The first is Live Composite, a mode built into the camera that produces star trails directly, with no software required. You set a base exposure, the camera takes it, then keeps taking exposures of the same length and only adds pixels to the growing image where they're brighter than what's already there. A dark sky stays dark between frames while the stars keep tracing longer and longer arcs. Because it's only ever adding brighter pixels rather than literally summing exposure values, the sky noise doesn't build up the way it would on a single multi-hour bulb exposure, which is the whole trick.
The second is a RAW sequence you shoot yourself and combine afterward in dedicated software like Sequator, DeepSkyStacker, or Starry Landscape Stacker. This is what you want for a clean, low-noise Milky Way or deep sky shot where the stars stay as points rather than trails. The camera doesn't do this stacking for you at all, it just needs to give you a clean, well-aligned sequence of frames to feed into that software later.
| Sky condition (Bortle class) | Base frame exposure | ISO | Frames for a 45-min trail | What to watch for |
|---|---|---|---|---|
| Bortle 1-2 (dark sky reserve) | 15s | 800 | ~180 | Airglow starts banding the sky green past ISO 1600 |
| Bortle 3-4 (rural, faint glow) | 8s | 800 | ~340 | Watch for a light dome creeping in from one horizon |
| Bortle 5-6 (suburban edge) | 4s | 640 | ~675 | Foreground goes muddy fast, shoot it separately and blend |
| Bortle 7+ (urban) | not recommended | - | - | Trails wash out before they're worth stacking |
These numbers come from my own field notes, not a spec sheet, so treat them as a starting point and adjust for your actual sky. The pattern that holds regardless of location is that darker skies let you run higher ISO and longer per-frame exposures before you hit the point where sky glow overwhelms star contrast.
Building a RAW sequence that actually stacks well
For point-star stacking, the camera's built-in interval timer does the heavy lifting. I typically run 20 to 30 second exposures at ISO 1600 to 3200, depending on how fast the lens is, with the interval set just long enough to clear the buffer between shots (roughly 1-2 seconds of dead time on this body when shooting compressed RAW). A sequence of 80 to 120 frames gives Sequator or DeepSkyStacker plenty of data to average out sensor noise without you standing around all night, and it's short enough that Earth's rotation hasn't smeared your composition if something needs recomposing.
Dark frames matter more on this sensor than on a lower-noise full-frame body, precisely because there's more fixed-pattern noise to subtract. I shoot ten dark frames at the same ISO and shutter speed with the lens cap on, immediately after the light sequence, before the sensor temperature has a chance to drift. Skip this step and you'll see hot pixels survive the stack as tiny colored dots scattered across an otherwise clean sky, which is a miserable thing to spot-heal out of a 20-megapixel file by hand.
One quirk specific to this camera worth flagging: the handheld and tripod High Res Shot modes that produce genuinely excellent 50-80 megapixel files for landscape work are not usable for star sequences. They work by shifting the sensor a fraction of a pixel between several exposures and merging them, which assumes your subject hasn't moved. Stars move, continuously, so a High Res Shot attempt on the night sky just gives you trailed, smeared points instead of the crisp detail boost you'd get on a static rock face. Stick to a normal single-shot RAW sequence for anything with stars in it.
| Lens | Full-frame equivalent | Max aperture | Coma control wide open | Rough street price |
|---|---|---|---|---|
| OM System 8mm f/1.8 Fisheye PRO | 16mm | f/1.8 | Very well controlled, slight stretch in extreme corners | ~€999 |
| OM System 7-14mm f/2.8 PRO | 14-28mm | f/2.8 | Mild coma wide open, clean by f/3.2 | ~€1,299 |
| Laowa 9mm f/2.8 Zero-D MFT | 18mm | f/2.8 | Manual focus only, coma visible past 80% frame height | ~€549 |
| Panasonic Leica 8-18mm f/2.8-4 | 16-36mm | f/2.8-4 | Soft corners at 8mm wide open, tightens by f/4 | ~€1,099 |
Of these, the 8mm fisheye is the one I reach for most for Milky Way arcs, mostly because f/1.8 buys you either a faster shutter (less star trailing per frame) or a lower ISO (less noise), and you can defish the frame in post if you don't want the curved horizon look. The Laowa is the budget entry point and it's genuinely capable, but manual focus in the dark takes practice even with focus peaking turned all the way up.
The unglamorous part: getting from 400 frames to a finished image
Nobody talks about this enough, but the tedious middle stretch of astro work isn't the shooting, it's sorting through what you shot. A single night can leave you with anywhere from 80 to 400 RAW files once you count light frames, dark frames, and the inevitable test shots where you were still dialing in focus. Doing that sort by eye, zooming into every frame on a laptop screen at 2am with cold fingers, is how good stacking candidates end up buried under junk you never bother to delete.
This is where I've actually started leaning on imagic rather than my old habit of dragging files into folders by hand. It scores sharpness locally on the actual pixel data, so a frame where the tripod got bumped or the AF drifted mid-sequence gets flagged before it ever makes it into DeepSkyStacker and drags your alignment quality down. The duplicate and burst clustering is even more useful for interval sequences specifically, since 100 near-identical 20-second exposures are exactly the kind of burst it's built to group, and I can pull the sharpest two or three as reference frames without scrubbing through the whole set manually. If you haven't looked at how that scoring actually works under the hood, this breakdown of AI photo culling covers the mechanics better than I can in a paragraph here.
The other reason it fits this particular use case: everything runs locally on the machine, with no upload step. On a dark sky trip you're usually somewhere with no signal at all, and the last thing you want is software that assumes it can phone home to process anything. I cull the whole night's shoot in the tent the next morning on battery power, no connection required, then hand the survivors off to the stacking software. For anyone building out their broader night shoot routine, these workflow tips pair well with an interval-heavy shooting style like this.
Once the stack is combined and I've got a single flattened TIFF out of Sequator, I still run it through a normal edit pass, and that's the third place imagic earns its spot in the chain: the apply_my_style preset learns from edits I've already made on previous night shots, so a new composite gets a starting point that already matches how I've been grading skies all season instead of me rebuilding the same curve and color balance from scratch every single time.
What I'd actually tell someone buying this camera for astro
If you already own OM System glass, or you specifically want a lightweight kit for trips where you're hiking to a dark sky spot rather than parking next to it, the Mark II is a genuinely good tool for this. Starry Sky AF alone saves real time in the field, and Live Composite means you can walk away from a laptop entirely and still come home with a trail shot. If you're choosing a system from scratch purely for astro and you don't care about weight or crop factor benefits for wildlife or birding, a full-frame body will still out-resolve it at high ISO, and there's no getting around that with software. Most people buying this camera aren't choosing it in isolation for one genre though, they're choosing it because it does five things well, and astro happens to be one of them rather than the only one.
Frequently Asked Questions
Can the OM-1 Mark II shoot the Milky Way without a star tracker?
Yes, within limits. At 8mm (16mm equivalent), you can typically run a 15-20 second exposure before star trailing becomes visible at normal viewing sizes, following the usual 500-rule math adjusted for the crop factor. Stacking 60-100 of those frames gets you a clean, low-noise result without ever attaching a tracker. A tracker still helps if you want to push exposure times longer or you're shooting a longer focal length, but it's not a requirement to get a usable shot with this body.
Does Live Composite work for deep sky targets like nebulae, or just star trails?
Live Composite is built for trails and light painting, not for building up faint deep sky detail. Because it only keeps the brightest pixel per position across the sequence rather than averaging, it won't reveal the faint, evenly-lit structure of something like the Andromeda Galaxy the way true signal-averaging stacking software does. For nebulae and galaxies, shoot a RAW sequence and combine it afterward in dedicated stacking software instead.
How cold-tolerant is this camera for winter dark sky sessions?
I've run it comfortably down to about -8C on a few Northumberland nights without issues, though battery life drops noticeably in the cold, so carry at least one spare and keep it in an inside pocket rather than a camera bag. The weather sealing held up fine through a light snow shower that would have made me nervous with an unsealed body.
What's the fastest way to sort a night's worth of interval shots before stacking?
Don't scrub through every frame manually if you can avoid it. Run the sequence through something that scores sharpness and groups near-duplicate bursts first, so you're only opening the handful of candidate frames that are actually worth a closer look. That's the exact gap imagic was built to fill, and it's the difference between a twenty-minute sort and a two-hour one after a long night in the cold.