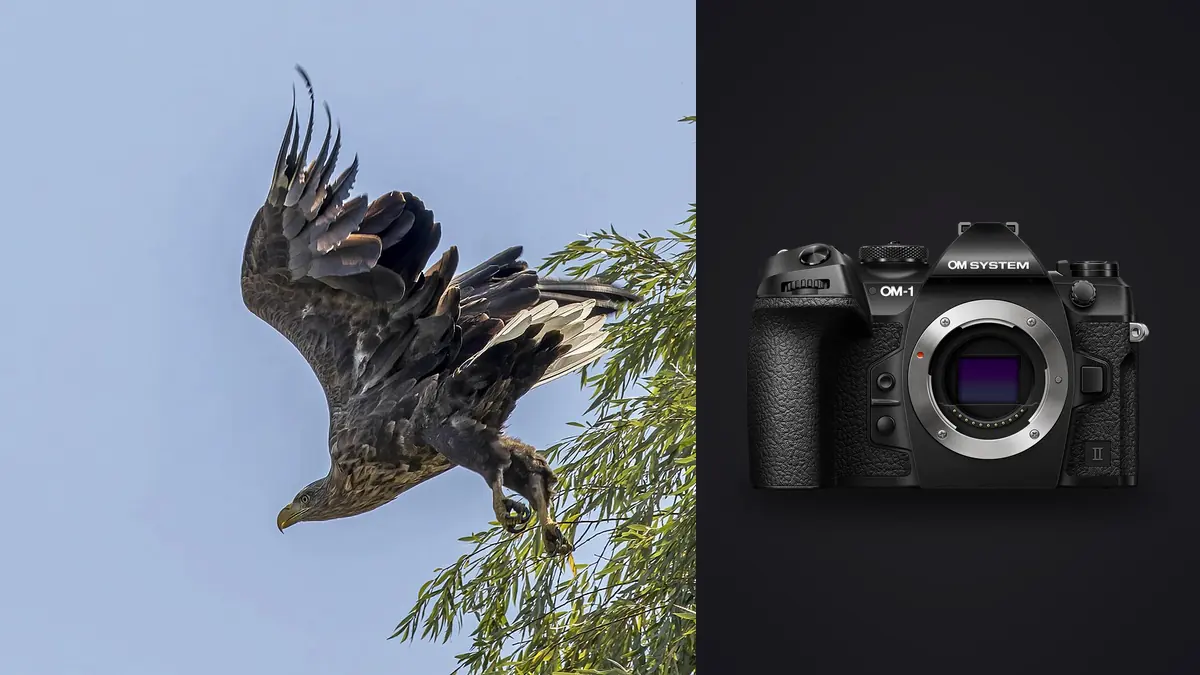
I spent most of last winter on a river mouth waiting for ospreys to fold their wings and drop, and the OM-1 Mark II is the body I had strapped to me for almost all of it. Not because it's the biggest sensor or the most talked-about release of the year, but because for the specific job of tracking something erratic and small in a big frame, the combination of a fast readout, genuinely useful AI subject detection, and a stabilized 300mm-and-up lens system that you can actually hand-hold all day matters more than raw resolution. This isn't a spec sheet regurgitation. It's what changed in my keeper rate, what settings I actually run, and where the system still lets me down.
What the Mark II actually changes for flight work
The sensor in the Mark II is the same 25.4 megapixel stacked BSI Four Thirds chip as the original OM-1, so if you're expecting a resolution jump, there isn't one. What OM System did instead was tune the parts that matter when a bird crosses your frame at forty miles an hour: the subject detection algorithm got noticeably better at holding onto a bird's head and eye through partial occlusion (a wingtip crossing the face, a branch in the foreground), the buffer got deeper so a long burst doesn't stall out mid-sequence, and they added a proper Live GND filter and a handheld high-res mode that I use more for perched portraits than flight, but it's there.
The part that actually moved my keeper rate was the detection persistence. On the original OM-1, if a tern banked hard and its head briefly disappeared behind its own wing, the AF box would sometimes jump to the background and I'd lose the whole sequence. The Mark II holds the last known position and re-acquires the eye a beat faster. It's not magic and it's not perfect against a cluttered reed bed, but against open sky or water it's a real, measurable improvement, not a marketing bullet point.
The other change worth mentioning: the shutter mechanism and buffer handling are more resilient. I used to babysit my SH2 bursts on the original body, counting frames in my head so I didn't hit the buffer wall mid-sequence on a peregrine stoop. On the Mark II I stopped doing that. I still fill cards fast, but I stopped losing the tail end of the best action because the buffer choked.
The autofocus setup I actually run
Menu diving for BIF settings is its own hobby, so here's what's on my body right now, not a theoretical "recommended" configuration:
- AF mode: C-AF with Bird Detection turned on under AI Subject Detection. I leave it on Bird rather than the generic subject-tracking mode because the bird-specific model is tuned to lock onto the eye specifically, not just the general silhouette.
- AF target mode: All-Target (the full frame array) when a bird is against open sky, Small or Cross target when it's weaving through trees or reeds and I need to tell the camera exactly where to look rather than trust it to pick the right thing out of clutter.
- C-AF sensitivity / subject tracking sensitivity: pulled toward the "not sticky" end of the scale for open-sky work, so it reacts fast to a bird changing direction. I move it back toward sticky when I'm shooting near a busy background, like gulls working a fishing boat, where I don't want the AF jumping to every bird that crosses in front.
- Release priority vs focus priority: release priority, always, for flight. A frame that's 90% sharp beats a missed shutter click.
- Back-button focus: yes. I keep AEL/AFL doing continuous focus tracking and the shutter button doing nothing but firing, which lets me lift off focus for a second when a bird lands and I want to recompose without the camera hunting.
One habit that took longer to build than the settings themselves: pre-framing wider than feels natural. The bird detection needs the subject to actually be a reasonable size in frame to lock reliably, but tracking a bird that fills 60% of the frame through an erratic bank turn is asking for trouble. I shoot loose and crop in post more than I used to on other systems, which the Four Thirds sensor's resolution tolerates fine up to a point, but it's a real tradeoff you should plan for rather than discover.
Shutter speed and exposure, not just AF
Autofocus gets all the attention in gear reviews, but exposure discipline matters just as much for BIF and it's the part beginners skip. For a mid-sized raptor like a kestrel or a harrier, 1/2000s is my floor in good light, and I'll push to 1/3200s or faster for anything smaller and twitchier, like swallows or terns working a shoreline. Anything under 1/1600s and I start seeing soft wingtips even with in-body stabilization doing its job on the body itself, because stabilization does nothing for subject motion, only camera shake.
ISO auto with a capped ceiling is how I handle the light swings you get chasing a bird across sun and shade. I set the auto-ISO ceiling around 6400 for anything I plan to keep as a full-frame print candidate, and I'll let it run higher, even to 12800, for documentation shots of a rare bird where getting the record matters more than print quality. The Four Thirds sensor is noisier at altitude than a full-frame body at the same ISO, that's just physics, but the noise it produces is fine-grained rather than blotchy, and it holds up better through a modern denoise pass than people who haven't shot the system recently tend to assume.
Exposure compensation dialed to -0.3 or -0.7 is my default against bright sky, because the meter wants to brighten the whole frame to compensate for all that white space and it'll blow the highlights on a white-bellied bird every time if you let it.
Picking glass: what actually pairs well
The lens matters more than the body for this genre, full stop. Here's how the realistic Micro Four Thirds options for flight work stack up against each other in the field, not on paper:
| Lens | 35mm-equivalent reach | Handling | Where it earns its keep |
|---|---|---|---|
| M.Zuiko 150-400mm f4.5 TC1.25x PRO | 300-800mm, up to 1000mm with the built-in teleconverter engaged | Heavy for extended handheld use, needs a monopod or a strong shoulder by hour three | Distant raptors and shorebirds where you genuinely need the reach; the built-in TC means no fumbling for an external converter mid-sequence |
| M.Zuiko 100-400mm f5-6.3 IS II | 200-800mm | Light enough for a full day handheld, noticeably less front-heavy on a monopod | The lens I actually recommend to someone starting out in this genre; it's the best reach-per-dollar in the system and sharp enough that I don't think about it |
| M.Zuiko 300mm f4 IS PRO + MC-14 | 600mm native, 840mm with the 1.4x teleconverter | The best balance of speed and weight, faster minimum aperture helps AF acquisition in low light | Dawn and dusk flight sequences where the extra stop over the zooms actually matters for keeping the shutter speed up |
| M.Zuiko 40-150mm f2.8 PRO II + MC-20 | 160-600mm at f5.6 with the 2x converter | Compact and fast to swing, the one I grab for close, fast subjects | Swallows, terns, and anything working close and erratic where you need to reframe quickly rather than track from a distance |
My honest take: if you're deciding between the 150-400mm and the 100-400mm II and budget is a real factor, buy the 100-400mm II and spend the difference on more time in the field. The reach gap matters less than most people think once you're comfortable cropping a well-focused frame, and a lighter kit means you actually bring it on the days you weren't planning to shoot.
Weather sealing and battery life, briefly
I've had this body out in driving coastal rain and sleet without a rain cover and it hasn't blinked, which matters more for BIF than most genres because the best light for flight (early, low, backlit) tends to arrive with weather. Battery life is the one place the system shows its smaller-format origins: a cold morning of continuous AF tracking and SH2 bursts will chew through a battery faster than a DSLR would, so I carry three now instead of two. Not a dealbreaker, just plan around it.
The part nobody puts in the camera review: what happens after
A single good morning on that osprey river mouth produces somewhere between 2,000 and 4,000 frames once you account for SH2 bursts fired at every decent approach. Most of those frames are near-duplicates of each other, three or four near-identical wingbeats from the same pass, and the honest truth is that scrolling through that manually at 100% zoom to find the one frame where the eye is sharp and the wing position is right is the least enjoyable part of this hobby. That grind is exactly what pushed me toward building imagic in the first place: it runs a local sharpness and focus check on every frame in a burst and groups near-duplicate sequences together, so instead of tabbing through 40 nearly identical wing positions one at a time, I'm looking at the two or three the software flagged as actually sharp on the eye. Everything runs on my own machine, nothing gets uploaded anywhere, which matters if you handle client or competition work you're not allowed to send through a cloud service. I also lean on the apply_my_style feature once I've settled on how I like my flight shots graded (I run mine a touch warm with the shadows lifted slightly to keep detail in dark wing feathers), because it applies that same look automatically to a fresh batch instead of me rebuilding presets by hand every session. If you're trying to get a sense of how automated culling actually differs from a plain Lightroom flag-and-sort workflow, I laid the mechanics out in more detail in how AI photo culling works, and there's a broader set of habits worth adopting in 10 tips for a faster photo workflow if the backlog is the part of this hobby that's wearing you down.
Frequently Asked Questions
Is the Micro Four Thirds sensor really a disadvantage for birds in flight against full-frame bodies?
Less than people assume, and in one specific way it's an advantage: the 2x crop factor means a 300mm lens behaves like a 600mm lens, so you're carrying and hand-holding genuinely long reach in a package that weighs a fraction of the full-frame equivalent. Where the smaller sensor does show up is high-ISO noise past about 6400 and slightly less dynamic range to recover a blown sky, both of which matter more for static landscape work than for a fast-moving subject where you're already shooting at a fast shutter speed and a controlled exposure.
Do I need the 150-400mm PRO lens, or will the 100-400mm II actually cover flight work?
For the vast majority of birders and wildlife shooters, the 100-400mm II covers it. The 150-400mm earns its price and weight when you're regularly working distant subjects that won't let you approach, like eagles on open water or shorebirds on a mudflat, where the extra reach and the built-in teleconverter change what's actually possible rather than just how much you crop afterward.
What shutter speed should I actually be using for birds in flight?
1/2000s as a floor for anything raptor-sized or larger, 1/3200s or faster for small, fast fliers like swallows and terns. In-body stabilization helps with camera shake but does nothing to freeze the subject's own motion, so don't rely on it to bail out a slow shutter speed the way you might for a static subject.
How do I deal with the sheer number of frames a flight session generates?
Cull ruthlessly and do it soon after the session while your memory of which passes were actually good is fresh. I run every card through imagic first to strip out the soft and duplicate frames locally before I ever open Lightroom, which turns a multi-hour sorting session into something closer to twenty minutes of picking favorites from an already-narrowed set.