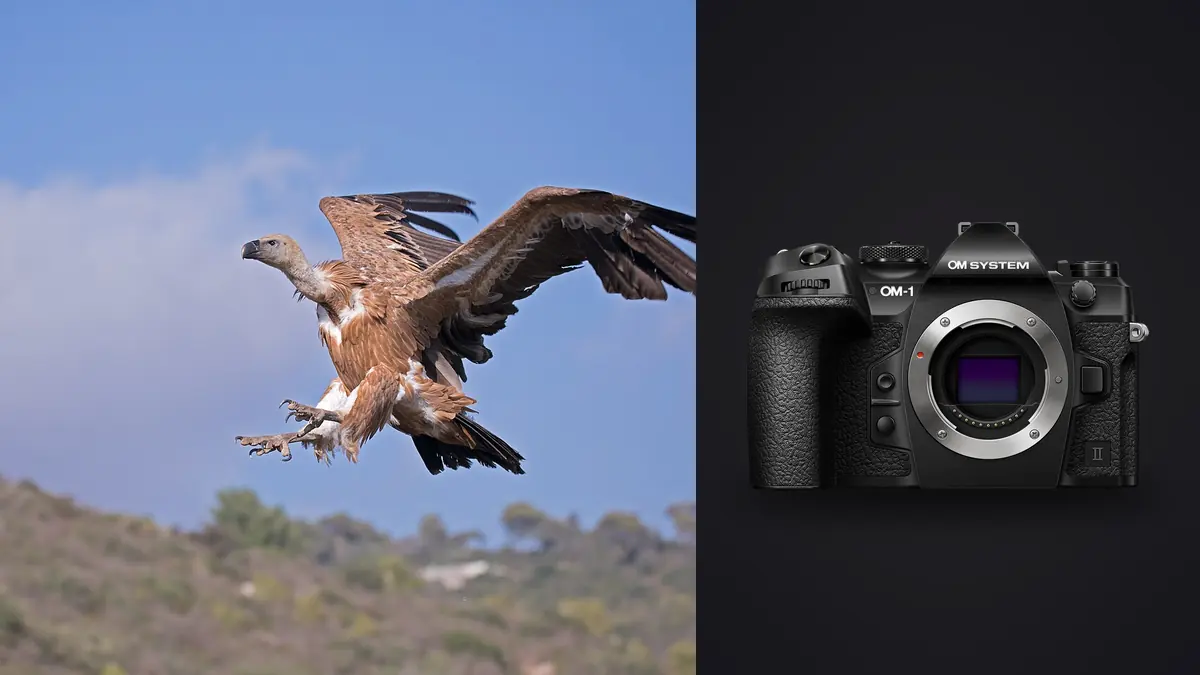
The OM System OM-1 Mark II can produce dense wildlife sequences through fast electronic capture, bird subject detection, and Pro Capture. Its Micro Four Thirds system also makes long equivalent reach practical in a relatively compact field kit. The workflow challenge begins when several hundred similar ORF files contain tiny differences in eye focus, wing position, obstruction, and behavior.
A reliable path protects every source file before selection, keeps special sequences together, uses technical scoring as navigation, and applies an ethical review before export. The goal is a concise wildlife story, not proof that the camera reached its maximum frame rate.
Record capture modes in a field note
Note when a sequence uses standard continuous capture, Pro Capture, a high-speed mode, or a slower deliberate rate. Some features differ in file behavior, buffering, or autofocus operation. The ingest reviewer should know why frames appear before the full shutter press or why one group has a different cadence.
Record major location and clock changes, lens or teleconverter use, and unusual exposure choices. A short note can identify the perch where a launch sequence began or the light that caused visible bands. This turns later troubleshooting into evidence rather than guesswork.
Do not record precise nest or sensitive-species coordinates in a note that will travel with public files. Keep necessary conservation information in controlled storage and remove it from delivery metadata when disclosure could cause harm.
Copy ORF files without breaking sequences
Create a job folder with originals, working data, and exports separated. Copy each card into a temporary card-number folder. Verify file counts and open samples from beginning, middle, and end. Keep the card untouched until independent copies meet the backup policy.
Watch for filename collisions across cameras or counter resets. Rename through a repeatable collision-safe method after verification. Preserve capture time and sequence order. Do not split a Pro Capture group merely because the files cross an arbitrary folder boundary.
If ORF and JPEG were recorded together, define whether they remain paired or whether JPEG serves only a field handoff. Avoid a folder where one format is deleted inconsistently. Matching basenames should remain traceable to the same exposure.
Keep special multi-frame modes identifiable
The OM-1 Mark II offers computational and high-speed modes that can create groups with a purpose different from a normal burst. Focus-bracket sources, high-resolution composites, and Pro Capture sequences should remain labeled until their role is understood. Do not select one frame from a source group without knowing whether later processing needs all of them.
Some modes may limit file type, autofocus, or subject suitability. Confirm these details at capture and again at ingest. A moving animal is not a good source for every computational mode, and a JPEG-only sequence may not match a RAW-centered delivery plan.
Use visible separator frames or folder notes between modes. Organization should let another informed editor understand the shoot without relying on memory. The small effort protects against accidentally treating a test as a final or deleting a required component.
Make the first cull technical and fast
Remove accidental frames, empty compositions, severe obstructions, irrecoverable exposure, and focus that misses the intended animal. Keep intentional motion blur and environmental silhouettes when they have a visual role. Technical rejection should not impose one style on every wildlife image.
Inspect the eye or important head plane, but also check the behavior. A sharp wing behind a soft eye usually indicates a miss. A sharp head with moving wings may be exactly right. Compare against static background texture to distinguish camera movement from subject movement.
Mark uncertain frames for later and keep the pass moving. Tiny subject size can make a file look acceptable until enlarged. Use a consistent magnification and check final crop dimensions before investing editing time.
Compare bursts by behavior and anatomy
Group frames from one launch, landing, feeding pass, or interaction. Choose the file where head angle, eye, wing shape, feet, tail, and background separation work together. The numerically sharpest frame may show a closed wing or hidden prey and be weaker editorially.
Keep a lead frame and only meaningful alternatives. A vertical crop candidate, wide environmental view, or later consequence can remain. Several adjacent frames with the same posture dilute the edit and increase delivery burden.
Pro Capture can record moments before the full press. Verify visual order before captioning. The first file shown by software may not correspond to the moment the photographer remembers pressing the shutter. Use metadata and behavior progression together.
Use local automation as a review layer
On Windows or macOS, imagic can locally analyze sharpness, exposure, closed eyes, and composition, then group duplicate and burst frames. That can make a large OM-1 Mark II folder easier to navigate while photographs remain on the machine.
Bird and animal anatomy still require human judgment. Closed-eye logic developed for people is not a wildlife selection rule, and a technically centered subject may be compositionally weaker than one moving into open space. Preserve a separate final rating from the automatic score.
Culling changes status and should not erase originals during review. If stored scores appear inconsistent with a visible file, inspect the image and score freshness rather than accepting or rejecting the result automatically.
Run an ethical wildlife pass
Remove images that reveal sensitive nest locations or include harmful handling. Check whether the photographer's presence changed feeding, nesting, or defensive behavior. A technically rare frame does not need to be published when it encourages unsafe imitation.
Captions should distinguish observed behavior from interpretation. Verify species identification through reliable references and qualified help when needed. Do not claim distress, courtship, hunting success, or another behavior solely from one ambiguous posture.
Review location metadata before delivery. Public files may need precise coordinates removed. Keep any legitimate research or conservation record in a controlled channel rather than embedding it in a general web export.
Edit ORF files by lighting group
Divide selects into consistent conditions: open sun, shade, backlight, water reflection, woodland, or artificial light. Establish white balance and broad tone for each group. One synchronized adjustment across every habitat can shift plumage and background color unpredictably.
Protect pale feathers, specular water, and saturated plumage. Lift shadows only until the animal remains natural and noise does not dominate. Micro Four Thirds files respond best when exposure was adequate at capture; severe underexposure cannot be hidden by aggressive smoothing.
Use non-destructive edits and apply noise reduction before output sharpening. Check fine feather and fur texture at delivery size. An over-smoothed animal pasted against a crunchy background is less convincing than moderate natural grain.
Crop according to output and animal welfare
Long equivalent reach does not eliminate the need to crop, especially with small birds in flight. Set a minimum useful output dimension and record the crop. If the subject remains too small, choose the environmental frame rather than inventing detail through extreme enlargement.
Leave space in the direction of movement and around wings. Avoid cutting feet, tails, and wingtips accidentally. A crop can remove a distracting branch, but it should not misrepresent distance or create a false interaction between animals.
Do not approach wildlife more closely merely to avoid cropping. A lower-resolution but respectful frame is preferable to a detailed image made by disturbing a nest or blocking an animal's path.
Build a balanced wildlife set
A delivery can include habitat, portrait, behavior, flight, interaction, and detail. The mix depends on the assignment, but repeated close portraits rarely describe a whole encounter. Include weather, scale, or environmental pressure where those elements are visible and relevant.
Sequence by story rather than capture order unless chronology matters. An establishing frame can lead into closer behavior and finish with departure or habitat. Remove images that repeat the same wing phase without adding information.
Verify species, location wording, and captions. Preserve the distinction between what was seen and what is inferred. A strong set should remain accurate without an exaggerated story.
Export and verify the final files
Export JPEG for common digital delivery or TIFF when the agreed production stage needs it. Use a separate folder, clear version name, requested profile, dimensions, compression, and metadata. Keep source ORFs and editing decisions intact.
Open exports independently and inspect the darkest, brightest, highest-ISO, and most heavily cropped files. Check halos around feathers, sky gradients, color consistency, orientation, and filename order. Compare export count with the approved list.
Archive originals, selects, captions, and non-destructive edits under the existing policy. A learned personal style can be applied through imagic only after a profile has been trained from the photographer's own edited examples, and it should be reviewed by lighting group before export. More delivery systems are in the workflow and editing guides.
Use a final handoff checklist
- Verify all cards and special sequences were copied.
- Confirm the final cull includes technical and behavioral review.
- Remove sensitive location data from public files where needed.
- Check species and captions from reliable information.
- Inspect exports at full and delivery size.
- Count files and preserve the source ORFs.
The workflow is complete only when the recipient can use the files and the originals remain recoverable under the archive plan.
Account for weather and field contamination
Rain, salt spray, dust, and mud affect more than the camera body. They can obscure the front element, slow card handling, and create faint low-contrast files that resemble focus misses. Check the lens surface during natural pauses and clean it with appropriate dry equipment under shelter.
Keep wet and dry accessories separated during ingest. A damp card or reader should not be connected until it is safe and dry according to manufacturer guidance. Record any sequence made through rain on the lens so unusual flare or softness has a known cause during culling.
After the shoot, verify weather-exposed files before changing ratings, then inspect camera doors, lens mount, teleconverter contacts, and bags. Allow equipment to dry gradually. The next field setup should begin only after contamination has been ruled out as a source of autofocus or contrast problems.
Weather can also be part of the story. Keep frames where rain, snow, or spray adds behavior and atmosphere, even when contrast differs from a clear-day baseline. Technical review should distinguish expressive conditions from preventable equipment contamination.
Frequently asked questions
Should Pro Capture files be culled differently?
Keep the sequence together and verify its visual order, because frames may precede the full shutter press. Then compare focus, behavior, and anatomy like any other burst.
Can automatic culling identify the best wing position?
It can surface technically strong candidates, but the photographer must judge wing shape, eye, feet, overlap, behavior, and story. Use automation as navigation.
When can OM-1 Mark II cards be formatted?
Only after every card has been verified and the required independent copies can be opened. Do not rely on a single working folder or on the card itself as backup.