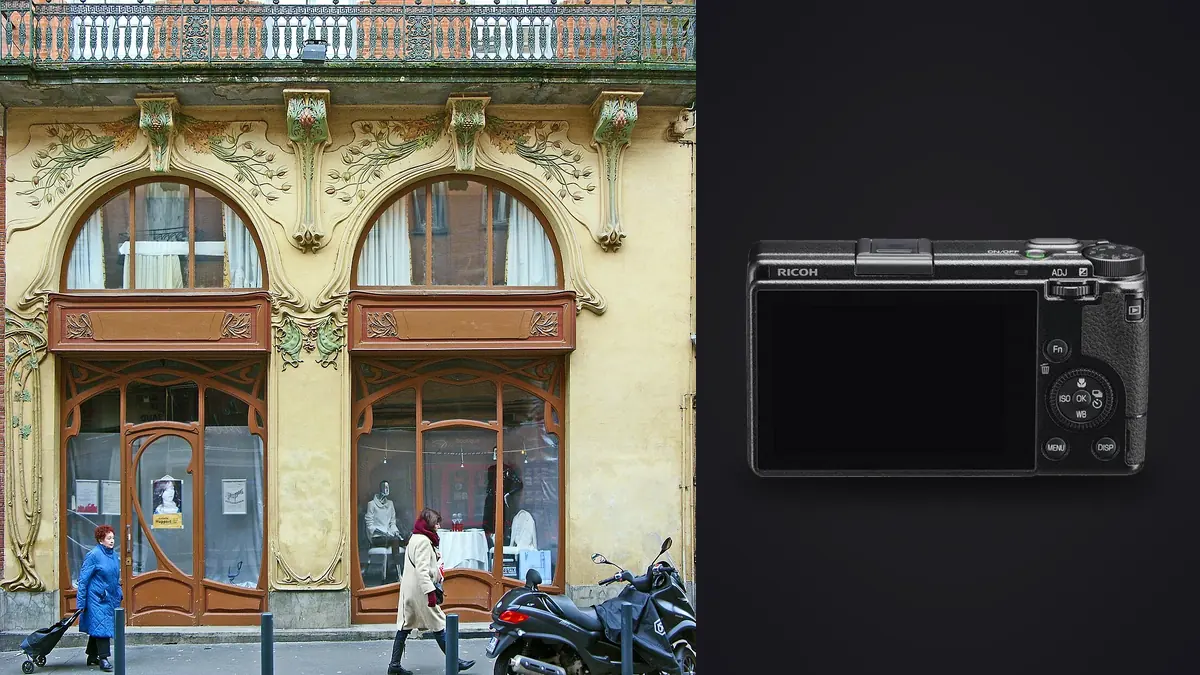
Most architecture and interior work gets shot on something wide: a 16-35mm zoom, a shift lens, or at minimum a 24mm prime. So a fixed 40mm-equivalent compact seems like an odd tool to bring on a design shoot. I've been carrying a Ricoh GR IIIx alongside my regular kit for a little over a year, mostly on residential interior jobs and a few small commercial fit-outs, and it has earned a permanent spot in the bag, just not as the camera doing the hero shots.
Why a 40mm Fixed Lens Even Belongs on an Interiors Shoot
The GR IIIx is the second body in Ricoh's GR III line, and the only real difference from the standard GR III is the lens: a 26.3mm actual focal length that renders as roughly 40mm equivalent on the APS-C sensor, against the GR III's 18.3mm (28mm equivalent). On paper that sounds like a small change. In a room, it's the difference between a lens that pulls in walls and one that describes them the way a person standing in the doorway actually sees them.
That's the pitch for the IIIx in this genre: less converging-vertical drama, less of the "everything looks bigger than it is" effect you get from an ultra-wide, and a perspective that reads as closer to natural human vision. For detail work, material call-outs, and any shot where the client needs to recognize their own countertop or their own staircase without the geometry lying to them, 40mm is genuinely useful. It is not, however, a room-filling focal length, and pretending otherwise is where people get disappointed with this camera on interior jobs.
Where 40mm Works Indoors, and Where It Fights You
I started keeping rough notes on which rooms the IIIx could actually cover on its own versus which ones needed my wider glass, because "it depends on the room" isn't useful information until you've quantified what "depends" means. Here's what a season of use looks like in table form, based on typical UK/EU residential room dimensions:
| Space type | Typical width | GR IIIx (40mm) verdict | What I do instead |
|---|---|---|---|
| Small bathroom / ensuite | 1.8-2.2m | Unusable without stepping into the hallway | Wider lens on the mirrorless body, corner position |
| Galley kitchen | 2.2-2.8m | Tight, only works shooting down the length | Wide zoom for the full-room shot; GR IIIx for cabinetry detail |
| Living / dining room | 3.5-5m | Works well from a corner, natural-looking result | Nothing, this is the sweet spot |
| Open-plan kitchen-diner | 5m+ | Comfortable, good separation between zones | Nothing |
| Hallway / corridor | 1-1.5m | Unusable, minimum focus distance and framing both fail | Wide-angle only |
| Furniture / material detail | 0.3-1m subject distance | Excellent, minimal distortion on product-style shots | Nothing, GR IIIx is my first choice here |
| Exterior facade, street setback available | 10m+ | Good, avoids the "toy building" look of a superwide | Nothing |
The pattern is consistent: anywhere I can back up ten or twelve feet, the GR IIIx produces a cleaner, more honest-looking frame than a 16mm lens does. Anywhere I'm boxed into a small room, it simply can't get the shot, full stop. On a typical residential job I'd say 30-40% of the frames I need are in that "can't get the shot" category, which is why this camera has never replaced my wide-angle kit and I don't think it's designed to.
Snap Focus, Macro, and the In-Camera ND for Detail Work
Where the GR IIIx earns its keep is in the secondary shots every interior gallery needs: hardware, tile edges, joinery details, a stack of folded linen, the grain on a piece of reclaimed oak. This is close-focus, deliberate-framing work, and the camera's Snap Focus mode is built for exactly that. You preset a focus distance, half-press disappears, and you're shooting at a fixed plane without the lens hunting.
| Snap Focus preset | f/5.6 depth of field (approx.) | Typical use on an interiors job |
|---|---|---|
| 1.0m | 0.85m - 1.2m | Single furniture piece, isolated against a wall |
| 1.5m | 1.2m - 2.0m | Vignette shots: a chair and side table together |
| 2.0m | 1.5m - 2.9m | Corner-of-room compositions, natural light window shots |
| 2.5m | 1.8m - 4.0m | Full seating area from across a living room |
| 5.0m | 2.8m - infinity | Exterior facades, deep hallway shots when space allows |
For actual macro work, the dedicated macro mode brings the minimum focus distance down to about 12cm, which is close enough for door hardware, tap fittings, and fabric texture without needing a separate lens. And the built-in 2-stop neutral density filter is more useful indoors than it sounds. Interior shoots often mean shooting into bright window light at f/2.8-f/4 for a shallow, editorial look, and without an ND you either stop down and lose the look or blow the highlights outside the glass. Flipping the ND on from the quick menu buys you the two stops back without carrying a separate filter for a lens that doesn't accept front filters in the first place.
The four-axis shake reduction is worth mentioning too, mostly because a lot of interior photography happens in rooms with mediocre ambient light and no tripod budget in the schedule. I've gotten sharp handheld frames at 1/8s on this camera more often than I expected to, which matters when you're moving through a property on a tight walkthrough and don't have time to set legs for every angle.
Crop Modes and the Files Themselves
The GR IIIx has in-camera crop modes that simulate 50mm and 75mm equivalent framing by cropping the sensor, which sounds like a workaround but is genuinely handy for material detail shots where you want a tighter frame than 40mm gives you without physically stepping in on something fragile. The tradeoff is resolution: the 75mm crop takes you down from 24.2MP to roughly 8MP, which is fine for web galleries and mood boards but not for anything a client might want to print large.
I shoot RAW (14-bit DNG) on every job and rarely touch the in-camera JPEG engine beyond checking exposure on the rear screen, which is the camera's other real limitation for this genre: it's fixed, not tilting. Low-angle shots (shooting up along a staircase, or getting the camera down to coffee-table height to catch reflections on a polished floor) mean either guessing the framing or getting on the floor yourself. On a GR III body with the standard 28mm this is a minor annoyance; on interior work where low, wide compositions are common, I've felt it more.
What Actually Happens to the Files Afterward
A single interior shoot with this camera in the bag alongside a mirrorless body generates a genuinely awkward culling problem: two cameras, two card imports, and a lot of near-duplicate framing because you naturally bracket angles when you're not sure which one is going to read best once the space is empty of people. I've settled into running everything through imagic before I touch Lightroom, mainly because its duplicate and burst clustering groups those near-identical angle variations automatically instead of me scrubbing through 400 thumbnails deciding which of six almost-identical corner shots is actually the sharpest.
The sharpness scoring is the other piece that matters specifically for this kind of work. Architectural detail shots live or die on focus plane accuracy, and it's genuinely hard to tell on a laptop screen at 1:1 whether a Snap Focus frame at 1.5m landed exactly where you wanted or drifted half a step off. Running local sharpness analysis across the take flags the soft ones before they get anywhere near a client gallery, which can save you from delivering a hero shot that looks fine at thumbnail size and falls apart at full resolution. Because the analysis runs on-device, unreleased interior designs and pre-launch commercial spaces never leave the laptop before a client has signed off, which some design firms genuinely ask about before a shoot.
Once a job is culled down, I lean on imagic's apply_my_style feature for the first editing pass. I trained it on a batch of my own previously graded GR IIIx interior files (consistent white balance handling, the way I pull down highlights from window light, a fairly neutral color response), and it now gets a new set of files most of the way to my usual look before I do a manual pass on the hero frames. It's saved real time on the deliver-in-48-hours jobs, where a design studio wants a gallery link the next morning and there isn't time for a from-scratch grade on 300 images. If you're comparing culling tools for a workflow like this, our photo culling software comparison covers how different approaches handle burst-heavy shoots like interiors tend to produce.
Verticals, Distortion, and the Post-Production Reality
No fixed-lens compact does perspective correction in-camera, and the GR IIIx is no exception. Any interior shot with a strong vertical line (door frames, cabinet edges, window mullions) that wasn't shot dead level needs a lens correction pass afterward. The 40mm field of view actually makes this easier than a wide-angle would: because you're not exaggerating the geometry to begin with, the correction adjustments tend to be smaller and less visually destructive than pulling a 16mm frame back into shape. I still shoot with a small bubble level clipped to the hot shoe, mostly out of habit from years on tripod-mounted architecture work, even though the IIIx has no hot shoe to clip it to (a small annoyance I've solved with a cold-shoe adapter that sits under the flash mount).
Handling and the Practicalities of a Client Job
At 262g and small enough to sit in a jacket pocket, the GR IIIx changes how a walkthrough feels for the client, which matters more than gear reviews usually admit. Turning up to someone's home with a tripod, a wide zoom, and a full bag reads as a production. Pulling a compact out of a pocket to grab a detail shot while you're already talking through the brief reads as casual, and homeowners can relax visibly once they realize not every shot is a formal setup. It's not a reason to shoot the whole job on it, but it's a reason to keep it accessible rather than buried in a case.
Battery life is the honest weak point. Ricoh rates it around 200 shots per charge under CIPA testing, and in practice on a cold job site in winter I've seen worse. I carry two spares and charge over USB-C between jobs, which works fine as a routine but means this isn't a camera you hand off to a second shooter without briefing them on battery discipline. The single UHS-I SD slot is also slower than I'd like when I'm reviewing files on-site through a laptop between setups, though it's never been a dealbreaker.
A Practical Pairing, Not a Replacement
My actual kit for a residential interior job now looks like this: a mirrorless body with a 16-35mm for the room-establishing shots and anything under about 2.5m of clearance, and the GR IIIx for details, vignettes, corner compositions in larger rooms, and exterior shots where I have setback. That's roughly a 60/40 split by frame count on a typical job, weighted toward the wide kit, but the IIIx frames are disproportionately the ones that end up in a portfolio because the perspective looks considered rather than stretched. If your work leans more toward smaller apartments or tight commercial spaces, the ratio flips hard toward the wide lens and the GR IIIx becomes closer to optional. If you regularly work in larger homes, open-plan renovations, or exteriors with decent street setback, it earns its place a lot faster. Worth reading alongside this if you're setting up an interiors workflow from scratch: our workflow speed guide covers the culling and delivery side in more general terms.
Frequently Asked Questions
Is the Ricoh GR IIIx wide enough for real estate interior photography on its own?
Not reliably. Most bedrooms, bathrooms, and galley kitchens in typical residential properties are too narrow for a 40mm-equivalent lens to capture the full room from a natural standing position. It works well in larger open-plan spaces and for detail shots, but a real estate photographer shooting full listings needs something wider (18-24mm equivalent) as the primary tool, with the GR IIIx as a secondary body for details and exteriors.
How does the GR IIIx compare to the standard GR III for architectural work?
The GR III's 28mm equivalent lens covers far more of a typical room and is the better single-camera choice if you can only own one. The IIIx's 40mm trades that room coverage for less distortion and a more natural, less "wide-angle" look on furniture, materials, and any shot where geometric accuracy to the eye matters more than fitting the whole room in frame. Some architecture photographers carry both bodies for exactly this reason rather than choosing one.
Does the lack of a tilting screen matter much for interior shooting?
It's a real limitation for low-angle compositions, shooting up staircases, or getting the camera down near floor level for reflection shots, all of which come up regularly in interior work. It's less of an issue for eye-level detail shots and vignettes, which make up most of what I actually use this camera for on a job.
Can the GR IIIx's RAW files handle the perspective correction interior shots usually need?
Yes. The 14-bit DNG files hold up well to lens correction and keystone adjustment in standard raw processors, and because the 40mm field of view starts with less inherent distortion than a wide-angle lens, the corrections needed are typically smaller and introduce less stretching at the frame edges than correcting an ultra-wide interior shot would.