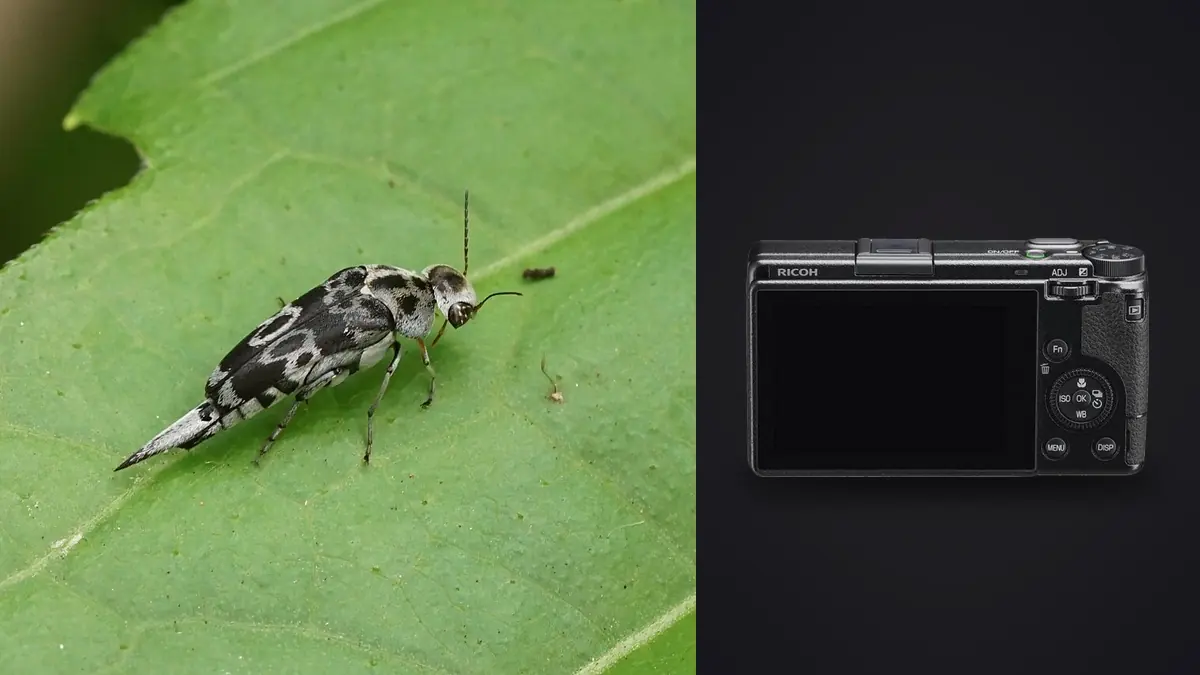
The Ricoh GR IIIx is a pocketable APS-C camera with a fixed 40mm-equivalent f/2.8 lens, 24.2-megapixel capture, sensor-shift stabilization, and a dedicated close-focus mode. It is useful for insects encountered during a walk, but it is not a true high-magnification macro system. The working distance is short, the lens cannot be exchanged for a longer macro optic, and a small subject will often occupy only part of the frame.
Those constraints favor a particular kind of picture: insects shown with a leaf, wall, flower, or patch of habitat, plus close studies of larger and cooperative subjects. Advanced results come from understanding the fixed perspective, controlling the focus plane, and carrying a tiny lighting kit that does not defeat the reason for choosing the GR IIIx.
Troubleshoot the limits of a fixed close-focus lens
Troubleshooting a GR IIIx insect frame starts with scale. If the insect remains small even at the closest usable distance, the limitation is magnification, not resolution or focus mode. If the head is sharp and the abdomen is soft, rotate the camera to align the sensor with the insect before stopping down further. If the entire subject blurs but the resting surface is crisp, raise shutter speed for movement. If the camera shadows the insect or causes it to retreat, change approach angle and wait rather than moving closer. Specular glare calls for a larger diffused source or a new light angle, while a busy habitat calls for a lower viewpoint or cleaner subject separation.
Define close-up success before approaching the subject
Macro is often used loosely to describe any close photograph. The GR IIIx can focus much closer in its macro mode than in normal operation, but it does not reproduce a tiny insect at life size on the sensor. If the goal is a frame-filling portrait of an ant's head, use a dedicated macro lens or a specialist system. If the goal is a beetle on bark, a butterfly resting among grasses, or a bee working inside a flower, the compact camera can be a strong fit.
Choose whether the frame is about anatomy, behavior, color, or environment. That decision controls distance. Moving to the closest possible point is not automatically better. A little more space may keep antennae intact, show the direction of travel, and prevent the camera from shading the insect.
The 40mm-equivalent angle feels natural for contextual close-ups. It also means the background remains fairly broad compared with a long macro lens. Before approaching, move around the subject and find a background with a simple tone or useful habitat detail. A small camera shift can replace a bright sky hole with dark foliage.
Control the focus plane with body movement
At close distance, depth of field is thin even with a compact lens. Autofocus may choose a high-contrast wing edge while the eye falls outside the plane. Use a small focus area over the intended feature and magnify a playback frame after the first successful approach.
For a side-on insect, align the sensor as nearly parallel as practical to the body. That places the nearer eye, thorax, and wing surface within a similar plane. For a head-on view, accept that the body will recede. Choose whether the eyes or another feature should lead, then let the softness support that choice.
Manual focus combined with a gentle forward-and-back rocking motion can be more predictable than repeated autofocus at the minimum distance. Set the approximate focus, keep elbows close, and move the whole camera a few millimeters. Release when the chosen detail crosses the sharp plane. Stabilization helps camera shake, but it cannot prevent the plane from moving because the photographer or insect shifts.
Use focus peaking as a guide, not a verdict
Peaking marks local contrast and can spread across textured wings or hairs. It does not know which eye matters. Keep the peaking level restrained, use magnification when the insect remains still, and verify actual detail in playback rather than trusting a colored outline.
Balance aperture, diffraction, and background clutter
Stopping down increases depth of field, but the smallest aperture is not automatically the sharpest choice. Diffraction gradually reduces fine detail, and a small aperture can make every twig and pebble recognizable. Start in the middle of the range, check whether the key features connect, and stop down only as far as the picture requires.
A wider aperture separates the subject but demands accurate plane alignment. It works well for a butterfly parallel to the sensor or an insect isolated against a distant background. A more closed aperture suits a beetle angled toward the camera, provided the background remains controlled.
Distance affects depth as much as aperture. Stepping back slightly can bring more of the insect into acceptable focus, then the 24.2-megapixel file can support a moderate crop. This is usually preferable to pressing the lens so close that the subject flees or falls into the camera's shadow.
Choose a shutter speed for the insect, not the stabilization rating
A resting beetle and a feeding bee require different shutter decisions. Sensor-shift stabilization can steady a hand-held composition, but legs, antennae, wings, and wind-blown plants still move. Watch the subject for a pause and prioritize a shutter speed that preserves the feature carrying the image.
Auto ISO is practical when moving between sun and shade. Set a minimum shutter appropriate to the behavior, choose the aperture for depth, and let sensitivity absorb the smaller light changes. If the camera selects an ISO beyond the quality needed for final output, add light or wait for a steadier moment rather than accepting motion blur.
Electronic shutter can be quiet around sensitive subjects, yet rapid wing movement may distort and some artificial lights may band. The normal shutter is a safer baseline for most close insect work. Test silence only when it has a clear behavioral benefit.
Carry a lighting kit that still fits the GR idea
Direct midday sun creates bright reflective patches and deep shadows under an insect. A small translucent diffuser held between sun and subject can soften that contrast. It should be placed without brushing the plant, casting an unnatural hard edge, or blocking the insect's escape route.
A compact LED can add focus light or lift a shadow, but its output may be limited in daylight. A small hot-shoe flash has more stopping power, though the GR IIIx has no built-in flash and any external unit makes the package larger. Keep flash power low, bring diffusion close, and angle the source so shiny wings retain shape rather than becoming flat white patches.
A white card can provide subtle fill without batteries. A black card can remove a bright reflection or simplify a pale background. These small modifiers are often more useful than a large accessory because they can be positioned without disturbing the habitat.
Use Snap Focus only when distance is truly known
Ricoh's Snap Focus system can set a fixed focus distance and remove autofocus delay. For close insects, its value depends on repeatability. It works when a subject returns to a known flower or crosses a marked surface at a stable distance. It is less suitable when the camera is moving in and out by centimeters.
Full Press Snap should not become an accidental override. Configure the shutter behavior deliberately and practice away from a live subject. If a quick full press moves focus to a preset distance that does not match the current close-up, the resulting frame can look inexplicably soft.
Save a custom setting for close work: macro focus mode, a small focus area or manual focus, RAW capture, a suitable minimum shutter, and a stable white balance. Keep a second setting for ordinary walking photography so the camera does not remain trapped in a close-focus configuration after the insect has gone.
Approach insects without damaging the scene
Move slowly and avoid casting a fast shadow over the subject. Many insects respond more strongly to abrupt movement than to a stationary nearby camera. Approach from an angle that leaves the flight path open. Do not pinch stems, chill insects, spray them, or relocate them for a cleaner composition.
Early, cool conditions can make some insects less active, but field ethics still apply. Stay on permitted paths where required, avoid trampling host plants, and do not disturb nesting or feeding behavior. If the insect repeatedly turns away, raises defensive posture, or abandons the plant, step back.
Wear neutral clothing and watch where knees and hands land. A compact camera makes it easy to work without a tripod, which reduces the footprint around delicate vegetation. A small ground pad can protect clothing while keeping the photographer in one controlled spot.
Review the file for biological and visual detail
At ingest, group images by encounter rather than by arbitrary time blocks. Compare eye sharpness, leg position, wing integrity, and behavior. A frame with slightly lower technical sharpness may be more informative if it shows feeding, mating, camouflage, or interaction.
imagic can help identify sharpness, exposure problems, and near-duplicate groups locally, with no need to upload the files. Keep the final decision manual, especially when shallow focus is intentional. Non-destructive adjustments can establish a consistent baseline, after which the selected file can be exported as JPEG or TIFF.
The single-photo editor is useful for trying a quick treatment on one frame, while the photography guides collect broader field and workflow advice.
Protect the compact camera at ground level
Close insect work places the GR IIIx near soil, pollen, wet leaves, and blowing grit. Keep the wrist strap attached, avoid setting the camera directly on the ground, and check the extending lens path before powering on. A grain of sand around a moving lens barrel is a more serious problem than a dusty outer shell.
Use a clean cloth or small pad as a temporary barrier when a low support is needed. Shield the camera from drizzle and condensation, and move it into a sealed bag before returning from cold outdoor air to a warm humid room. Let the equipment equalize before opening the bag. This reduces moisture forming on internal and external surfaces.
Inspect the front element and screen between encounters, but do not over-clean in the field. Blow loose particles away before wiping. The camera's portability is an advantage only when it remains ready; a basic protection routine preserves that readiness without expanding the kit into a full macro pack.
Advanced close-insect checklist
- Decide whether the picture needs anatomy, behavior, or environmental context.
- Choose the background before moving to minimum focus distance.
- Align the focus plane with the important features and verify a frame at magnification.
- Set aperture for the required depth, not automatically to the smallest opening.
- Use shutter speed for subject and plant movement; stabilization is secondary support.
- Diffuse hard sun or add a small, controlled fill without blocking the escape path.
- Check frame edges for clipped antennae, bright gaps, and distracting stems.
- Leave immediately if the subject's behavior shows repeated disturbance.
Frequently asked questions
Is the Ricoh GR IIIx a true macro camera?
No. Its close-focus mode supports useful close-ups, but it does not provide the life-size reproduction or working distance of a dedicated macro lens. It is strongest for larger insects and environmental views.
Should stabilization allow a slow shutter for insects?
Only when the insect and its support are genuinely still. Stabilization counters camera movement, not antennae, wings, legs, or a flower moving in wind.
Is autofocus or manual focus better at close distance?
Both can work. A small autofocus area is quick for a clear subject, while preset manual focus and gentle body movement can be more predictable when contrast or foreground clutter confuses autofocus.
Can the digital crop create more macro magnification?
It creates a tighter file by cropping recorded pixels; it does not increase optical reproduction. Use it for framing convenience, not as a replacement for closer optics.