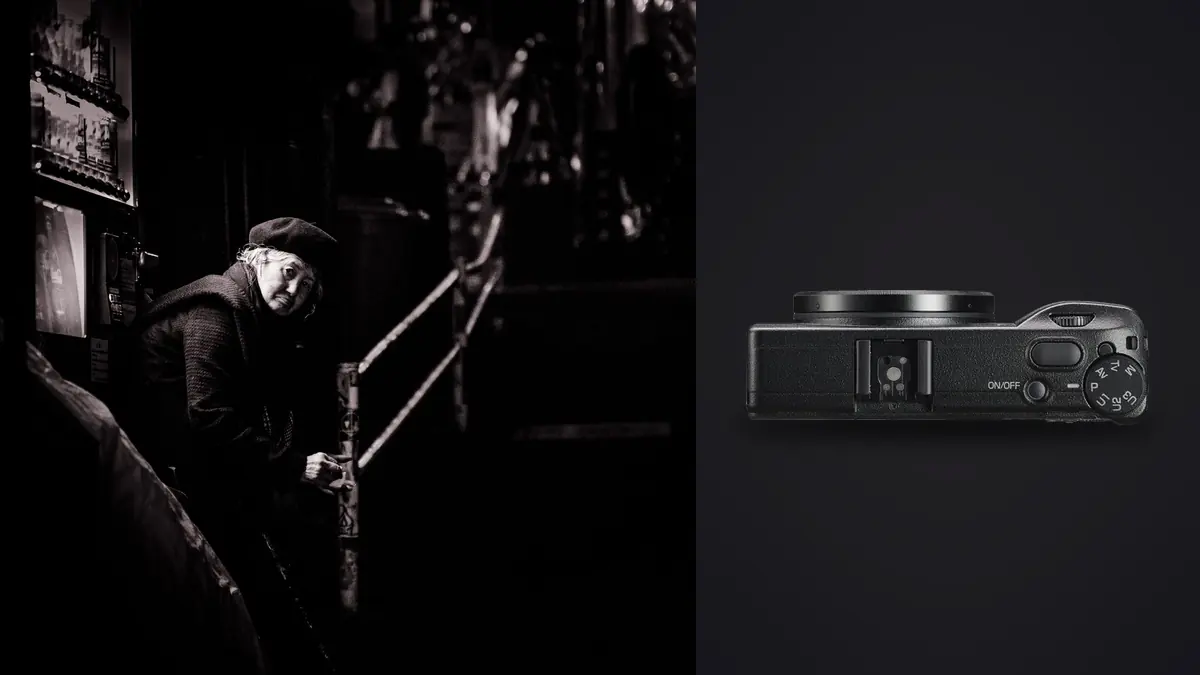
The Ricoh GR IIIx rewards a setup that is simple enough to remember while walking. Its fixed lens, compact body, autofocus choices, and Snap Focus options can support quiet observational work, but only if controls are assigned before a scene changes. A pocket camera becomes slow when every decision sends the photographer back into a menu.
This Lens and Location Guide begins with the GR IIIx's fixed angle of view, then maps it to routes, working distances, layered backgrounds, and changing light. Focus states support that plan, but they do not replace judgment about presence, local law, consent where relevant, and the effect of pointing a camera at another person.
Choose routes that suit the fixed 40mm-equivalent view
The GR IIIx cannot become wider when a narrow lane blocks retreat or longer when a subject remains across a square. Scout positions where a person can be shown with enough environment at a respectful distance. Doorways, arcades, crossings, market aisles, and transit platforms each create different layers and movement boundaries.
Look for backgrounds that organize rather than merely decorate: repeating windows, a patch of light, a distant sign, or a clean wall beyond the subject plane. Note how far the subject must be from that background for separation at the aperture you expect. The fixed lens becomes easier when distances are learned in real places.
Plan a second route for rain, closures, crowd density, or changed access. Revisit a few positions at different hours to understand light and behavior. Street planning should improve attention to the location, not turn passersby into interchangeable figures.
Define three jobs for the camera
The general state should handle a person or relationship that gives time for deliberate framing. Use an autofocus area you can place confidently, an exposure mode that protects a practical shutter time, and a modest drive setting. This is the setup for waiting at a corner, following a gesture, or making an environmental portrait with clear awareness of focus.
The Snap state is for a known working distance and a scene that may disappear before autofocus settles. It trades automatic distance selection for prediction. The precision state is for static details, layered reflections, signs, architecture, or a cooperative portrait where a small AF area or manual focus is useful.
Assign those states to user settings or accessible controls according to the current GR IIIx manual. Record what each recalls, because not every camera parameter necessarily follows a custom setting. Limit the alternatives. A configuration you cannot identify by touch is not ready for street use.
Make the general autofocus state predictable
Start with a focus area that matches how you frame. Auto-area behavior can help when the subject is isolated, while select or pinpoint options give more control in layered scenes. Zone-based selection can provide a middle ground. Ricoh's official specification lists the available focus modes and notes that some options depend on current firmware.
Place the focus area before raising the camera when you know where the subject will enter. At close distance, a face near the edge may not be the camera's preferred target. Face or eye detection can assist, but posters, reflections, and multiple people can compete. Watch what the indicator selects during ordinary practice.
For a moving subject, distinguish acquisition from tracking. If the first frame focuses on the background, change the starting area or placement. If later frames leave the person, check your framing and the selected focus behavior. A focus box is feedback, not proof that the eye is sharp.
Set Snap Focus from distance, aperture, and output
The GR IIIx offers Snap Focus distances and Full Press Snap behavior. Choose a distance you can recognize in the world, such as the width of a small room, a familiar pavement interval, or a practiced arm-to-subject relationship. Do not treat a memorized distance as universal if glasses, darkness, perspective, or hurried movement make estimation unreliable.
Depth of field depends on focus distance, aperture, acceptable sharpness, and output size. A depth scale can guide setup, but it does not guarantee that an eye will withstand a large crop. Test people or textured objects at the near limit, chosen plane, and far limit, then inspect the intended display size.
Understand how a full shutter press interacts with autofocus and Snap in the active configuration. Practice both a deliberate half-press route and the immediate route until their difference is automatic. Accidental full presses are easy on a small body, so shutter feel and grip matter as much as the menu value.
Protect motion without forcing one shutter time
A standing conversation, walking pedestrian, cyclist, and moving vehicle need different treatment. Set an Auto ISO minimum or manual shutter strategy based on the fastest movement you expect, then verify how the camera responds when light falls. Stabilization can reduce camera movement, but it cannot stop a hand, stride, or turning face.
Sometimes motion blur is the subject. A slower exposure can let a person separate from a static storefront or turn traffic into structure. In that case, stabilize the camera, choose where the moving edge should remain recognizable, and make a short intentional sequence. Do not confuse deliberate blur with an unexplained miss.
Review the direction of softness. A sharp background with a smeared person usually points to subject motion. Uniform diagonal movement across static edges suggests camera shake. A crisp plane behind the subject suggests focus distance. Change the corresponding variable rather than raising ISO or shutter speed automatically.
Keep exposure steady across bright signs and dark streets
Highlight-weighted metering can help protect bright areas in some scenes, but it may render a face too dark when a sign dominates. Multi-segment metering may react to large background changes. Learn how the selected pattern behaves, keep compensation accessible, and check important highlights on representative frames.
Manual exposure can keep a sequence coherent when the light on the subject remains stable. Aperture priority can adapt as you move between conditions but may choose an unsuitable shutter time unless limits are configured. Auto ISO with a deliberate ceiling and minimum behavior can provide flexibility, yet it still needs observation.
Shoot RAW when the workflow needs maximum adjustment latitude, but do not use RAW as permission for careless exposure. Deep recovery can reveal noise and color shifts, while clipped channels in signs or clothing cannot always be restored. Decide which information matters in the picture.
Compose with the fixed 40mm-equivalent view
The GR IIIx lens gives a field of view roughly like a 40mm lens on full frame. It is neither an ultra-wide inclusion tool nor a tight telephoto. It can hold a person with enough environment to explain the setting, but it requires the photographer to notice frame edges and working distance early.
Do not solve every composition by stepping into another person's space. Wait for relationships to align, move laterally, use foreground layers, or accept a wider context. Cropping can refine an edge; it cannot recreate the change in perspective made by a different camera position.
Set aspect-ratio guides only if they support a known output. Preserve a full DNG when possible so a temporary display shape does not discard future options. Check whether in-camera crop modes alter only metadata, JPEG output, or recorded dimensions in the chosen setting.
Arrange controls for one-handed confirmation
Put exposure compensation, focus mode or Snap distance, Auto ISO behavior, and drive where they can be confirmed without searching. Use a display with enough information to prevent mistakes but not so much that a small subject disappears. Disable accidental touch actions if they repeatedly move the AF point while carrying the camera.
Set screen brightness for the environment. An overly bright display can make a dark exposure look adequate and draw attention at night. A dim display in hard sun may hide a recording warning. Learn the status indicators for storage, power, and active user mode.
Carry the camera with a secure strap or wrist loop, lens protection suited to the pocket or bag, and controls guarded against pressure. Confirm that the lens can extend freely before powering on. Dust prevention is easier than repairing a sequence with repeated spots.
Use quiet handling without pretending to be invisible
A small camera changes how conspicuous the equipment feels, but it does not remove the photographer from the scene. Body language, distance, repetition, and where the lens points remain visible. Avoid covert behavior that would be inappropriate if noticed. Respect requests to stop and follow rules in private spaces, transit systems, events, and restricted sites.
Disable unnecessary sounds and lights where permitted, but confirm that doing so does not hide useful warnings. Silent or electronic capture can interact with moving subjects or artificial lighting, so inspect shape and banding under the conditions you use. Quiet operation is an etiquette tool, not a technical guarantee.
For documentary work involving vulnerable people, children, medical situations, protest, or private information, consider consequences beyond legal permission. Captions, timing, and later publication can cause harm even when capture occurred in public. Seek qualified guidance for high-risk use.
Test each setup on repeatable ordinary scenes
Use a route with pedestrians at known distances, shop lighting, deep shade, and moving traffic. Make the same type of frame with general AF and Snap. Record which method acquired the intended plane, what shutter time did to movement, and whether the control state remained obvious.
Inspect a full sequence on a larger display. Locate the sharpest plane, compare edge framing, check bright signs for clipping, and note any banding. Change one variable for the next pass. A successful test is one you can explain, not merely one lucky sharp image.
Save the final configuration only after using it across several light states. Photograph or write down the settings and export a backup if the camera supports it. Firmware changes can add features or alter menus, so revisit the baseline after updating.
Build a reversible DNG review path
The GR IIIx records DNG, which imagic supports. After making verified copies, scan the directory before analysis. The application processes locally, scores technical qualities, and groups similar frames. Culling changes status rather than deleting the original, allowing a cautious first pass.
Street selection cannot be reduced to technical rank. Review gestures, spatial relationships, background details, dignity, sequence context, and caption evidence. If a stored score appears inconsistent, check freshness and reanalyze stale photos; reselecting only changes rank from scores already saved.
The desktop overview describes local culling and non-destructive edits, while the workflow and editing guides cover broader review systems. Keep setup notes beside rejected examples so field configuration improves from identified causes.
Frequently Asked Questions
Should Snap Focus replace autofocus on the GR IIIx?
No. Snap is useful when you can predict distance and depth, while autofocus is safer when subject distance is uncertain or precise placement matters. Keep both accessible and practice the transition.
Does the GR IIIx stabilization freeze walking people?
No. It can reduce camera movement, but a moving person still requires an appropriate shutter time or intentional blur. Diagnose the direction and plane of softness.
Is a small camera automatically unobtrusive?
No. People respond to distance, body language, repetition, and context as well as camera size. Work openly, respect boundaries, and consider the consequences of publication.