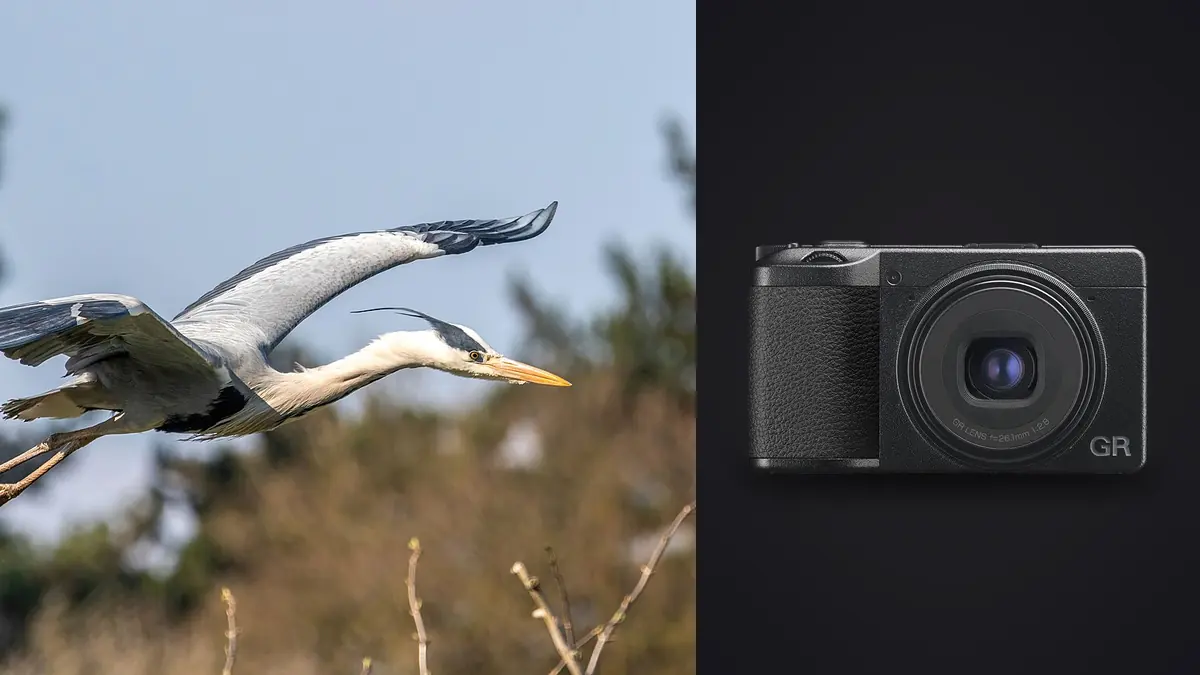
The Ricoh GR IIIx is not a conventional bird-in-flight camera. Its fixed lens gives a roughly normal field of view, it has no viewfinder built into the body, and it cannot accept the long telephoto lenses that make distant birds large in the frame. Those limits should shape the assignment before the shutter is pressed. The camera is better at birds within a human landscape: gulls crossing a harbor at close range, pigeons lifting from a square, garden birds near a familiar perch, or a wider scene in which flight gives structure to the place.
Once that honest scope is accepted, the GR IIIx offers a useful advantage: it is small enough to be present when a larger kit is not. Its DNG files fit a straightforward local workflow. The goal is not to turn every tiny bird into a tight portrait. It is to preserve the strongest close, environmental, and behavioral frames from capture through delivery.
Define a viable GR IIIx bird photograph
A viable subject is either close enough to read clearly or placed in an environment that contributes to the image. Large, habituated birds near a waterfront are more realistic than a small raptor high overhead. A flock against graphic architecture can work even when no individual fills the frame. A bird launching from a nearby rail can succeed because the behavior, background, and distance align.
Set a minimum subject size for the intended output. If a bird occupies only a few hundred pixels, no culling score or sharpening tool can create feather detail that was never recorded. Keep such a frame only when silhouette, formation, light, or place carries it. This decision at ingest prevents hours spent attempting impossible crops.
Field technique should favor known paths. Watch where birds land, feed, or cross between structures. Stand at a respectful distance, pre-frame the setting, and wait for movement to enter. Do not approach nests or pressure wildlife for a closer picture. The fixed lens encourages context, which can produce a more responsible and distinctive result than chasing magnification.
Capture DNG files with culling in mind
Use DNG when light, white balance, or highlight recovery may need careful adjustment. JPEG can still be useful for a fast handoff, but the RAW file provides a stronger editing source under bright sky and dark plumage. If storage allows, recording both can offer immediate previews while retaining the DNG. Decide before the outing so the folder has a consistent file pattern.
Choose a shutter speed that suits the wing movement and camera motion. A bird gliding across the frame needs less than a nearby bird launching directly toward the camera. Use Auto ISO within a range that preserves the needed shutter and aperture. Review highlights on white feathers, reflective water, and clouds. A slightly dark bird can often be treated carefully; featureless white plumage cannot be recovered.
Shoot short sequences around a visible change: wings opening, feet leaving the perch, a turn into light, or two birds separating. Long uncontrolled bursts create many files with the same weak geometry. The GR IIIx is most productive when anticipation limits volume. Leave extra frame space in the direction of travel because the rear-screen view and rapid movement make tight tracking difficult.
Build a safe ingest before judging anything
At the computer, copy the complete card structure into a clearly named shoot folder. Include date, location, and a concise subject description. Do not format the card until the copy has been verified and backed up according to the photographer's normal policy. Keep DNG and matching JPEG files together during verification so pairs do not become separated accidentally.
Confirm file count, open samples from the beginning and end, and check that metadata appears sensible. If the outing includes several cards, use card-specific subfolders during the first copy to prevent duplicate filenames. Consolidate only after the naming method is known to be collision-safe. A simple text note can record unusual circumstances, such as a dirty window, a changed clock, or a sequence made with a different exposure strategy.
Do not begin aggressive deletion on the only working copy. Culling should change selection status, not erase evidence before the backup is secure. This is especially important with flight sequences, where a neighboring frame may contain the better wing position even if its thumbnail appears similar.
Run the first cull for technical viability
The first pass asks only whether the frame can serve its intended purpose. Reject accidental exposures, severe motion that has no visual role, frames where the bird has left the composition, and crops too small for the required output. Mark borderline images separately rather than arguing with them during the fast pass.
Evaluate focus on the head or the most important silhouette edge. For a small subject, view at a consistent magnification so one frame is not favored merely because it was displayed larger. Compare related frames side by side. A wing can be sharp while the eye is behind the focus plane, and a clean eye can coexist with expressive wing blur. The right choice depends on the image's intention.
Desktop software can make the mechanical review easier. imagic analyzes photos locally for sharpness, exposure, closed eyes, and composition and groups duplicates or bursts. For birds, closed-eye detection is not the central criterion, so treat any automatic result as a pointer rather than a verdict. The photographs remain on the Windows or macOS computer, and culling does not need to delete originals.
Make the second cull about behavior and sequence
Now compare technically viable frames for meaning. Look at wing position, head angle, separation from the background, direction of gaze, and the relationship among birds. A frame with slightly less microscopic detail may be stronger because the feet have cleared the perch or the wings form a clean shape. Choose the moment a viewer can understand immediately.
Reduce repetitions. Three near-identical gulls against the same water rarely make a better set than one excellent gull and two different observations. Preserve a progression only when it tells a sequence, such as approach, landing, and interaction. If delivering a story, mix establishing views, medium environmental frames, and the closest successful behavior.
Use ratings or color labels consistently. One practical system is: reject for unusable, one mark for technically possible, two for narrative contenders, and a final flag for delivery. The labels themselves do not matter. What matters is avoiding a system that changes halfway through the folder.
Edit without disguising the fixed-lens limit
Begin with white balance, exposure, and broad contrast. Recover sky only until it looks plausible, then shape the bird with modest tonal adjustments. Excessive shadow lifting can reveal noise and flat color, particularly when a small subject was underexposed. Noise reduction should reduce distraction without turning feathers into smooth blocks.
Crop for composition and output ratio, but record the resulting pixel dimensions before investing further work. A social image, editorial web frame, and large print have different needs. Do not upscale a severe crop merely to make the dimensions look reassuring. If the bird remains too small, return to the environmental composition or exclude the frame.
Apply sharpening at the final output size. Halos around dark wings against bright sky are a common sign of too much. Local contrast can also exaggerate out-of-focus branches and water texture, so compare the entire image, not just the subject. The free single-photo editor can help test a restrained treatment on one frame before applying comparable decisions to a set.
Prepare a clear delivery set
Rename or sequence final files only after selection is stable. Export to a separate delivery folder so DNG originals and non-destructive decisions remain intact. JPEG is usually practical for online delivery; TIFF may be appropriate when another controlled editing or production stage needs it. Match color space, dimensions, and compression to the receiving use rather than making one universal export.
Inspect exported files, not just editor previews. Open a sample at full size and delivery size, check gradients in sky, look for sharpening halos, and verify that metadata follows the agreed policy. Location metadata can be sensitive around nests or threatened species. Remove it from public files when disclosure could put wildlife at risk.
Finally, archive the selects, original DNG files, and a record of export settings according to the existing backup plan. The strongest outcome from a GR IIIx bird outing may be a concise set of place-aware photographs, not a conventional portfolio of tight wildlife portraits. The workflow and editing library offers more ways to make that handoff repeatable.
Match crop and delivery to the actual use
Before final cropping, write down the destination's aspect ratio and minimum useful dimensions. A horizontal editorial banner, a square social post, and a small print place the bird differently. Starting from the destination prevents a strong wingtip or environmental cue from being removed merely because a familiar crop ratio was selected by habit.
Prepare separate exports when two uses require different compositions. Do not stretch one severe crop across every channel. Keep filenames related so the receiver can identify the variations, and include a short note distinguishing full scene from tighter crop. If publication may add text, leave deliberate negative space instead of assuming the designer can create it later.
A final contact sheet is useful for checking rhythm across the delivered set. At thumbnail size, repeated horizons, similar bird positions, and inconsistent color become obvious. Replace redundant frames before export rather than asking the recipient to find the variety. This last sequence check is where a modest fixed-lens outing can become a coherent visual story.
Keep the uncropped master adjustment alongside each output version. If an editor later requests a vertical crop or more space around the bird, the change can be made from the complete file rather than from a compressed delivery JPEG. This is one reason non-destructive work matters: a destination-specific decision stays reversible while the original DNG remains untouched.
Save the rejected extreme crops as ratings rather than extra exports. They can remain available for reference without confusing the delivery folder or encouraging use beyond their practical resolution.
Frequently asked questions
Can the Ricoh GR IIIx replace a telephoto birding camera?
No. Its fixed normal-angle lens cannot provide the reach or subject isolation of a long telephoto. It works best for close, habituated birds and environmental scenes where context matters.
Should every flight sequence be kept until editing?
Keep the complete sequence through secure ingest, then remove technically unusable frames and compare the remainder by behavior. Preserve multiple images only when each adds a distinct moment or compositional role.
Is DNG worthwhile for small bird subjects?
Yes, when exposure and color need careful work, but RAW flexibility cannot invent missing detail from an extreme crop. Subject distance and final output size still set the practical limit.