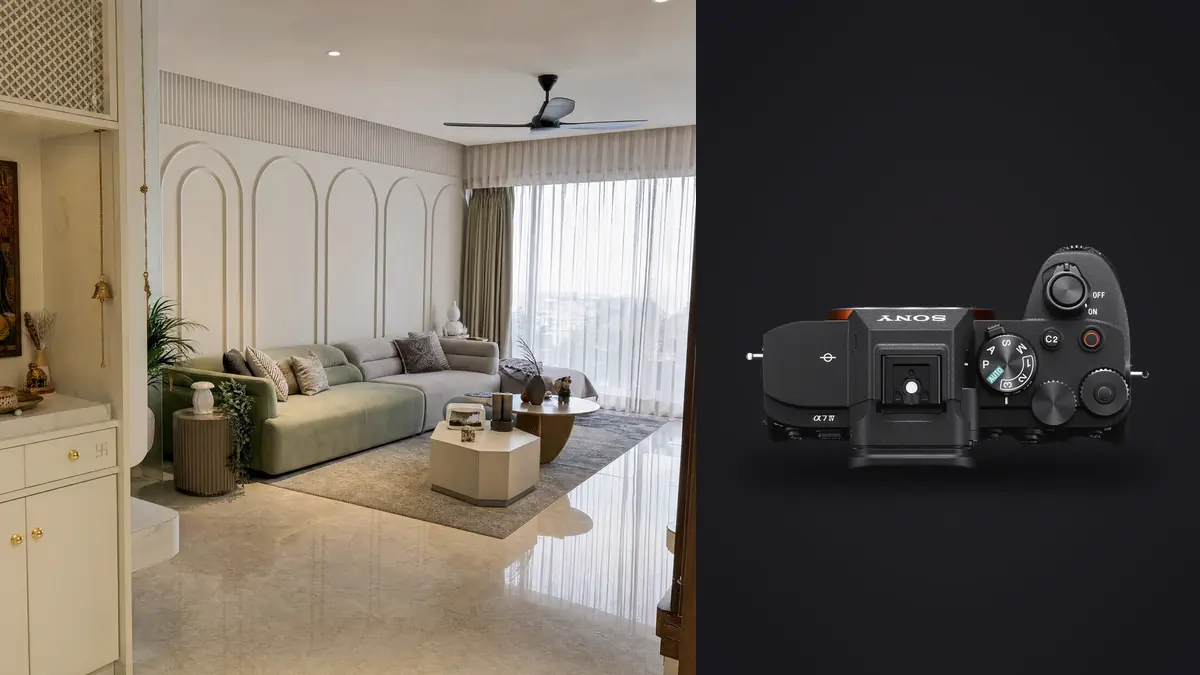
Why Interiors Are a Different Test for a Camera
Architectural and interior photography punishes a camera in ways that portrait or street work never does. You're not chasing a decisive moment, you're fighting a room: a window blowing out to white while the far corner sinks into shadow, a client standing behind you wanting to see the shot on a laptop before you move the tripod six inches, and a shot list that might run to fifteen rooms before lunch. I've shot real estate listings, a boutique hotel relaunch, and a handful of architecture-firm portfolio jobs on a Sony A7 IV over the past two years, and it has become my default body for this specific kind of work, not because it's flashy, but because almost nothing about it gets in the way.
The A7 IV isn't marketed as an architecture camera. Sony doesn't really sell it that way, and most reviews of it focus on the video specs or the autofocus for weddings and events. But the 33-megapixel sensor, the dynamic range it captures, and a handful of quieter features (electronic level, silent shutter, pixel shift, decent battery life for a full day of bracketing) add up to a body that handles interiors better than its marketing would suggest.
Dynamic Range: The Actual Problem You're Solving
Every interior shoot has the same underlying problem: the light coming through the windows is often five to seven stops brighter than the ambient light inside the room. Expose for the window and the room goes muddy. Expose for the room and the window turns into a white rectangle with no view, no curtains, no texture. You solve this one of three ways: bracket and blend in post, add strobes or continuous lighting to bring the interior up to match the window, or lean on the sensor's native dynamic range and pull detail back in raw processing.
The A7 IV's sensor gives you roughly 14 stops of usable dynamic range at base ISO in good light, which in practice means a single well-exposed raw file, shot for the highlights outside the window, usually has enough shadow detail to recover a presentable interior without visible banding, as long as you're not pushing more than three or four stops in Lightroom or Capture One. That's not enough for a full sun-drenched living room with a dark hallway behind you, but it's enough that I shoot fewer bracket sets than I used to on older bodies, and on smaller rooms (bathrooms, closets, hallways) I frequently get away with one frame.
How I Actually Bracket on Interior Jobs
For anything with a window in frame and no supplemental lighting, I still bracket, because relying on sensor latitude alone is a bet you'll eventually lose on a job that matters. My default is a 3-shot AEB set at -2, 0, +2 EV using the mechanical shutter, then blend by hand or with a luminosity mask rather than an automated HDR merge, which tends to flatten contrast and give interiors that flat, slightly nauseating "real estate HDR" look agents hate and buyers scroll past.
| Room / Lighting Situation | Typical Approach | Bracket Spread | Frames per Setup |
|---|---|---|---|
| Small bathroom, no window | Single exposure, base ISO | None | 1 |
| Bedroom, moderate window light | 3-shot bracket, hand blend | -1.3 / 0 / +1.3 EV | 3 |
| Living room, bright window + skyline | 5-shot bracket, luminosity mask blend | -2 / -1 / 0 / +1 / +2 EV | 5 |
| Kitchen with mixed tungsten/daylight | 3-shot bracket + gray card reference frame | -1.3 / 0 / +1.3 EV | 4 |
| Twilight exterior with interior lights on | Manual blue-hour sequence, tripod locked | 3-5 frames over 20-30 min | 3-5 |
| Architecture detail (stairwell, ceiling feature) | Focus-stacked bracket set | 0 EV across 4-6 focus points | 4-8 |
Do the math on a fifteen-room house shoot and you're routinely walking away with 600 to 1,000 raw files by the end of the day, most of them near-duplicates of the same composition at different exposures. That volume is exactly the kind of thing that makes culling software worth having rather than optional. I run these through imagic afterward specifically because it clusters bracketed sequences and burst-style duplicates automatically using local sharpness and focus scoring, so I'm not manually eyeballing which of five nearly identical frames in a bracket set is the sharpest before I even start blending. It runs entirely on the laptop, no upload queue, which matters when you're trying to hand a client a rough gallery the same evening.
Autofocus and Shooting Mode: Slower Than You'd Think, On Purpose
The A7 IV's 759-point phase-detection autofocus and real-time tracking get all the attention in reviews because they're genuinely excellent for people and pets. For architecture, none of that matters much. You're on a tripod, the subject isn't moving, and you're almost always in single-shot AF-S with focus peaking or the magnified live view to nail focus manually on a specific edge or texture, usually a third of the way into the frame rather than dead center.
Where the autofocus system actually helps is on days you're shooting handheld, walkthroughs for a real estate agent who wants a fast lifestyle set alongside the tripod work, or a design firm that wants candid shots of the installation crew. Eye AF locks fast enough that I can hand the camera to an assistant for a quick series without babysitting focus, which isn't something I'd have trusted on the A7 III.
Silent Shooting Matters More Than People Expect
Interior shoots frequently happen in occupied spaces, model homes with staff walking through, a restaurant an hour before service, an office during a slow afternoon. The A7 IV's fully electronic silent shutter mode means you can fire off a bracket set without the mechanical clack that makes people in the next room turn around. The tradeoff is rolling shutter distortion if anything moves fast through frame, which isn't usually a concern in a locked-off interior shot, but I do switch back to the mechanical shutter for anything with a ceiling fan running or a person walking through a doorway during exposure.
Pixel Shift and Why It's More Useful Than It Sounds
Sony's Pixel Shift Multi Shooting mode takes 4 (or up to 16, motion-compensated) frames while shifting the sensor by one pixel between exposures, then composites them into a single image with far less demosaicing artifact and, in the 16-shot mode, a genuine resolution boost. On paper it sounds like a gimmick built for product photographers shooting flat lay catalog work. In practice, it's useful for architecture too, specifically for hero shots destined for large print, a lobby image blown up to six feet wide for a hotel's marketing wall, or a stair detail a design firm wants on the cover of a portfolio book.
The catch is real: it requires a completely static subject, a tripod, and Sony's desktop software (or third-party raw processors that support the format) to assemble the composite, and it takes several seconds per set, so it's not something you reach for on every frame. I use it maybe twice per shoot, for whichever one or two compositions I already know I want blown up big.
Lens Choices That Actually Matter for This Work
The body matters less than the glass on interior jobs, and the E-mount lineup has some genuinely strong options if you pick carefully.
- Sony FE 16-35mm f/2.8 GM II: my primary lens for probably 70% of interior frames. Wide enough for tight rooms without the extreme distortion you get under 16mm, and sharp into the corners even at f/8-f/11 where architecture work tends to live.
- Sony FE 20mm f/1.8 G: lighter and cheaper than the GM zoom, and useful when a room genuinely won't fit anything longer, though the extra width means more time in Lightroom correcting converging verticals.
- Sony FE 12-24mm f/2.8 GM: overkill for most residential work, but earns its keep on cramped commercial interiors, stairwells, and anything where you physically cannot back up any further.
- Adapted tilt-shift lenses: Sony doesn't make a native E-mount tilt-shift, so anyone doing serious architectural correction work adapts a Canon TS-E or a Laowa shift lens. It's manual everything, slow to work with, and still the cleanest way to keep verticals straight in-camera rather than stretching pixels in post.
One underrated body feature here: the A7 IV's electronic level, visible in the viewfinder or on the rear screen, has genuinely saved me from crooked verticals more than any lens choice. Two axes, pitch and roll, both shown at once. On a tripod with a leveling base it gets you most of the way to true without needing to check every frame in post.
The File Management Problem Nobody Warns You About
A single A7 IV compressed raw file runs 35-45MB. Shoot a full house in raw with bracketing and you're looking at 25-40GB of data before lunch, and if you're also doing pixel-shift composites or focus stacks for detail shots, that number climbs fast. Multiply across a month of listings and portfolio jobs and storage stops being an afterthought.
The bigger issue isn't storage capacity though, it's review time. Nobody wants to manually flag the sharp frame out of a six-image focus stack, or figure out which of five bracket exposures has the cleanest highlight retention, across a hundred setups. This is the part of the job that actually eats the day. I've settled into a routine where the cards come off the camera straight into imagic for a first pass: it scores sharpness and focus locally on the machine (nothing leaves the laptop, which matters for any shoot with NDA restrictions around unreleased developments), groups the bracket and burst clusters together, and flags the technically best frame in each group so I'm not opening forty near-identical raws side by side in Bridge just to find the one where the water in the pool fountain wasn't mid-splash.
The other piece that's saved real hours is the "apply my style" preset feature, which trains on your own past edits rather than shipping a generic architecture LUT. Interior and real estate galleries need a consistent look across a hundred-plus images shot under wildly different lighting (mixed tungsten, daylight, LED strip lighting under cabinets), and a preset trained on how I've actually graded my own interior work gets me a usable starting point across the whole set instead of an even coat of the same three-click preset everyone else downloaded from the same pack. If you're weighing culling tools for this kind of volume, it's worth reading through how AI photo culling actually works before committing to a workflow, since the scoring approach differs meaningfully between tools.
Where the A7 IV Falls Short
It's not a perfect fit for everything in this genre. The rolling shutter on the electronic shutter is noticeable if you're doing any twilight timelapse-style blending where lights are changing mid-sequence. Buffer depth in compressed raw is generous for bracket sets but will eventually slow you down if you're firing 16-shot pixel shift sequences back to back without pausing to let the buffer clear. And at 33 megapixels, you have plenty of resolution for print and web, but if a client specifically wants massive gigapixel panoramic stitches of a large commercial space, a higher-resolution body (or more overlap frames in your stitch) closes that gap better than pixel shift does.
None of that has been a dealbreaker on the jobs I've actually shot. It's a camera that gets out of the way, which for interior work is close to the highest compliment I can give a piece of gear.
Frequently Asked Questions
Do I need a full-frame body like the A7 IV for interior and architectural photography, or is APS-C good enough?
APS-C bodies can absolutely handle real estate and interior work, and plenty of working photographers shoot it exclusively on crop sensors. What full frame buys you here is more usable dynamic range for those window-versus-room exposure problems, and wider native lens options without the crop factor pushing you into fisheye territory. If you're shooting mostly smaller residential interiors on a budget, APS-C with a good wide lens is a perfectly reasonable starting point. For commercial and hospitality work where dynamic range and print size matter more, full frame earns its cost.
Is the A7 IV's 33-megapixel sensor enough resolution for large architectural prints?
For most gallery prints, lobby installations, and portfolio books, yes, 33 megapixels prints comfortably at sizes well beyond what most clients actually order. For the rare six-foot-wide lobby mural or oversized trade show banner, the Pixel Shift Multi Shooting mode gets you a meaningfully larger, cleaner composite as long as the scene is completely static and you're willing to process it through Sony's software afterward.
What's the fastest way to cull hundreds of bracketed exposures from a single shoot?
Manually flagging bracket sets one by one is the single biggest time sink on high-volume interior jobs. Tools built around local sharpness and focus scoring can automatically cluster bracket sequences and near-duplicate bursts, then surface the technically strongest frame in each group, which is a meaningfully different approach than the older "sort by rating stars you assign yourself" workflow most photographers grew up on. It's worth comparing a few options directly against your own file volume rather than assuming one workflow fits every shoot size.
Should I use HDR bracketing or just rely on the A7 IV's dynamic range for interiors?
For small, evenly lit rooms without a bright window in frame, a single well-exposed raw is often enough given how much shadow detail the sensor recovers. For anything with a bright window, skylight, or mixed interior/exterior scene, still bracket. Sensor latitude has improved a lot generation over generation, but it hasn't erased the physics of a room that's five or more stops darker than the view outside its own window.