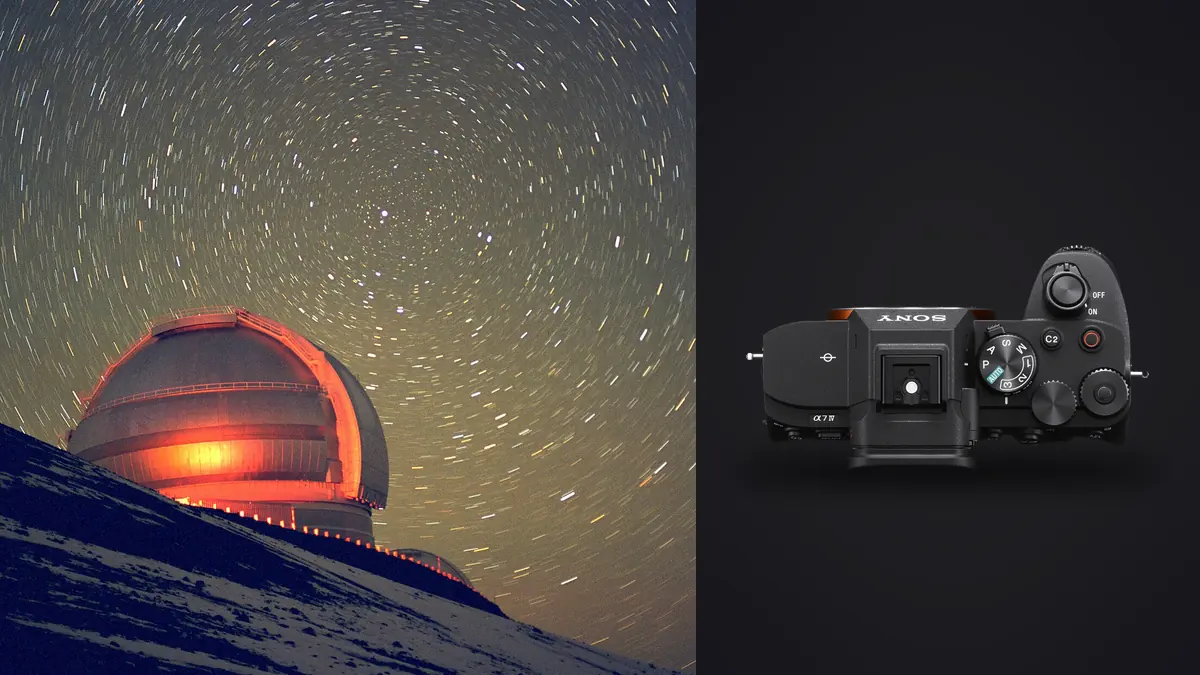
I have taken the Sony A7 IV out under genuinely dark skies more times than I can count now, and it is a strange camera to write about for astrophotography because Sony never designed it as an astro tool. It is a hybrid stills and video body first. But the sensor happens to be very good for stacking star fields, and once you understand where it fights you (a noise reduction quirk that has followed Sony bodies for years) it turns into one of the more capable stacking cameras in its price range. This is not a spec sheet regurgitation. It is what actually changes in your files when you point this camera at the sky for two hours, and how I build a stack from it without losing faint stars to in-camera processing.
The sensor itself: what actually matters for stacking
The A7 IV uses a 33-megapixel back-illuminated sensor, which is a change from the 24-megapixel chip in the A7 III. For stacking, the resolution bump is a mixed blessing. You get more detail in the Milky Way core once you stack and stretch, but the pixel pitch shrinks to roughly 3.76 microns, which means individual pixels gather less light and star trailing shows up sooner at 100% crop than it did on the A7 III. That is not a flaw, it is just a tradeoff you need to plan your exposure times around, which I get into below.
What actually helps is the dual conversion gain circuit. Sony switches to a high-gain readout mode somewhere around ISO 640 on this body, and read noise drops noticeably at that point. Below that ISO the sensor still has decent dynamic range but you are leaving read noise headroom on the table for something like a stacked star field, where you want the faintest possible signal to rise above the noise floor. In practice I shoot the bulk of my subs between ISO 1600 and ISO 3200, landing comfortably inside the high-gain range without pushing so far that hot pixels start dominating individual frames.
The star-eater problem, and how to dodge it
If you search astrophotography forums for Sony cameras you will run into "star eater" within about two clicks. It refers to an in-camera noise reduction pass that Sony applies to long exposures, originally meant to clean up hot pixels, that also strips out faint, single-pixel stars before the RAW file is even written to the card. It showed up on the A7S, got worse on some A7R bodies, and Sony partially addressed it with firmware changes years ago. The A7 IV inherited an improved version of this processing, but it has not disappeared entirely, and it still shows up most aggressively in single-shot drive mode on exposures past roughly 3.2 seconds.
The workaround that has held up for me: shoot in continuous low-speed drive mode with a wired remote or the camera's own interval function held on bulb, rather than triggering single-frame bulb shots one at a time. That routes the exposure through a different internal processing path that does not apply the same aggressive star-suppression pass. It is not documented anywhere in Sony's manual. It is something the astro community figured out through testing, but it is repeatable, and it is the single biggest quality difference I have found between a mediocre A7 IV stack and a genuinely good one. I also shoot lossless compressed RAW rather than the older compressed format, since that compressed pipeline was where a lot of the worst star-eating behavior lived on previous Sony bodies.
Picking an exposure time that matches the resolution
The old "500 rule" (500 divided by focal length equals your max shutter speed) was written for cameras with far fewer pixels than the A7 IV. At 33 megapixels, that rule gives you exposures with obvious star trailing the moment you zoom in past 50%. I use something closer to the NPF rule, adjusted down further because of the smaller pixel pitch, and these numbers have held up consistently in the field on a static tripod with no tracker:
| Lens focal length | Rule-of-500 estimate | Real max exposure on A7 IV (pixel-level sharp) |
|---|---|---|
| 14mm | 35s | 20s |
| 20mm | 25s | 13s |
| 24mm | 21s | 11s |
| 35mm | 14s | 7s |
| 50mm | 10s | 5s |
Those "real max exposure" numbers assume you care about pixel-level sharpness for stacking, where trailing compounds across dozens of frames instead of just softening one photo. If you are only ever going to view the final image at web resolution you can push each of these a couple of seconds longer and get away with it. But since the entire point of stacking is to recover detail you could not get in a single frame, I would rather shoot more, shorter subs than fewer long ones that are already slightly trailed before they reach the stacking software.
Building the sequence in the field
For a typical Milky Way stack I am shooting 40 to 80 subs at whatever the exposure ceiling from the table above works out to for the lens I brought, plus a matching set of dark frames shot with the lens cap on at the same ISO, shutter speed, and body temperature right after the light frames. I skip flats unless I am shooting a wide lens where vignetting is obvious, since flats add a fussy extra calibration step that most single-session shoots do not actually need.
Battery life is one place the A7 IV is genuinely good for this. The NP-FZ100 will get you through a two-hour stacking session with the rear screen dimmed and no real battery anxiety, which matters when you are standing in a field at 2am and do not want to swap batteries mid-sequence and risk bumping the tripod. I also shoot to both card slots during these sessions, less because I am worried about card failure and more because it gives me an untouched backup set of RAWs before I start culling and stacking the working copies.
Culling before you stack
Eighty subs from one session sounds manageable until you are actually looking at eighty nearly identical frames of the same patch of sky, trying to spot which three or four have slightly trailed stars from a gust of wind, a focus drift, or someone walking near the tripod. This is the part of astro work that nobody enjoys and everybody skips corners on, and it is exactly the kind of grunt work I now run through imagic before touching a stacking program. Its sharpness scoring is built around detecting genuine focus and blur differences rather than exposure or color, which for a star field means it flags the two or three frames where stars have gone slightly soft from vibration or focus creep, even when the difference is invisible at thumbnail size. I pull those out before stacking rather than after, because a handful of soft frames mixed into a sixty-image stack drags the whole average down more than people expect.
It also matters that this runs entirely on the machine, with nothing uploaded anywhere, since a night of A7 IV RAWs at 33 megapixels each adds up to tens of gigabytes fast, and I am usually doing this culling pass on a laptop at a campsite with no signal at all. For more on how that kind of local scoring actually works under the hood, this breakdown of AI photo culling covers the mechanics in more detail than I need to repeat here.
Turning the subs into a stack
Once the set is culled I hand the RAWs to dedicated stacking software rather than trying to do this in Lightroom or Photoshop, which were never built for star alignment. The three I actually use depend on what I am stacking:
| Software | Platform | Best for | Cost |
|---|---|---|---|
| Sequator | Windows only | Fast Milky Way stacks with a foreground | Free |
| Starry Landscape Stacker | Mac only | Landscape astro with a horizon in frame | Paid, one-time |
| DeepSkyStacker | Windows only | Deep sky targets, no foreground | Free |
For a wide Milky Way shot with a horizon in the frame, Sequator has been the most forgiving of the three with A7 IV files specifically. It handles the foreground-versus-sky masking automatically most of the time, which matters because a 14mm or 20mm frame usually has a ridge line, trees, or a tent in it. DeepSkyStacker is overkill for that kind of shot, but it is what I reach for when I am stacking a tighter frame on a star tracker with no foreground at all, since its alignment and rejection algorithms are built specifically around deep sky work rather than landscape composites.
From a flat stack to a finished edit
A raw stacked TIFF out of any of those programs looks worse than a single unedited RAW, not better. All the noise reduction from averaging helps, but the file is flat, the Milky Way core has no contrast, and skin-toned light pollution near the horizon usually needs targeted correction before it looks like anything you would show someone. I do the actual grading in the same place I do the rest of my editing, and I have set up a preset in imagic trained on how I already edit landscape and blue hour work using the apply_my_style feature, so the stacked file gets pulled toward the same color and contrast decisions I would make by hand rather than starting from a generic astro preset built for someone else's camera and someone else's sky. It is not a substitute for actually working the core contrast and horizon glow by hand, but it gets the starting point much closer than a default profile does. If you have not built out a consistent color approach across a body of night photography yet, this color grading guide is a reasonable place to start before you touch anything astro-specific.
Which lenses actually make sense on this body
The A7 IV does not care what lens you put on it, but the pixel density means soft corners and coma show up more obviously than they did on the 24-megapixel A7 III. The Sony 20mm f/1.8 G has been my most-used lens for this specifically because coma control wide open is genuinely good into the corners, which matters when half your frame is pinpoint stars rather than a big, forgivingly-metered subject where a bit of corner softness gets ignored. The 14mm f/1.8 GM is the wider option and it is excellent, but it costs close to three times as much, and I only reach for it when I specifically need the extra field of view for a big foreground element. Adapted manual lenses like the Rokinon or Samyang 14mm f/2.8 are still a reasonable budget option if you already own one from a previous body, though you lose autofocus for daytime work and have to nail focus manually with focus peaking or magnified live view every single time.
Frequently Asked Questions
Does the Sony A7 IV need a star tracker for stacking to work?
No, and most of what I have described above assumes a static tripod. A tracker (something like a Star Adventurer or an iOptron unit) lets you shoot much longer individual subs without trailing, which means fewer frames and cleaner shadows in the final stack, but it adds setup time, polar alignment, and one more thing that can go wrong in the dark. I would rather someone learn static tripod stacking on this body first and add a tracker once they are comfortable, rather than fighting two new skills at once.
What white balance should I shoot at for star stacking?
Shoot RAW and leave it on auto or a fixed daylight-ish setting like 3800K to 4000K in camera, since it does not bake anything in and you will reset it entirely during editing anyway. What actually matters more than the in-camera white balance number is staying consistent across every sub in the sequence, because stacking software aligns and averages pixel values, and a white balance that drifts between frames (which can happen if you leave it on auto in a scene with shifting light pollution color) adds a subtle color inconsistency that shows up as noise in the stack.
Is the A7 IV's autofocus any use for astrophotography?
Barely, and I would not rely on it. Autofocus hunting in near-total darkness is one of the more frustrating things you can do to yourself in the field. I focus manually using magnified live view on a bright star, lock focus, then switch the lens to manual (or tape the focus ring if it is a fly-by-wire lens without a hard stop) so nothing shifts if you bump the barrel while changing settings mid-session.
How many subs do I actually need for a noticeable improvement over a single frame?
You start seeing a real difference around 15 to 20 stacked subs, where background noise visibly smooths out. Past about 40 to 50 frames the improvement flattens out noticeably, each additional sub buys you less than the last. I settle around 40 to 60 subs for most Milky Way sessions because that is a reasonable amount of shooting time and storage against the actual gain in the final file.
None of this makes the A7 IV a dedicated astro camera, and if deep sky imaging with a telescope and a tracker is the actual goal, a dedicated cooled astro camera will beat it every time. But as a body you can also use for weddings, hiking video, and everyday stills during the day, then point at the sky that same night without needing cloud storage or a subscription to process what you shot two hundred kilometers from the nearest signal, it earns its place in the bag. I run the whole pipeline, from culling in imagic to final grading, on the same laptop I bring into the field, and that offline part stops being a nice-to-have the first time you are stacking subs at a trailhead with zero bars.