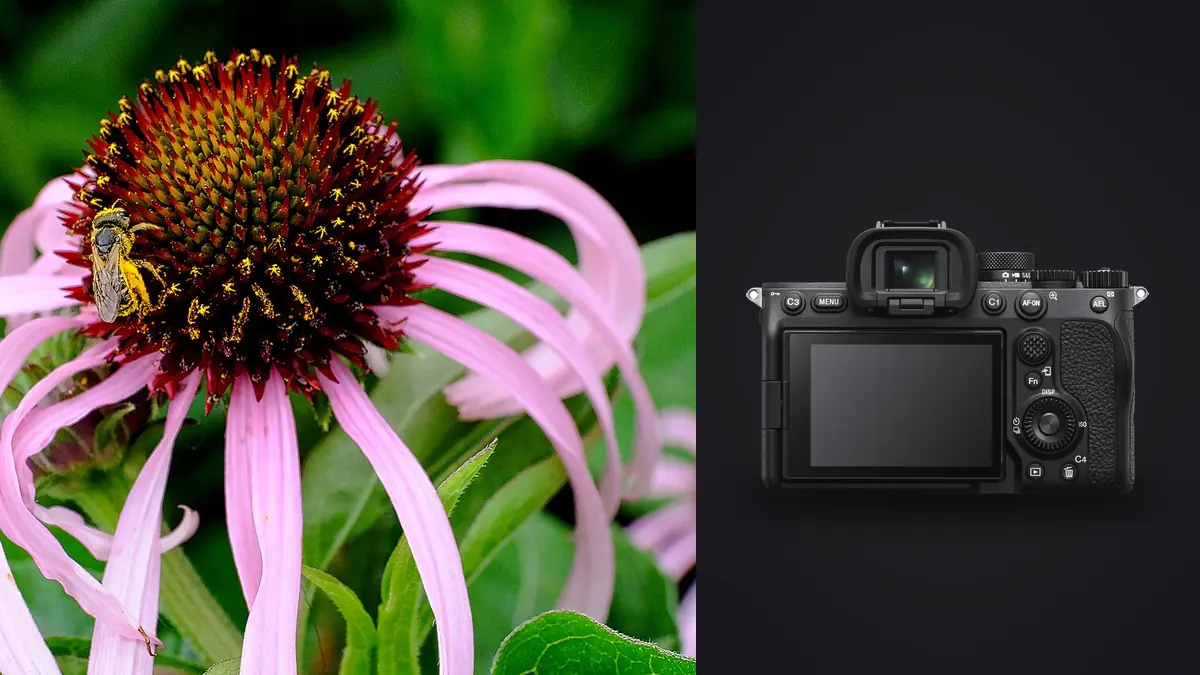
The A7 IV Wasn't Sold as a Bug Camera, But That's What Mine Has Become
When the Sony A7 IV came out, the marketing was all about hybrid shooters: wedding photographers who also needed 4K video, event shooters who wanted a deeper buffer than the A7 III. Nobody was pitching it as a macro insect rig. I bought mine for exactly those hybrid reasons, and then a damselfly landed on a reed three feet from where I was standing with a 90mm macro lens on, and that was more or less the end of my "general purpose" plans for this body. Two seasons later, easily 40% of my shutter count is dragonflies, jumping spiders, and the occasional very patient praying mantis.
The reason it works isn't any single headline spec. It's that the 33-megapixel sensor gives you enough resolution to crop hard on a subject that might only fill a quarter of the frame, the buffer is deep enough that you don't fill it mid-sequence during a focus-bracket run, and the body is light enough to hand-hold for an hour of crouching in wet grass without your wrist giving out. None of that shows up on a spec sheet as a "macro feature." It just adds up in the field.
Autofocus: Good, But Not the Reason to Buy This Camera for Insects
I want to correct something I see repeated in comment sections: the A7 IV's Real-time Eye AF is built and trained for humans, animals, and birds. It does not have a dedicated insect subject-recognition mode the way some of Sony's newer bodies (and firmware branches on the A9 III and A1 II) eventually picked up. So when people say "just use Eye AF" for a jumping spider, what's actually happening is general Real-time Tracking latching onto the highest-contrast cluster in your focus area, which is often the eyes anyway because insect eyes tend to be dark and reflective against a lighter body. It works more often than it should, but it's not the same targeted feature as photographing a dog or a heron.
At true 1:1 magnification with the 90mm, depth of field at f/8 is measured in single millimeters, and autofocus hunting at that magnification is slow and imprecise enough that most of my keepers come from manual focus, either racking the lens by hand or rocking my whole body forward and back while holding focus distance fixed. Where the AF earns its keep is the approach: acquiring a dragonfly perched 1.5 meters out, letting continuous AF and subject tracking keep it locked as I close the distance, then switching to MF for the final centimeters. Treat autofocus as a distance-closing tool for macro, not a framing tool, and you'll stop being frustrated by it.
Where it genuinely struggles
Backlit subjects against bright foliage are the worst case. The A7 IV's AF will frequently grab the leaf edge instead of the insect silhouette, especially with thin-legged subjects like crane flies or mosquitoes where there isn't much mass for the system to key on. I've had better luck in these situations dropping the AF area down to a small flexible spot and placing it manually on the body of the insect rather than trusting wide-area tracking to find it.
Lens Pairings That Actually Hold Up
The Sony FE 90mm F2.8 Macro G OSS is still the lens I reach for first, and I'd guess it's true for most A7 IV owners doing insect work. True 1:1 magnification, genuinely useful optical stabilization for handheld shots (though the CIPA rating drops off a cliff at close focusing distances, more on that below), and it's weather sealed, which matters when you're shooting after rain because that's when dew-covered subjects sit still.
For anyone wanting more magnification without an autofocus lens, the Laowa 100mm F2.8 2X Ultra Macro APO is worth the manual-focus learning curve. It native-mounts to E-mount, goes to 2:1, and the APO correction means less color fringing at the edges than older macro designs. I use it specifically for extreme close-crops on things like compound eyes or wing scales where the 90mm simply can't get close enough optically.
Budget route: Kenko extension tubes (the DG series, in 12mm/20mm/36mm) on the 90mm push the minimum focus distance in and increase magnification for a fraction of the cost of a second macro lens, at the expense of losing infinity focus while they're mounted. And a clip-on diopter like the Raynox DCR-250 on a longer telephoto (I've used one on a 200mm) buys you working distance for skittish subjects like hoverflies that bolt the second your shadow crosses them, which a true 1:1 macro lens simply can't give you because you have to get so close.
The Settings I Actually Use, By Situation
Insect macro isn't one set of settings, it's five or six different problems depending on whether the subject is dead still, twitchy, backlit, or you're in a controlled indoor setup. Here's what's actually in my camera for each scenario, not a generic "recommended settings" table copied from a spec sheet.
| Scenario | Aperture | Shutter | ISO / Flash | Focus Mode | Why |
|---|---|---|---|---|---|
| Dew-covered damselfly at dawn, tripod | f/8 | 1/60 | ISO 200, no flash | MF, focus bracketing on (15 shots, step 3) | Subject won't move; stack for depth without diffraction penalty of f/16 |
| Handheld dragonfly on a perch, breeze present | f/11 | 1/250 | ISO 800, single diffused flash | AF-C, flexible spot, small | Flash freezes micro-movement from wind; f/11 buys a bit more DOF margin for handheld error |
| Jumping spider, actively moving | f/13 | 1/200 | ISO 1600, twin macro flash (Godox MF12) | AF-S, single point, manual recompose | No time for bracketing; twin flash keeps both eyes lit without a single hot spot |
| Backlit wing detail, skittish hoverfly | f/5.6 | 1/1000 | ISO 1250, no flash (natural backlight) | MF, rocking focus | Wide aperture isolates translucency in the wing; shutter speed covers wingbeat blur and hand shake at distance |
| Studio light-box, pinned/rehabilitated specimen | f/16 | 1/125 | ISO 100, two softboxes | MF, focus rail + bracketing (40+ shots) | Subject is fully static; deep stack tolerates diffraction softness because stacking recovers detail |
Depth of Field Is the Real Enemy, Not Light
Everyone worries about light in macro work, but the actual limiting factor is depth of field. At 1:1 on the 90mm, even f/16 gives you a sliver of sharp focus, maybe 1-2mm depending on subject distance, and diffraction on a 33-megapixel sensor starts visibly softening detail past roughly f/11 anyway. That's the tension: stop down for depth, and you lose resolution to diffraction; open up for sharpness, and almost nothing is in focus.
The A7 IV's built-in focus bracketing (accessible from the drive mode menu, up to 299 frames, adjustable step width) is the practical answer for static subjects. I typically run 15-30 frames at step 3 for a resting dragonfly and blend them later in stacking software. For anything that might move mid-sequence, which is most live insects, I've had far better luck taking three or four manually-focused frames at slightly different focus points and blending those than trying to run a 30-frame automated bracket on something that could fly off after frame six.
Lighting Something Smaller Than a Fingernail
Sony's own twin macro flash, the HVL-MT24AM, is old at this point (it predates the A7 IV by years) but it still mounts and fires fine on the Multi Interface Shoe if you can find one used. Most people I know doing this seriously have moved to the Godox MF12 twin-lite macro kit instead: cheaper, smaller, and the ring-mounted twin heads let you dial each side independently, which matters for controlling shadow on a rounded subject like a beetle's back.
One thing that trips people up moving from wildlife to macro: at these working distances your flash sync speed matters less than your shutter type. I shoot mechanical shutter for flash work at high magnification rather than the silent electronic shutter, because rolling shutter artifacts on a fast-moving subject (a dragonfly adjusting its wings, for instance) get exaggerated at extreme crop factors in a way that's much less forgiving than on a normal frame.
What Happens After the Shutter: Culling a Few Hundred Nearly Identical Frames
A single decent focus-bracket session on one subject can run 20-40 frames. Multiply that across an afternoon chasing six or seven different insects and you're looking at 300+ RAW files that all look the same at a glance, just shifted a millimeter of focus apart. Scrolling through that manually to find which frame in each stack is actually the sharpest is the part of macro work nobody enjoys, and it's the part where I've started leaning on imagic. It scores sharpness locally across the sequence and groups near-duplicate bursts together, so instead of zooming into forty thumbnails one by one I can see which two or three frames in a stack are the actual focus-peak candidates before I even open a stacking program.
Because everything runs locally rather than uploading to a cloud service, it's also just faster on a field laptop with no signal, which matters more than I expected the first time I tried culling a day's shoot from a car in a nature reserve parking lot with no connectivity at all. The other piece I use is the apply_my_style preset, trained on my own past edits rather than a generic macro preset pack, since insect photos tend to need a fairly consistent treatment (slightly cooler shadows, restrained saturation on greens so backgrounds don't compete with the subject) and doing that by hand across a big batch gets tedious fast.
Field Habits That Matter More Than Gear
Shoot early. Insects are cold-blooded, and in the hour after sunrise most of them are still too sluggish to fly off the second you approach, which is a bigger factor in your keeper rate than any camera setting. Set white balance manually rather than trusting Auto WB; shooting against green foliage backgrounds, AWB on the A7 IV drifts warm and inconsistent frame to frame in a way that's genuinely annoying to correct later across a whole session. And watch the wind more than you watch your histogram. A breeze that feels negligible standing up can move a reed or leaf enough at 1:1 magnification to blur an otherwise perfectly focused frame, even at 1/250.
If you're new to this and coming from general wildlife or landscape shooting, it's worth reading up on building a faster culling workflow before your first big macro outing, because the volume of similar-looking frames this kind of shooting produces catches most people off guard the first time.
Frequently Asked Questions
Should I have bought the A7R IV instead, for the extra resolution when cropping into small subjects?
I get asked this a lot and my honest answer is no, not for insect work specifically. The A7R IV's 61 megapixels sound appealing for cropping, but the buffer is shallower and clearance for continuous shooting during a focus-bracket run is tighter, which matters more than the extra megapixels when your subject might move between frame 8 and frame 9. The 33-megapixel files from the A7 IV crop plenty for web and print use, and the deeper buffer has saved more shots for me than the resolution difference has cost me in detail.
Is the in-body stabilization actually useful at macro distances, or do I need a tripod every time?
Partially useful. Sony's CIPA rating for the A7 IV's IBIS (5.5 stops) is measured at normal shooting distances, not at 1:1 magnification, and stabilization effectiveness drops noticeably the closer you focus because angular movement translates into much larger apparent shifts at high magnification. For handheld work I still treat it as buying me maybe a stop and a half of real-world help, not five and a half. For anything static, dew-covered subjects, pinned specimens, deliberate focus stacks, a tripod or a dedicated macro focus rail is still the right call.
Can the built-in focus bracketing replace a dedicated macro focusing rail?
For subjects that hold still, largely yes, and it's what I use for 90% of my static stacking now rather than a rail. The camera racks focus electronically between frames instead of physically moving the camera, which is faster to set up and works fine for lab or field-static subjects. Where a rail still wins is extreme magnification work above 2:1 with a bellows or reversed lens setup, where focus-by-wire electronic stepping isn't fine enough and physical rail movement gives you better control over the increment size.
What's a realistic minimum working distance I should expect from a 1:1 macro lens on this body?
With the 90mm G at true 1:1, you're working with roughly 8-9cm of clearance between the front element and the subject, which sounds close and is close: close enough that your own shadow becomes a real problem, and close enough that anything with a functioning nervous system (most jumping spiders, most flies) will often bolt before you get there. That's the practical argument for extension tubes or a diopter on a longer lens when the subject is easily spooked, even though you lose some optical quality compared to a purpose-built macro lens.