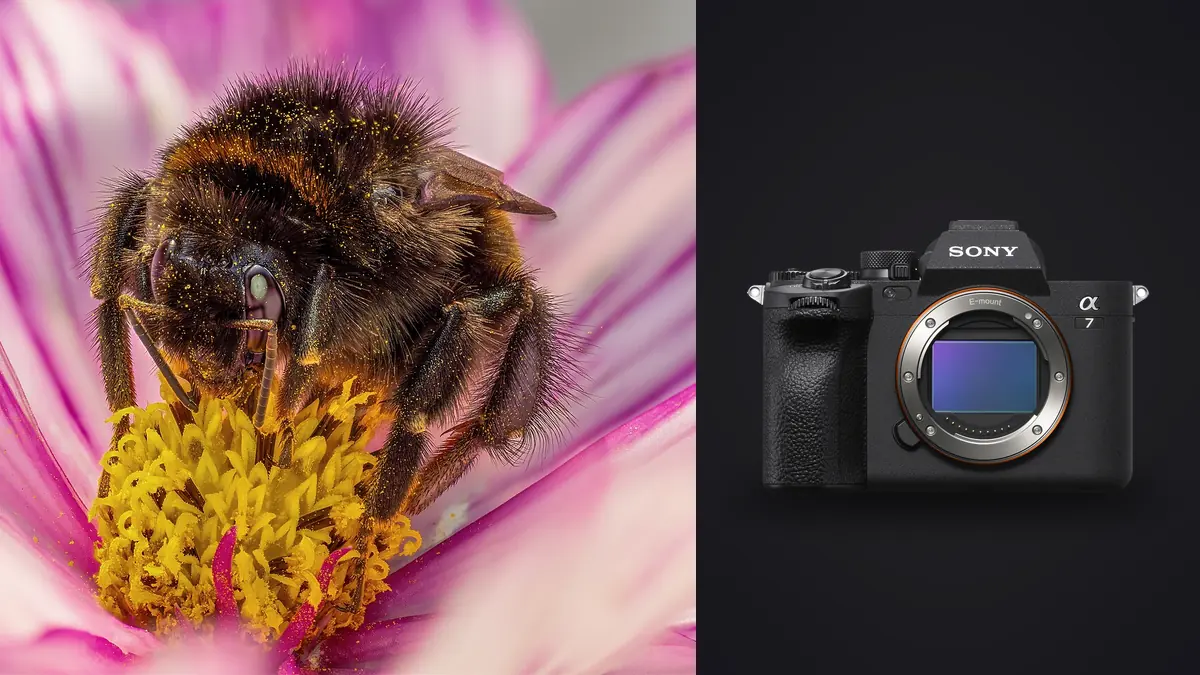
The Sony A7 IV wasn't built as a macro camera. There's no dedicated macro mode, no built-in extension, nothing that marks it out from any other full-frame body in Sony's lineup. What it has instead is a 33-megapixel sensor with enough resolution to crop hard, in-body stabilization rated to 5.5 stops, a focus bracketing function buried in the menu that almost nobody talks about, and autofocus that is very good at recognizing eyes on mammals and birds and completely indifferent to a jumping spider's eight of them. That combination turns out to matter a lot for insect work, sometimes in the camera's favor and sometimes not.
I've spent parts of the last two summers shooting dragonflies at a reservoir edge and hoverflies in a garden with an A7 IV paired mostly with a 90mm macro lens. Some of what gets written about this camera for macro use reads like it was assembled from a spec sheet rather than a field bag. This is the version with the parts that actually change how a session goes.
What the sensor and shutter actually give you
Thirty-three megapixels is enough to shoot a bee at arm's length with a 90mm lens and still crop in 20-30% in post without the file falling apart, which matters because true 1:1 macro range is often too close for skittish insects to tolerate. You get some working room back by shooting a little wider and cropping.
The stabilization is rated at 5.5 stops with an unstabilized lens (higher with OSS lenses that coordinate with the body), and at macro distances that's a genuine help for handheld shots in the 1/60 to 1/125 range where camera shake, not subject motion, is what's ruining the frame. It does not fix subject movement. An insect's own micro-movements at high magnification (breathing, antennae twitching, wind moving a stem) will still blur a shot the stabilizer can't touch.
The shutter is where the camera shows its age a little. Full autofocus and auto-exposure tracking through the burst tops out around 6fps in 10-bit compressed raw. The 10fps figure Sony advertises requires either 8-bit JPEG/HEIF capture or "speed priority" continuous shooting, which locks exposure and focus to the first frame of the burst. For a static or slow-moving subject that's irrelevant. For a dragonfly taking off, it means you either accept 6fps with full tracking or 10fps with focus locked at frame one, and at macro distances a locked focal plane goes soft within two or three frames of the subject moving forward or back.
Electronic shutter is worth knowing about for skittish subjects, since it's silent and won't spook a resting butterfly the way the mechanical shutter's clack can. The tradeoff is rolling shutter: this isn't a stacked sensor like the A9 series, so fast wing beats captured in full electronic shutter mode can show skew or a slight banana warp on the wings. For anything with wings moving quickly (hoverflies especially), I'll switch back to the mechanical shutter and eat the noise.
Autofocus at macro distances: what actually works
Real-time Eye AF on the A7 IV recognizes human, animal, and bird eyes. It does not have an insect-specific subject recognition mode, and in practice it will not reliably lock onto a compound eye the way it locks onto a bird's. At true macro magnifications (anything approaching 1:1) autofocus in general becomes unreliable regardless of subject, because depth of field is measured in millimeters and the AF system is hunting through a plane that thin.
What works better in the field is Direct Manual Focus (DMF): half-press for the camera to get you roughly close with AF, then fine-tune manually while the half-press is held. Combined with focus peaking set to a high-contrast color like red or yellow, this gets you to critical focus faster than waiting on AF-C to settle at high magnification. For static subjects (a beetle resting on a leaf at dawn before it's warmed up enough to move) I'll often switch to full manual focus and use the "focus and recompose by rocking the camera" method, moving the whole body forward and back a few millimeters rather than turning the focus ring, since that's faster and more precise at 1:1 than trying to dial in focus with the lens.
One underused setting: shooting in APS-C/Super35 crop mode gives roughly 1.5x reach at 14.6 effective megapixels. For a bee or dragonfly that won't tolerate you getting closer, cropping in-camera this way buys working distance without adding a teleconverter or a second lens, at the cost of resolution you'd probably be cropping away in post regardless.
Lens pairings that actually make sense for insects
The lens matters more than the body for this genre, and working distance (how far the front of the lens sits from the subject at maximum magnification) is the number that decides whether an insect tolerates you or flies off. Here's how the common options for the A7 IV compare, based on what I've either shot with directly or fielded from other photographers using the same combinations.
| Lens | Max magnification | Approx. working distance at 1:1 | Stabilization | Best for |
|---|---|---|---|---|
| Sony FE 90mm F2.8 Macro G OSS | 1:1 | ~13cm | OSS + IBIS | General all-rounder, native AF speed |
| Sony FE 50mm F2.8 Macro | 1:1 | ~4cm | IBIS only | Static subjects, flowers, product-style detail (too close for most insects) |
| Sigma 105mm F2.8 DG DN Macro Art | 1:1 | ~13cm | IBIS only | Sharper corners than the Sony 90mm, heavier to hand-hold all day |
| Tamron 90mm F2.8 Di III Macro VXD | 1:1 | ~9cm | IBIS only | Fastest AF motor of this group, good for opportunistic non-macro shots too |
| Laowa 100mm F2.8 2X Macro APO | 2:1 | ~6cm at 2:1, more at 1:1 | None (manual focus only) | Extreme magnification on dead or very still subjects |
For live insects, the 90mm-105mm range is the sweet spot. A 50mm macro puts your lens hood close enough to cast a shadow over most bugs before you're at working magnification, and that shadow alone is often enough warning for them to leave. The Laowa is genuinely excellent for 2:1 detail shots of dead specimens, wing scales, or anything pinned and still, but it's manual-focus-only glass and not something I'd reach for chasing a live dragonfly.
Aperture and diffraction at close range
This is the part of macro shooting that catches people who are used to normal focal distances off guard: as you focus closer, the effective aperture gets smaller than the number printed on the lens barrel, a result of the "bellows factor" in close-focus optics. At 1:1 magnification, roughly two stops of light and depth of field get eaten by this effect, which means an aperture that reads f/11 on the lens is behaving closer to f/22 in practice.
On a 33-megapixel sensor, diffraction softening becomes visible starting around f/11-f/13 under normal conditions. Combine that with the bellows factor at 1:1 and you can be well into visibly soft, diffraction-limited territory while the aperture ring still says something moderate.
| Marked aperture | Approx. effective aperture at 1:1 | What you'll see on a 33MP file |
|---|---|---|
| f/4 | ~f/8 | Sharp, but depth of field often under 1mm at high magnification |
| f/8 | ~f/16 | Usable working depth for a small insect's whole body, minimal diffraction loss |
| f/11 | ~f/22 | Noticeably softer at pixel level, more usable DOF |
| f/16 | ~f/32 | Visibly diffraction-limited, only worth it if DOF is the priority over pixel sharpness |
In practice I sit around f/8-f/11 marked for live single-frame insect shots and accept the depth of field I get, or move to focus bracketing when the subject is cooperative enough to hold still.
Focus bracketing and stacking a static subject
The A7 IV has an in-camera focus bracketing function that most people who buy this camera never open. It shoots a sequence of frames (up to 299) stepping the focus point forward by an amount you set, then leaves you to stack them yourself in software like Helicon Focus or Photoshop; the camera doesn't blend anything itself. For dew-covered insects at first light, when they're too cold to move, this is the single best macro trick the A7 IV offers. A cold beetle or damselfly at dawn will sit for a 40-60 frame bracket sequence without moving, and stacking that at home turns a subject with a millimeter of usable depth of field into an image that's sharp from the front legs to the back of the thorax.
The catch is what a session like that does to your card. A single 60-frame bracket in compressed raw runs somewhere around 2.5-3.5GB, and a good dawn session might produce eight or ten of these sequences alongside regular handheld shots. Sorting through hundreds of near-identical frames afterward, picking which ones are actually sharp enough to feed into the stack and which are the two or three throwaway frames where wind moved the stem, is not a fun way to spend an evening by eye. This is where I lean on imagic's local sharpness scoring to rank a bracket sequence by actual focus quality before I touch Helicon, and its burst clustering to group the sequence together automatically instead of scrolling through a folder of files that all look nearly the same. It runs on the machine, no upload involved, which matters when you've come back from a reservoir with a card full of raw files and don't want to wait on anything.
Field settings by scenario
What actually changes session to session isn't the camera menu overall, it's which corner of it you're using for a given subject. This is roughly what I set for the situations that come up most in a summer of insect shooting.
| Scenario | Shutter | Aperture (marked) | Drive mode | Focus method |
|---|---|---|---|---|
| Cold, dew-covered insect at dawn | 1/125s (tripod, so slower is fine) | f/8, using focus bracketing | Bracket sequence | Manual, peaking on |
| Bee or hoverfly actively foraging | 1/1000s minimum | f/8-f/11 | Continuous, 6fps (raw + AF tracking) | DMF, half-press then fine-tune |
| Dragonfly perched, wary of approach | 1/500-1/800s | f/8 | Single shot, mechanical shutter (silent option if very skittish) | Manual, rock-to-focus |
| Dragonfly in flight | 1/2000s or faster | f/5.6-f/8 (accepting shallow DOF) | Continuous, mechanical shutter | AF-C, wide zone, accept a lower hit rate |
Flight shots of dragonflies are genuinely the hardest thing to get consistently with this body. The AF system does fine on birds because it recognizes a bird's silhouette and eye; it has no equivalent model for an insect's shape, so tracking a dragonfly through a frame is closer to tracking a small, fast, irregular blob. I keep hit rates for in-flight insect shots low on purpose in my own expectations, maybe one usable frame in fifteen to twenty, and shoot in short continuous bursts rather than holding the shutter down for a long stretch, since the buffer and card write speed matter more than people expect once you're shooting 14-bit raw at 6fps for several seconds at a time.
Lighting: why most insect macro is flash-lit, not natural light
Once you're stopping down to f/8-f/11 marked (closer to f/16-f/22 effective at 1:1) to get workable depth of field, available light usually isn't enough, especially early or late in the day when insects are actually active and cooperative. Most serious macro-insect work is done with some kind of flash, whether that's a single speedlight on a bracket with a diffuser, or a proper twin-flash macro rig like the Godox MF12 pair mounted around the lens barrel. The A7 IV syncs cleanly with Sony's flash system and third-party TTL flashes built for E-mount, and high-speed sync is available if you want to shoot wide open with fill flash rather than stopped down, though for insect work I mostly want the smaller aperture and use flash to compensate for the light it costs.
A ring light or diffused twin flash also helps flatten the harsh midday shadows that a single small flash throws on a subject with as much surface texture as an insect's exoskeleton or wing venation. Underexposing the ambient background by a stop or two while the flash properly exposes the subject is a reliable way to get insect shots against a clean, dark background even in a busy garden.
Sorting and finishing the files afterward
A single afternoon of insect shooting on this camera, mixing handheld bursts with a few bracket sequences, routinely leaves me with 600-1,000 raw files, most of them near-duplicates of a subject that barely moved between frames, or bursts where only one or two frames out of a dozen actually nailed focus on the eye. Going through that by eye in Lightroom, zooming into each one to check sharpness at 100%, is the slowest part of the whole process and the part most likely to get skipped, which is how a genuinely good frame ends up buried in a folder nobody revisits. I run the card through imagic first: its local focus scoring flags which frames in a burst are actually sharp on the subject rather than the background, and the duplicate and burst clustering groups near-identical frames together so I'm reviewing one group decision instead of forty individual images. Everything runs on the machine, so a field laptop with no signal at a reservoir isn't a problem.
For color, insect subjects are unusually demanding: iridescent wing cases on beetles, the blue sheen on a damselfly's thorax, and the compound-eye colors that shift with viewing angle can all get flattened or shifted by an aggressive default profile. I've trained imagic's apply_my_style feature on a set of my own finished macro edits, so new sessions land closer to the color and contrast treatment I actually want before I open anything in a full editor, which saves a fair amount of the fiddly per-image color correction that used to eat the most time after a shoot. If you're building out a workflow around a lot of burst and bracket shooting generally, the culling stage is worth reading up on separately; how AI photo culling works covers the mechanics in more depth than fits here, and these workflow tips apply just as well to a macro session as to any other high-volume shoot.
Where the A7 IV falls short for this genre
Worth saying plainly: if insect photography is the only thing you shoot, there are better tools for it. A camera with a stacked sensor and genuinely fast full-tracking burst (something in the A9 or A1 range) will land more in-flight dragonfly shots per session. A camera with in-camera stacking output, rather than bracket-and-blend-later, saves a step for anyone doing heavy stacking work. And a body with a smaller, lighter form factor is easier to hand-hold at ground level for an hour chasing something small. The A7 IV is a generalist body that happens to be good enough at macro and insects when you understand its limits, not a specialist tool built for this genre. For a photographer who shoots weddings, landscapes, and the occasional macro session on the same body, that's a reasonable tradeoff. For someone shooting insects exclusively, it's worth handling one of the more specialized options before buying.
Frequently Asked Questions
Does the Sony A7 IV's Eye AF work on insects?
No. Real-time Eye AF on this body recognizes human, animal, and bird eyes, but there's no insect-specific subject detection. At macro distances autofocus in general struggles regardless of subject recognition, since depth of field is often under a millimeter. Manual focus with peaking, or Direct Manual Focus to fine-tune after an initial AF lock, is more reliable than relying on AF-C for true macro-range insect shots.
What's the best lens to pair with the A7 IV for live insects?
A 90mm-105mm macro lens gives enough working distance to shoot 1:1 without your lens hood spooking the subject. Sony's own FE 90mm F2.8 Macro G OSS is the most common pairing and has fast native AF plus optical stabilization on top of the body's IBIS. The Sigma 105mm and Tamron 90mm are both solid E-mount alternatives if you want to compare AF speed or price against the Sony option.
Can the A7 IV do focus stacking for macro shots?
It can shoot a focus-bracketed sequence in-camera (up to 299 frames, adjustable step size), but it does not blend or stack the frames itself. You take the bracket sequence and process it into a single stacked image in separate software such as Helicon Focus or Photoshop's focus-stacking tool. It's most effective on still or slow-moving subjects, like insects at dawn before they've warmed up enough to move.
Is 10fps burst shooting on the A7 IV fast enough for insects in flight?
The advertised 10fps figure requires either 8-bit capture or locking focus and exposure to the first frame of a burst, which isn't ideal for erratic subjects like dragonflies. With full raw capture and continuous AF/AE tracking, the practical burst rate settles closer to 6fps. It's workable for insects in flight but expect a lower hit rate than you'd get on a body built around a stacked sensor and faster continuous tracking.