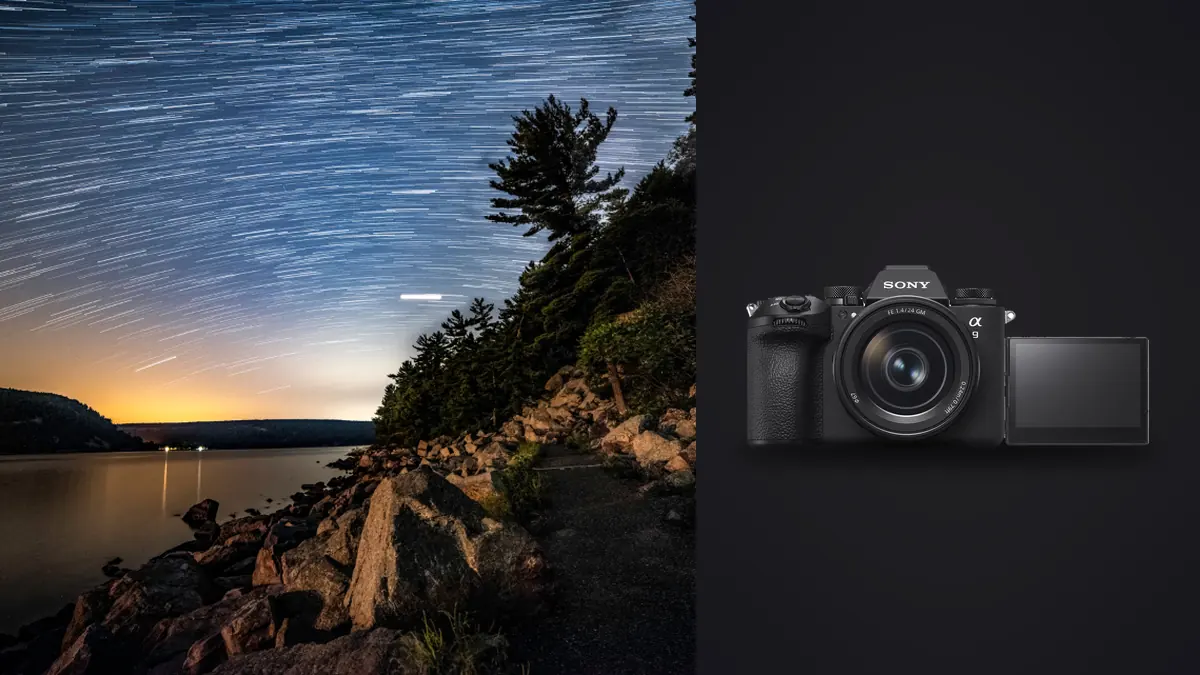
A Sports Camera at the Edge of a Dark Sky Site
I did not buy a Sony A9 III to photograph stars. I bought it for lacrosse sidelines and cyclocross mud, for the 120fps bursts and a shutter that does not care how fast anything is moving. It took a friend talking me into a weekend at a Bortle 3 site two hours outside of town before I pointed the thing straight up. What I found surprised me in both directions: the global shutter sensor that makes this camera brilliant for sport does something genuinely different to a night sky exposure than any rolling-shutter Sony I have used, and not all of it is good news.
This is not a "best camera for astrophotography" piece. The A9 III was never designed for that job, and there are cheaper bodies that will out-resolve it under a dark sky. This is a field guide for the specific situation a lot of Sony shooters are actually in: you already own the A9 III for something else, you want to shoot the Milky Way on the same trip, and you want to know exactly what settings and workflow get you a clean stacked image instead of a noisy disappointment.
What the Global Shutter Actually Changes Under the Stars
The A9 III is the first full-frame global shutter camera on the market, and the sales pitch is all about sports: zero rolling shutter distortion, flash sync at any shutter speed up to 1/80,000s, and blackout-free 120fps shooting. None of that matters for a stationary tripod pointed at Cygnus. But the sensor architecture that makes global shutter possible does carry over into how the camera behaves at high ISO in the dark, and it is worth understanding before you plan a shoot around it.
No Rolling Shutter, No Banding, But a Noise Trade-off
Every pixel on the A9 III's 24.6MP sensor reads out simultaneously instead of line by line. That is irrelevant for a 10-second static exposure of the sky, since nothing is moving during the frame. What is relevant is that the additional circuitry needed to read every pixel at once adds a bit more read noise than you get from a comparable rolling-shutter sensor at the same ISO. It is not dramatic, and you will not see it in a single frame viewed at normal size, but pixel-peep a high-ISO astro frame from the A9 III against one from an A7 IV and you will notice the A9 III needs slightly more noise reduction (or slightly more stacked frames) to land at the same cleanliness. This is the honest trade for a sensor built to shoot 120 frames a second without artifacts.
The ISO 250 Floor and What It Costs You
The bigger practical issue for night work is the base ISO. Sony set the A9 III's native floor at ISO 250, with no extended low setting below that. Most full-frame bodies start at ISO 100, and that gap matters more than it sounds like it should. A lower base ISO generally means a cleaner noise floor to build exposures from and more dynamic range headroom in the shadows, which is exactly where the faint stuff in a night sky lives. Shooting at ISO 250 as your absolute minimum means you are already a stop and a third above where an A7 IV or A7R V would start, and every exposure you take at night inherits that. It does not ruin the camera for astro. It does mean you plan around it rather than pretending it is not there.
Field Settings That Actually Work
Because of that ISO floor, I stopped trying to chase one perfect long exposure with the A9 III and moved to stacking a stream of shorter frames instead. This also happens to suit the camera: dual CFexpress Type A / SD UHS-II slots and a body built to handle long high-speed bursts without choking make it comfortable running an interval sequence for twenty or thirty minutes straight.
Exposure Numbers for This Sensor's Pixel Pitch
The A9 III's 24.6MP full-frame sensor works out to roughly 5.94-micron pixels, on the finer side for a body this age, which means star trailing shows up sooner than it would on a lower-resolution sensor at the same focal length. These are the numbers I actually use in the field, rounded to what I dial in rather than a theoretical maximum:
| Lens / Focal Length | Aperture | Max single-frame shutter before trailing | Practical ISO for the Milky Way core | Typical subframes per stack |
|---|---|---|---|---|
| Sony FE 14mm f/1.8 GM | f/1.8 | ~8 sec | 3200-4000 | 40-60 |
| Sony FE 20mm f/1.8 G | f/1.8 | ~6 sec | 4000-5000 | 50-70 |
| Sony FE 24mm f/1.4 GM | f/1.4 | ~5 sec | 3200-4000 | 60-90 |
| Sony FE 35mm f/1.4 GM | f/1.4 | ~3.5 sec | 4000-5000 | 90-120 |
Notice the pattern: shorter focal lengths tolerate longer single exposures, so you can run lower ISO and take fewer frames to hit the same total integration time. At 14mm, fifty frames at eight seconds gets you roughly six and a half minutes of stacked light. At 35mm you need closer to a hundred frames at three and a half seconds to land in the same territory. Both approaches work. Which one you pick depends on whether your priority is a wider field of view or tighter framing on a specific part of the sky.
Turning Off the Things That Hurt You
Long exposure noise reduction should be off for any of this. It doubles your time between frames (the camera takes a dark frame of equal length after every exposure) and it is doing a job the stacking software will do better anyway. High ISO NR barely touches RAW files on Sony bodies regardless of the setting, it mostly affects the in-camera JPEG, so leave it wherever is convenient and do not worry about it. What you do want is electronic front curtain shutter behavior staying consistent, since the A9 III has no mechanical shutter to switch between in the first place. That is one less thing to think about compared to older bodies.
Stacking Instead of One Long Exposure
Star stacking means taking many shorter exposures of the same static composition and combining them in software, aligning on the stars and averaging out the noise, rather than trying to get everything from one long exposure. Given the A9 III's ISO floor, this approach suits it better than chasing a single 20 or 25 second frame at ISO 6400, where noise stacks up fast with no low-ISO cushion to fall back on.
Built-in Interval Shooting
The A9 III has a built-in interval shooting function in the menu, so you do not need an external intervalometer or a phone tethered over Bluetooth. Set your subframe count, exposure length, and interval gap, and let it run. I add roughly one second of buffer between frames beyond the exposure time itself, since the camera needs a moment to write each RAW file to the card even with a fast CFexpress Type A card installed. Power is the other constraint: the NP-FZ100 battery is rated for a few hundred shots depending on temperature, and cold nights drain it faster than the spec sheet suggests. USB-C power delivery while shooting works on this body, so a power bank clipped to the tripod leg buys you a much longer session than the battery alone. If you want more on tightening up the shoot-to-edit side generally, I put together ten tips for a faster photo workflow that hold up just as well on a night session as they do on a long daytime shoot.
Culling a 150-Frame Stack Before It Ever Reaches Stacking Software
Here is where the workflow actually gets tedious without help. A single stacking session at 24mm and f/1.4 might leave you with 80 to 100 RAW frames, and not all of them are usable. Wind vibration on the tripod, a truck passing on a distant road, dew creeping across the front element halfway through, or a focus micro-shift from temperature drop can all soften individual frames without being obvious on a camera's rear screen at 2am. Feed a handful of soft frames into DeepSkyStacker or Sequator and they drag the whole averaged result down, adding a faint double-star ghosting effect that is a pain to track back to its source.
This is the one part of the night I do not do by eye anymore. I run the night's capture through imagic's local sharpness scoring before touching any stacking software, since it flags the frames that are measurably softer than the rest of the sequence, the ones a tired eye at a campsite table would probably wave through. It also clusters the near-duplicate frames from a sequence together, which matters more than it sounds like it should when you are staring at ninety nearly identical star fields trying to remember which five you already flagged as sharp (the underlying culling process is the same one that works for a wedding reception burst, it just happens to be useful out here too). Because imagic runs entirely offline, this happens at the trailhead or the campsite with zero signal, not after driving back into range of a cell tower.
Lens Pairing and Field Notes
The A9 III shares its mount and metering with the rest of Sony's E-mount lineup, so the fast wide primes that work for any astro body work here too. The 14mm f/1.8 GM is the one I reach for most for a full Milky Way arc, the 24mm f/1.4 GM for tighter compositions with more foreground presence, and the 20mm f/1.8 G when I want something lighter to carry on a longer hike in to a dark site. None of these are astro-specific lenses, they are the same GM and G primes people buy for weddings and portraits, which is part of why the A9 III's night sky output looks as good as it does despite the sensor's ISO ceiling working against it.
Weather Sealing, Cold, and Dew
Sony rates the A9 III's weather sealing at the same level as the A9 II, and in practice it has handled heavy dew and a couple of genuinely cold nights near freezing without complaint. Dew on the front element is the actual enemy, not the camera body. A basic USB dew heater band around the lens barrel, powered off the same bank running the intervalometer session, solved more problems for me than any camera setting has.
Manual Focus, Every Single Time
Autofocus on a star field is not reliable on any mirrorless body, the A9 III included, so switch to manual focus and use focus magnifier on the brightest star or a distant light before starting the sequence. Do this fresh every session. Focus that was perfect at sunset can drift half a stop soft by midnight as the lens barrel contracts in falling temperature, which is exactly the kind of subtle softness that a sharpness-scoring pass catches and a glance at the rear screen usually does not.
From Stacked Frame to Finished Image
Once DeepSkyStacker or Sequator has produced a stacked composite, the actual edit is closer to normal landscape processing than anything astro-specific: pull the shadows up carefully, control the highlights on the core, balance the foreground exposure if you blended a separate frame for it. If you shoot enough of these over a season, keeping the look consistent from one dark-sky trip to the next becomes its own small problem, especially if months pass between outings and you forget exactly how you handled the last one. I trained imagic's apply_my_style feature on a batch of my own past night sky edits, and now applying that same starting point to a fresh stacked composite gets me most of the way to a finished look before I touch a slider by hand. It is not a substitute for judgment on any individual image, but it saves reconstructing the same color decisions from scratch every trip.
Frequently Asked Questions
Is the Sony A9 III's global shutter sensor actually good for astrophotography?
It is not a disadvantage in the way people sometimes assume. Global shutter changes nothing about a static night sky exposure, since there is no motion within the frame for rolling shutter artifacts to appear in. The real factor is that the sensor runs slightly noisier at high ISO than a comparable rolling-shutter chip, and the ISO 250 floor removes the low-ISO cushion other bodies have. Neither is disqualifying, both just mean you lean more heavily on stacking multiple frames to reach a clean result.
What ISO should I actually use given the ISO 250 floor?
For Milky Way core detail with a fast wide prime, ISO 3200 to 5000 is the practical working range in the field settings table above. Going lower than that at night usually means underexposing the faint detail you are trying to capture in the first place, which defeats the point of having a low base ISO to begin with. Going much higher adds noise the stack has to work harder to remove.
Do I need a star tracker, or is stacking enough?
A star tracker (something like a Sky-Watcher Star Adventurer) lets you take longer individual exposures at lower ISO by physically compensating for Earth's rotation, and it is the better choice if you are after a deep, richly detailed single composition of a specific target. Stacking short untracked frames, the approach this guide focuses on, gets you most of the way there for wide-field Milky Way shots with foreground interest, without carrying a second piece of equipment into the field. I use both depending on the shot, but stacking alone covers most nights.
Which Sony lenses actually pair best with the A9 III for night sky work?
The FE 14mm f/1.8 GM, 20mm f/1.8 G, and 24mm f/1.4 GM cover the range I actually use, all fast enough to keep exposure times and ISO reasonable given this sensor's pixel pitch. There is nothing astro-specific about any of them, they are the same primes Sony sells for events and portraiture, so if you already own one for other work it will do the job here too.