A personal editing style is a pattern of decisions, not a collection of favorite slider values. It appears in how a photographer protects highlights, places skin, separates shadows, handles mixed light, controls secondary colors, and decides which scenes deserve an exception. A learned style profile can turn those patterns into a useful starting point, but only when the source edits are coherent and the results are evaluated across the conditions the profile will face.
imagic documents apply_my_style as using a profile learned from photographs the user edited. It is not a stock preset and should not be described as one. The tool set also includes calibration, learning, example matching, profile inspection, and application functions. Exact parameters should be discovered from the installed build with imagic tools before any automation is written.
Define the style in words before selecting examples
Write a one-page style brief. Describe tonal structure, white-balance tendencies, skin priorities, color hierarchy, local contrast, texture, and output. Use observable language. "Warm highlights with neutral whites" is more useful than "sunny." "Open dark fabric without gray blacks" is more useful than "soft." Include the conditions under which the rule changes.
Add protected anchors. Skin should remain credible across the range of people photographed. Neutral products may need to stay neutral. Black clothing may need visible texture. A night reception should not be lifted until it resembles daytime. These constraints help distinguish a consistent style from a repeated color cast.
Identify the intended domain. A profile built around daylight family portraits may not be a sensible starting point for concerts, interiors, products, or astrophotography. Narrow scope is not a weakness. It makes evaluation clearer and reduces the number of contradictory examples.
Audit the edited library for consistency
Review finished projects at thumbnail and normal size. Look for periods where the editing approach changed, client-specific color requirements, experimental grades, outsourced retouching, old camera profiles, and files that were exported before the edit was complete. Separate technically final work from images merely marked as favorites.
Group candidates by light: open shade, direct sun, window light, warm interiors, mixed artificial light, flash, and night. Within each group, compare black point, highlight color, skin, foliage, white objects, and saturation. If the choices vary without an intentional reason, the library is not yet a single teaching set.
Do not select only hero photographs. A calibration set needs ordinary frames that reveal routine decisions, difficult files that demonstrate recovery limits, and quiet transitions that show how the style behaves without dramatic light. Exclude duplicates so one scene does not dominate through volume.
Prepare source and reference pairs carefully
A learning workflow is strongest when the relationship between an original and its approved edit is unambiguous. Preserve the camera RAW, the edit metadata or final reference required by the selected method, and reliable identifiers. Do not mix an image whose final appearance came from extensive compositing or external retouching unless that transformation is within the profile's documented scope.
Check orientation, crop, camera profile, white balance, and color space. A rendered reference in a small web color space may not convey every decision from the RAW workflow. If examples come from multiple editors, verify that each was approved to the same brief. Remove files that contain accidental masks, uncorrected lens problems, or temporary proof grades.
Keep a manifest of included project, scene, camera, lighting family, and reason for inclusion. The manifest does not need private client details. It gives the future operator enough context to understand why an example belongs and to remove it if the style changes.
Choose the documented calibration route
The imagic tool summary lists start_style_calibration and record_style_calibration for a guided calibration path, learn_style_from_library for learning from existing work, and match_style_from_examples for example-based matching. These names indicate different inputs and states; their exact schemas must be read from imagic tools.
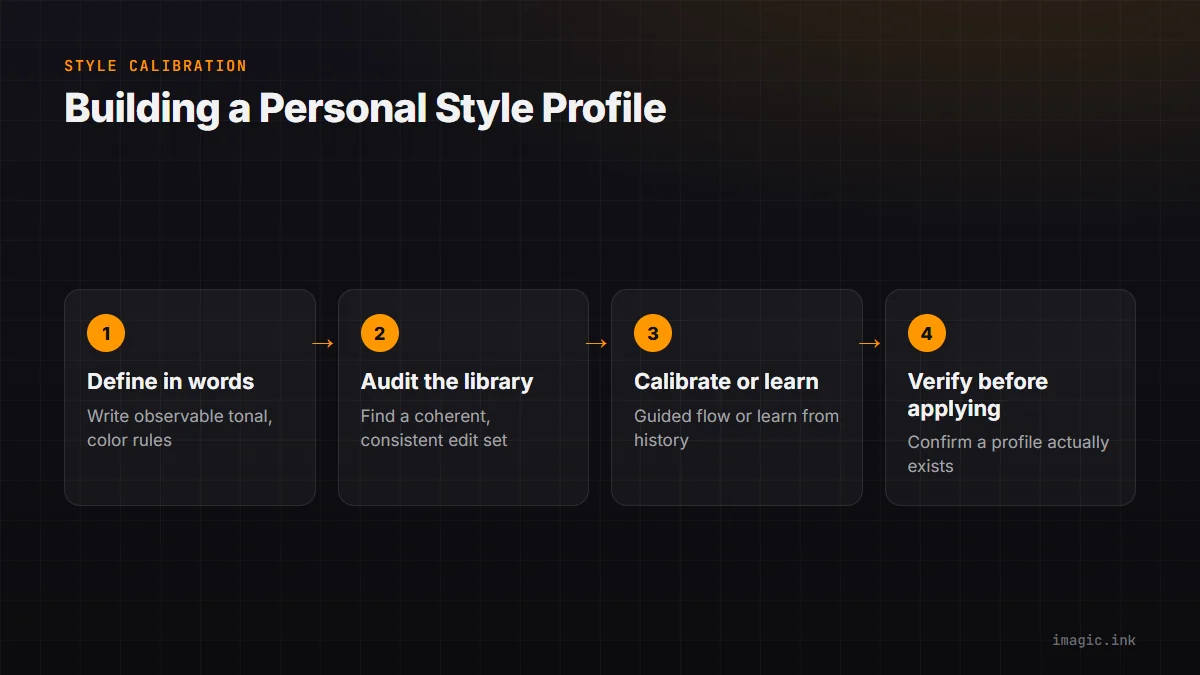
Use a guided route when the process needs deliberate user decisions recorded in sequence. Use a library route when a clean body of finished work already exists. Use example matching when references have been curated specifically for the target look. Do not call every method in succession merely because each exists. Choose the path that matches the available evidence.
Run calibration on a copied, backed-up job under the correct user account. Record the selected examples and tool result. If the tool reports missing or invalid inputs, fix the source set instead of substituting unrelated photographs to make the operation complete.
Verify that a profile exists before application
Call get_style_profile after training and before applying the style to production photographs. If it returns no profile, the workflow is not ready. A script or agent should stop with a clear instruction to calibrate or learn. It should not silently choose a preset or claim that a personal style was applied.
Record the profile state and the date or version information the tool exposes. Preserve the calibration manifest beside the studio's workflow documentation. If a new profile replaces an older look, store representative approved exports from both so jobs can be matched to the correct era.
Profile existence does not prove quality. It proves only that applicable state is available. The next step is a blind validation on photographs excluded from the calibration source.
Create a holdout validation set
Select unseen images from the same intended domain. Include straightforward light, difficult exposure, mixed color, different skin tones, saturated subjects, and at least one condition near the edge of scope. Preserve the photographer's approved manual edits as references, but hide them during the initial review of profile output.
Judge the starting treatment by categories rather than a single impression: exposure direction, white balance, highlight shape, shadow separation, skin, dominant color, secondary color, and amount of correction required. Mark acceptable, repairable, and out-of-scope. A profile that performs well on daylight but consistently fails under mixed LED needs a boundary or additional coherent evidence, not a vague declaration that it is mostly accurate.
Compare sequences, not only isolated images. A style can look appealing one frame at a time while creating flicker across small exposure changes. Check adjacent photographs for unnecessary shifts in warmth, saturation, and black point.
Apply only to an explicit selected scope
apply_my_style accepts selected photo IDs according to the documented example. Build that list from reviewed keepers or another explicit rule, then report its size before application. Avoid applying across the entire library because a natural-language request said "the shoot" when multiple jobs or rejected frames are present.
The normal imagic sequence is ingest, analyze, inspect, apply the user's learned style to chosen keepers, and export. Culling remains reversible, and edits are stored non-destructively until export. That supports an approval pass, but it does not remove the need to confirm that the correct photographs received the correct profile.
Start with a representative subset from every lighting family. Review it at calibrated viewing conditions appropriate to the delivery. If the subset needs a consistent correction, decide whether that belongs in scene-level normalization, the profile, or a separate output treatment. Do not retrain the global style around one unusual venue.
Separate profile behavior from scene correction
A personal look and basic input correction solve different problems. Exposure variation, changing light sources, lens behavior, and camera profiles can make the same creative intent appear inconsistent. Normalize scenes enough that the profile is not asked to repair every capture error. Preserve intentional underexposure or color when it carries the story.
Use scene anchors: one representative frame for window light, open shade, warm interior, flash, and night. Approve the anchor, then synchronize only the corrections that genuinely apply to its group. Inspect transition frames individually. A subject moving from a doorway into daylight can cross two lighting families within seconds.
Local adjustments, retouching, crop, and horizon remain image-specific. A learned style is a starting treatment for consistent global intent, not a reason to ignore masks, blemishes, distractions, or delivery geometry.
Diagnose failure before adding more examples
| Symptom | Likely issue to inspect | Useful response |
|---|---|---|
| All scenes too warm | Reference white balance or source bias | Audit neutral anchors and example consistency |
| Night scenes lifted too far | Domain missing from brief or examples | Set a boundary or build a coherent night profile |
| Skin varies by venue | Mixed-light correction is unstable | Normalize lighting families before style review |
| One project dominates output | Duplicate or unbalanced examples | Rebalance by scene, not by file count |
| Adjacent frames flicker | Input changes trigger inconsistent treatment | Review sequence anchors and capture variables |
More data is not always better. Ten contradictory projects can teach a less useful pattern than a small, coherent set. Change one factor at a time and rerun the holdout review so the cause remains visible.
Version the style as creative work evolves
Photography styles change through new cameras, lighting, clients, and taste. Set a review interval or trigger, such as a new body, a revised brand brief, or a sustained change across several delivered projects. Do not update the profile after every fashionable grade. A stable baseline is necessary to know whether a change is real.
Archive the style brief, source manifest, holdout results, representative exports, and application date. Name versions by purpose and period. If a returning client expects an earlier look, use the documented version or reproduce it manually rather than assuming the latest profile is an improvement for that job.
The desktop workflow explains the local application, and the AI and Technology section covers related questions about learned tools. A useful profile remains subordinate to the photographer's brief, judgment, and final approval.
Keep client styles and training examples separated
A studio may hold several distinct visual identities: its own house look, a private-label client treatment, an editorial publication style, and a temporary campaign grade. Do not combine them in one learning set merely because all were approved somewhere. Maintain a manifest and access boundary for each profile, with a name that states owner, purpose, and permitted projects.
Client references can carry contract and confidentiality restrictions beyond the photographs themselves. Confirm that using prior edits for learning is permitted, limit access to the responsible operators, and remove a source when consent or rights expire. A local workflow reduces external transfer, but it does not authorize cross-client reuse.
Before a new job, confirm the active profile aloud or in the run summary and test it on a non-sensitive representative file. This small checkpoint prevents a technically successful batch from applying the wrong brand identity. If provenance of the profile is uncertain, fall back to a documented manual baseline until ownership and scope are resolved.
Frequently asked questions
Is apply_my_style the same as applying a preset?
No. The documented feature uses a profile learned from the user's own edits. A preset stores fixed instructions, while the profile is intended as a personal learned starting point.
What should happen if get_style_profile returns nothing?
Stop the application step and build a profile through an appropriate documented learning or calibration route. Do not substitute a generic look while reporting success.
Should every finished image be added to the calibration library?
No. Include coherent, approved examples that represent the intended domain. Exclude experiments, contradictory client looks, duplicates, and files finished through transformations outside the profile's scope.