
What an AI Photo Editing Agent Actually Does to a Real Shoot
Most explanations of AI agent photo editing stay abstract: "the agent scans, culls, and edits your photos." This post narrates one real shoot instead, an 800-frame wedding day shot on two cameras, from import to a delivered client gallery, showing the actual tool-call sequence an MCP client makes against imagic and, just as important, exactly where a human still has to make a call. imagic's MCP server, part of imagic Max, is what makes this a single conversation instead of an afternoon of manual sorting; the free 500-photo trial includes full Max access, so this workflow is testable before you buy anything.
The Setup
800 RAW files across two card dumps, ceremony and reception, shot on two bodies. The photographer's actual prompt to Claude Code, sitting in the import folder:
Scan this folder, analyse everything, group duplicates
and bursts, and give me a summary before we go further.
Step 1: Scan and Score (Machine Time)
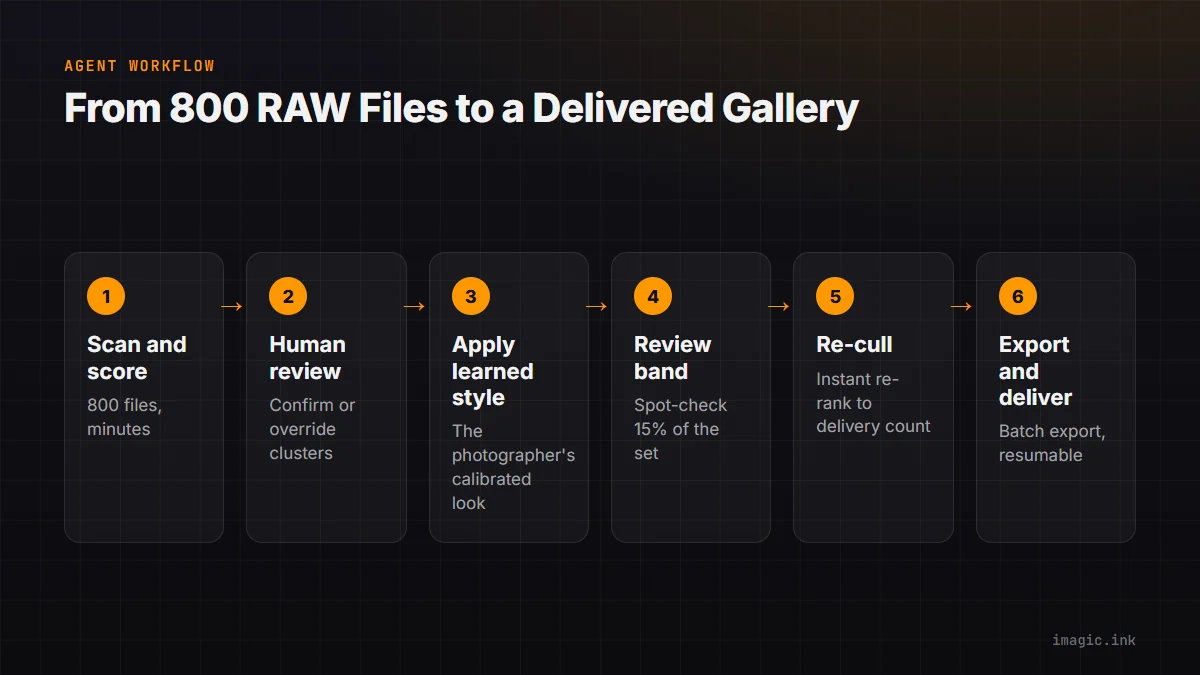
This is where an agent earns its keep purely on volume. The scan tool indexes all 800 files, reading RAW metadata across formats. The quality-scoring tool then rates every frame on sharpness, exposure, noise, and composition, and the duplicate/burst-detection tool clusters near-identical shots, the inevitable 4-to-8-frame bursts from continuous shooting during the vows and the first dance. What comes back isn't 800 individual verdicts, it's roughly 180 clusters with a top pick flagged in each, plus a scored list of the true singles. This step, done by hand, is the part that eats an entire evening. Done through MCP tool calls, it's minutes, and the photographer hasn't touched a single image yet.
Step 2: Human Review of the Shortlist (Where Judgment Comes Back In)
The agent hands back roughly 180 candidates with scores and cluster reasoning attached. This is the first point where the human is back in the loop, not because the scoring is wrong, but because quality scores can't know that the slightly-softer frame is the one where the bride is actually laughing instead of mid-blink. The photographer skims the list, overrides four or five picks where the "wrong" frame in a cluster is the better shot emotionally, and confirms the rest. imagic keeps those manual overrides distinct from the AI's original picks, so an override survives later re-culling passes instead of getting silently reset.
Step 3: Apply the Learned Style
Before any edits go out, the agent applies the photographer's calibrated style, set up once via style calibration, where imagic pulled 8 scenario photos from their library (a mix of outdoor ceremony light, indoor reception light, and close portraits) and had them edit each the way they normally would. That calibration session is the second place the human stays central: the style isn't generic, it's their own exposure, color, and crop decisions, learned once and reapplied at scale. The prompt for this shoot:
Apply my calibrated style to the confirmed selects,
grouped by lighting condition (ceremony, reception,
portraits) since they need different starting points.
The adjustments land as non-destructive edits in imagic's normal edit history, reviewable and reversible exactly like manual edits, nothing is baked in irreversibly at this stage.
Step 4: The Review Band (Catching What the Agent Shouldn't Decide Alone)
Not every applied edit is final. The photographer spot-checks a review band, roughly 15% of the styled set, sampled across lighting conditions rather than randomly, and adjusts exposure on a handful of backlit reception shots the auto-applied style underexposed. This is the third human touchpoint, and it's deliberately narrow: reviewing a sample instead of all 180 images, because the calibration step already did the heavy lifting of matching their taste. Manual tweaks made here, like the overrides in step 2, persist through anything downstream.
Step 5: Re-Cull to the Delivery Count
The client package promised "60 to 80 final images." The styled, reviewed set sits at 94. Rather than re-running quality analysis, the agent re-ranks against the existing scores:
Narrow this to my best 75, weighted toward covering every
part of the day rather than just the highest scores.
This is instant re-culling: no re-scan, no re-scoring, the ranking recomputes from data the earlier steps already produced. If the client later asks for 10 more, or fewer, the same instant re-rank runs again.
Step 6: Batch Export and Delivery
The final export tool runs against the confirmed 75, resumable if the batch gets interrupted partway. Output format and size were specified once in the prompt; the agent doesn't ask again per image. From 800 raw frames to a delivered, styled gallery, the machine did the volume work (scan, score, cluster, initial style application, re-ranking) and the human made four judgment calls: cluster overrides, calibration itself, the review-band touch-ups, and the final delivery count trade-off.
Why the Human-in-the-Loop Points Matter
The workflow above isn't "hand the shoot to AI and walk away." It's built so the tedious, high-volume, mechanically-scorable work (sharpness, duplicates, initial exposure matching) goes to the agent, and the judgment calls that need actual taste (which blink to forgive, how a style should shift under different light, what the delivery count trade-off should be) stay with the photographer. Style calibration is what makes that split work: without it, an agent applying "AI edits" at scale just means 800 photos that all look like nobody in particular. With it, the agent is applying decisions the photographer already made, at a volume they couldn't do by hand in the same time.
FAQ
How long does a shoot like this actually take end to end?
The scan-and-score pass on 800 files runs in minutes. The bulk of remaining time is the human review steps, cluster overrides and the review band, which for an experienced editor on a familiar shoot type is closer to an hour than the several hours full manual culling and editing would take.
What happens if I skip style calibration?
The style-application tools need a calibrated profile or a saved preset to apply. Without either, you'd be back to manual per-photo adjustment for the styling step, though scan, scoring, and duplicate detection still work without it.
Can I run this workflow through the CLI instead of a chat client?
Yes. The same pipeline is scriptable headlessly: imagic --headless --scan DIR --analyse --export runs scan, scoring, and export without an AI client in the loop, useful for a fixed pipeline you don't want to re-describe in a prompt each time. See Photo Editing MCP: The Complete Guide for the full tool breakdown either way.
Does this require imagic Max?
The MCP tool calls and style calibration do, yes, they're part of imagic Max. Quality scoring and duplicate detection are available on every tier. The free 500-photo trial includes full Max access, so the entire workflow above is testable without buying anything first. Setup specifics for Claude Code and Codex/ChatGPT are in How to Edit Photos with Claude Code and How to Edit Photos with ChatGPT and Codex.
Try It on Your Next Shoot
Start imagic's free 500-photo trial on the desktop page, no credit card required, full Max access included, and run the scan-and-cull prompt on your next real shoot before deciding if the full agent workflow fits how you edit. See imagic's MCP overview for the full setup options across clients.