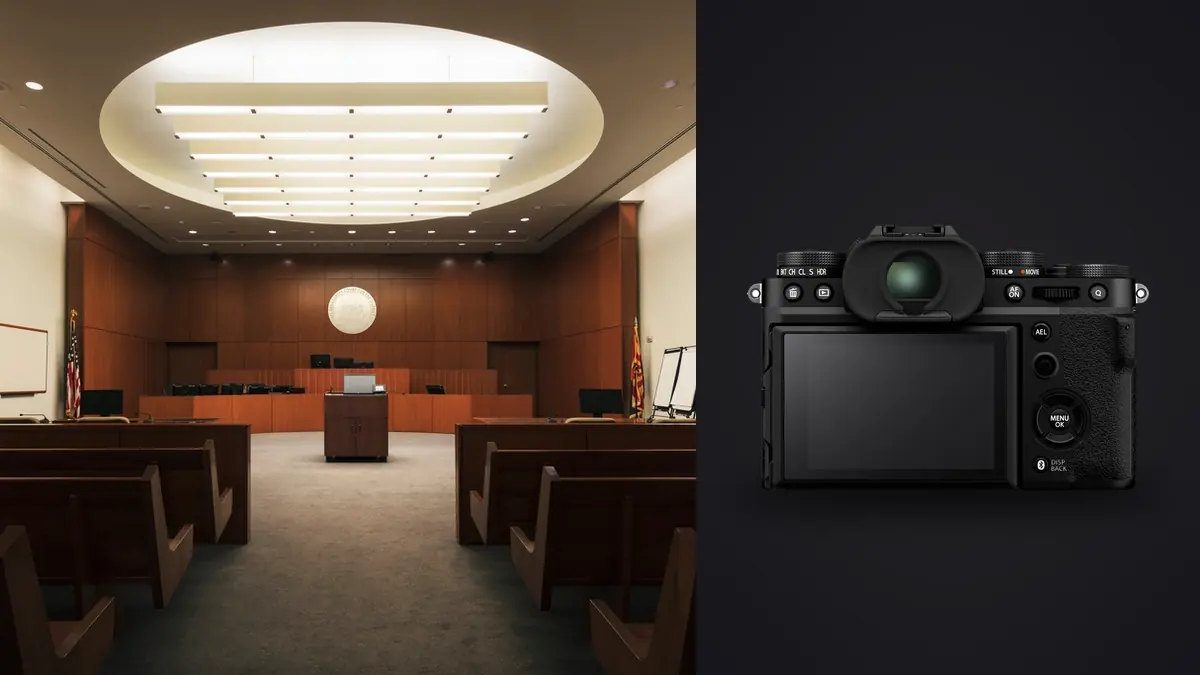
I picked up the X-T5 about a year after it launched, mostly because I was tired of hauling a full-frame body and three heavy zooms into cramped apartments where I'd spend half the shoot squeezing between a sofa and a wall trying to find a spot to stand. What I didn't expect was how well the 40-megapixel APS-C sensor would hold up against the medium-format-adjacent files I was used to working with. This isn't a camera built for architecture the way a technical view camera is, but with the right two or three lenses and a realistic workflow around it, it earns its spot in an interiors bag.
This piece is about what actually matters when you point an X-T5 at rooms, buildings, and the spaces between them: resolution and the pixel shift mode, lens choices for tight interiors, how you deal with converging verticals, and what a shoot day with a battery-hungry stabilized body actually looks like when you're on someone else's property for three hours.
Why the sensor resolution matters more here than in most genres
Interior and architectural clients crop. A real estate agent wants a square Instagram version, a portrait-orientation MLS listing, and a wide banner for a website, all from the same living room frame. A 40MP file gives you room to reframe after the fact without apologizing for the output. I've delivered crops as tight as 60% of the original frame to a magazine editor who wanted a detail shot I hadn't actually planned to shoot, and the file held up printed at a quarter page.
The X-T5 also carries Fujifilm's pixel shift multi-shot mode, which stacks 20 frames and outputs a 160-megapixel composite through Fujifilm's Pixel Shift Combiner software. For architecture this is more useful than it sounds like a marketing checkbox feature. Interiors are static. Nothing is moving except maybe curtains near an open window, so the usual pixel-shift weakness (motion blur artifacts on anything that moves between frames) barely comes into play. It is a good fit for something like a hotel lobby headed for large-format prints, and the level of texture recovery in stone and fabric at that resolution is genuinely different from a single 40MP exposure upsized.
The catch is real: pixel shift needs a tripod, a completely static subject, and the separate desktop combiner app, which only runs on Windows and macOS and adds a processing step most listing photographers won't bother with on a Tuesday afternoon shoot with six other properties booked. For everyday interior work I shoot the standard 40MP raw and save pixel shift for the handful of scenes that will be printed big.
Lens choices: this is where the system either works or doesn't
APS-C means every focal length reads longer than the number printed on the barrel, and for architecture that's the whole game. You want wide, you want it rectilinear (not a fisheye smear), and ideally you want some way to control perspective without cranking the sliders in post until the file falls apart. Fujifilm's X-mount has grown a decent set of options for this, though none of them are cheap.
| Lens | Full-frame equivalent | Max aperture | Distortion control | Best use case |
|---|---|---|---|---|
| XF8-16mmF2.8 R LM WR | ~12-24mm | f/2.8 | Very well controlled for the width, minor barrel distortion correctable in one slider | Small bathrooms, tight stairwells, anything where you're backed against a wall |
| XF10-24mmF4 R OIS WR | ~15-36mm | f/4 | Good, slightly softer corners wide open than the 8-16 | General interior walkthroughs, lighter travel kit, has OIS for handheld twilight exteriors |
| XF16-55mmF2.8 R LM WR | ~24-84mm | f/2.8 | Excellent, this is the workhorse detail lens | Furniture details, material close-ups, hallway shots where 16mm equiv is wide enough |
| Laowa 9mm f/2.8 Zero-D | ~13.5mm | f/2.8 | Genuinely distortion-free at the edges for a lens this wide, but manual focus only | Extremely tight spaces where even the 8-16 can't back up far enough |
| Adapted Canon TS-E 24mm (via Techart/Fringer) | ~36mm shift range | f/3.5 | True optical shift, not a crop-and-correct simulation | High-end architectural exteriors where keystoning has to be solved in-camera, not in Lightroom |
The XF8-16mm is the one I reach for most. It's heavy for an APS-C lens (over 800 grams) and it doesn't take front filters because of the bulbous element, but the rectilinear correction is good enough that I rarely touch the lens profile beyond Lightroom's default. The 10-24mm is the more sensible buy for someone starting out, it's a third of the weight and the OIS actually helps for handheld exterior twilight shots where you're bracketing without a tripod.
The tilt-shift row deserves a caveat. Fujifilm has never made a native X-mount tilt-shift lens, so anyone who wants true optical perspective control (rather than digital correction that throws away resolution at the edges) is adapting a Canon EF TS-E lens through a Techart or Fringer adapter. It works, focus confirmation is decent, but you lose autofocus entirely and you're adding another point of failure to a system that was supposed to be small and simple. I only bring that combination when I want architectural exteriors with dead-straight verticals and no post correction.
Dealing with converging verticals
Every interior and architecture shooter fights the same problem: point a wide lens up or down even slightly and the verticals lean. There are three ways to handle it and I use all three depending on the job.
Level the camera and shoot from the geometric center of the room
The cheapest fix is discipline. A hot-shoe bubble level or the X-T5's electronic level overlay (which you can set to show both pitch and roll at once) keeps the sensor plane parallel to the walls, which keeps verticals vertical without any correction needed. The tradeoff is you often end up with a lot of dead space at the top or bottom of the frame that you crop out later, which is another reason the 40MP sensor is worth having on this camera specifically. You can afford to lose a third of the frame to a level horizon and still deliver a usable file.
Correct digitally with the built-in profile plus manual nudges
For 90% of my listing and interior work this is the answer. Shoot slightly tilted if you have to for framing, then pull the vertical slider in Lightroom or Capture One and fine-tune with the manual transform grid. The XF8-16 and XF16-55 both have accurate lens profiles baked into Adobe's database, so the barrel distortion correction is close to invisible before you even touch the vertical correction.
Shift optically with the adapted tilt-shift
Reserved for the jobs where digital correction would eat too much resolution at the edges, usually big architectural exteriors going to print at poster size. It's slower to shoot (manual focus, careful shift dialing while checking the level) but nothing beats it for edge sharpness on a straight vertical line.
Weather sealing and the realities of a shoot day
The X-T5 is weather sealed at over 60 points, which sounds like a spec sheet line until you're doing an exterior walkaround in Scottish drizzle for a renovation portfolio and you realize the camera just doesn't care. I've shot through light rain on a construction site visit without a rain cover and had zero issues. That said, the lenses matter just as much as the body here. The 8-16 and 16-55 are both WR (weather resistant) rated; some of the cheaper third-party primes are not, so check before you assume the whole kit is sealed just because the body is.
Battery life is the more annoying reality. In-body stabilization and a high-resolution EVF both drain the NP-W235 faster than older Fuji bodies. A full day of interior work, tripod-mounted with the EVF constantly active for framing checks, will chew through two batteries easily. I carry four now and charge overnight without fail. It's a small tax for a camera this size and resolution, but worth planning for before a full-day commercial job rather than discovering it mid-shoot.
What actually happens to the files afterward
A single interior job for me usually means bracketed exposures (three to seven frames per angle for HDR blending in mixed window and ambient light), shot across ten to fifteen setups in a property. That's easily 150 to 300 raw files by the time you've covered every room, plus detail shots and exteriors. Sorting through that pile by eye, deciding which bracket set is the sharp one and which frame in a burst has the cleanest reflection in a window, used to eat a chunk of my evening.
This is where I actually lean on imagic now rather than scrolling through Lightroom's grid view frame by frame. It runs its sharpness and focus scoring locally on the machine, so it flags the one tack-sharp frame out of a five-shot bracket without me eyeballing each one at 100%, and because it's processing on my laptop rather than uploading unreleased property photos anywhere, there's no confidentiality worry before a listing goes live. The duplicate and burst clustering is genuinely useful for interior work specifically, since exposure brackets look like near-duplicates to a human scanning fast but need to stay grouped and intact rather than getting flattened into one "pick."
I've also started using the apply_my_style preset feature for consistency across a single property's edit set. Once I've graded three or four rooms the way I want (a particular white balance correction for mixed tungsten and daylight, a specific shadow lift), applying that same trained look to the rest of the shoot saves a lot of the manual matching that used to happen room to room. If you're trying to tighten a workflow that's currently all manual sorting, it's worth reading through our workflow speed guide alongside whatever culling tool you land on, since the gains compound when the sorting step and the editing step are both faster.
Where the system falls short
I want to be honest about the limits, because I've seen this camera oversold for architecture in a few gear roundups. APS-C depth of field at wide apertures behaves differently than full frame, which mostly doesn't matter for interiors shot at f/8 to f/11 anyway, but it does mean the "creamy background" look some architectural photographers like for foreground foliage or furniture is harder to get without physically getting closer. There's also no native tilt-shift, so anyone doing serious architectural exteriors as their primary business, not just interiors, may find the adapted lens workaround limiting compared to a Canon or Nikon full-frame body with a proper native TS lens. And the pixel shift workflow, while excellent in output, is genuinely clunky in practice: tethered software, a completely separate combiner step, and no in-camera JPEG preview of the stacked result.
Frequently Asked Questions
Is the X-T5's APS-C sensor actually good enough for professional real estate and interior work?
For the vast majority of listing photography, print magazine spreads, and design portfolio work, yes. The 40MP resolution outperforms plenty of older full-frame bodies, and the crop flexibility alone (square social crops, portrait MLS crops, wide banner crops from one frame) can make a delivery workflow faster, not slower.
Do I need the pixel shift 160MP mode for typical listing photography?
No, and I'd actively discourage it for day-to-day listing turnaround. It requires a tripod, a static scene, and a separate desktop combiner step that adds real time to your post-production. Save it for large-format print jobs or hero shots where a client has specifically asked for maximum detail.
What's the single best lens to start with for interior and architectural shooting on the X-T5?
If budget allows one lens, the XF10-24mmF4 R OIS WR covers most interior situations at a manageable weight and price. The XF8-16mmF2.8 is the better tool once you're consistently hitting rooms too tight for the 10-24, but it's a heavier, pricier second purchase rather than a starting point.
How do I deal with converging verticals without a tilt-shift lens?
Level the camera using the built-in electronic level, shoot with margin around the frame so you have room to crop after correcting, and use the vertical transform tools in Lightroom or Capture One. For most commercial interior work this gets you a result clients can't tell apart from an optically shifted frame.
None of this makes the X-T5 the obvious or only choice for architectural photography. It's a compromise built around size, weight, and file quality that happens to land in a genuinely useful spot for interiors and residential architecture specifically, less so for photographers whose primary business is large-scale commercial exteriors needing native tilt-shift glass. For the kind of interior, real estate, and small commercial architecture work that fills most working photographers' calendars, it's held up on every job I've thrown at it this past year.