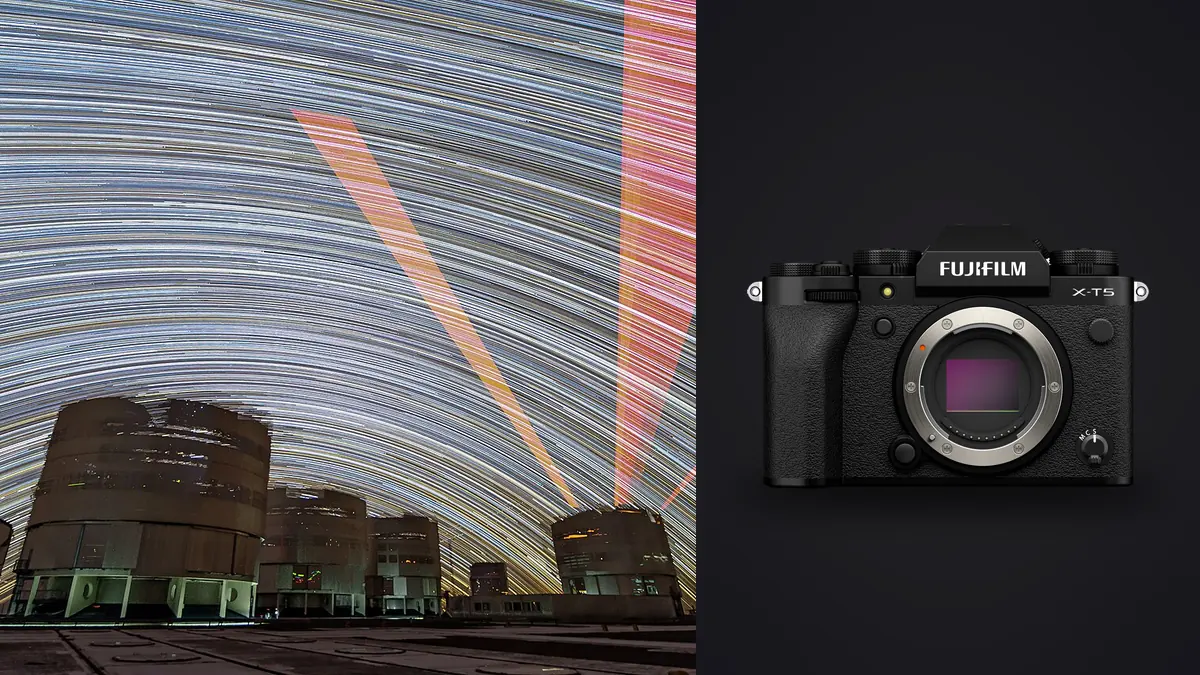
The Fujifilm X-T5 was not designed as an astrophotography camera. It was designed to cram as much resolution as possible into an APS-C body while keeping the size and handling of the older X-T3/X-T4 line. That decision, 40.2 megapixels on a sensor the same physical size as its 26-megapixel predecessor, has a bigger effect on night sky shooting than most reviews mention. Smaller photosites change how much exposure time you actually have before stars smear, how noise behaves at high ISO, and how forgiving the whole file is once you start stacking dozens of frames on top of each other.
I have run three separate star stacking sessions with an X-T5 over the past two winters, two Milky Way sessions in low-Bortle skies and one all-night star trail sequence, and the sensor's resolution turned out to matter more than any spec sheet number. This is what actually changes in the field, not a rehash of the marketing copy.
Why the 40-Megapixel Sensor Changes the Astro Math
The X-T5 uses the X-Trans CMOS 5 HR sensor, back-side illuminated, no optical low-pass filter, native ISO 125 to 12800 with extended range down to 64 and up to 51200. Pack 40.2 million photosites onto a 23.5mm x 15.6mm sensor and each one works out to roughly 3.76 microns, noticeably smaller than the 26-megapixel X-Trans 4 sensor's pixels. Smaller photosites gather less light each, which is the reason high-ISO noise per pixel looks worse at 100% crop than it does on the lower-resolution body.
In practice this washes out once you downsample or stack. A 40-megapixel file resized to the same output size as a 26-megapixel file shows comparable noise, and stacking a dozen frames averages the random noise down further regardless of starting resolution. The resolution advantage shows up somewhere else: cropping into a Milky Way frame for a print or for a tighter composition of the core leaves you with far more usable detail than the older sensor would. The tradeoff is that star trailing becomes visible at 100% much sooner than it did on 26 megapixels, which changes how you calculate your maximum shutter speed (more on that below).
Shutter Modes, Long Exposure Noise Reduction, and the Star Eater Question
Fujifilm bodies have a documented history of "star eater" behavior, where in-camera long exposure noise reduction algorithms mistake dense star fields for hot pixel noise and smear or delete faint stars during processing. This was worst on the X-T2 and partially present on the X-T3 and X-T4 under specific shutter speed ranges. Fujifilm has quietly improved the algorithm across firmware updates, and the X-T5 is noticeably better behaved than the early X-series bodies, but I still test it on every trip rather than assume it is fixed. Shoot a 30-second exposure of a dense star field, then a 30-second dark frame with the lens cap on, and compare. If stars near the edges of the frame look softened or reduced in number compared to a shorter exposure of the same field, the noise reduction is still interfering.
The practical fix is the same one that has worked since the X-T2 days: disable long exposure noise reduction in the menu and handle noise reduction yourself in post, either through stacking or through a manually shot dark frame subtraction. Mechanical shutter remains my default for any single exposure past a few seconds, since it avoids the banding that electronic shutter can introduce under starlight-level light and gives predictable exposure timing when I am also running an intervalometer sequence for stacking.
| Shutter Mode | Long Exposure NR Behavior | Banding Risk at Night | Best Use in the Field |
|---|---|---|---|
| Mechanical | Applies automatically above roughly 1 second unless disabled in menu | Minimal | Single long exposures, star trail base frames, tracked shots |
| Electronic Front Curtain | Same NR behavior as mechanical shutter | Low | General handheld night work, reduces shutter shock on a tripod |
| Fully Electronic | Lighter NR pass on some firmware versions, less predictable | Noticeable under very dark skies | Fast interval bursts where silence matters, not for single long subs |
Lens Choices for Wide Field and Milky Way Work
The X-T5's 1.5x crop factor means focal length choices for the Milky Way core skew wider than they would on full frame. The Fujinon 8-16mm f/2.8 is the obvious workhorse (12-24mm equivalent), sharp into the corners and fast enough for 20-30 second subs, but it is heavy and the front element rules out most filter-based dew prevention. For a lighter kit I default to the Viltrox 13mm f/1.4, which gains a full stop over the zoom and handles coma at the edges better than I expected for the price. The Samyang/Rokinon 12mm f/2.0 is the budget option, fully manual focus and manual aperture, which is honestly not a huge downside for astro since you are manually focusing to infinity anyway.
The Fujinon 16mm f/1.4 and 23mm f/1.4 both work for tighter Milky Way compositions or nightscapes where the core is a smaller part of the frame, and their faster apertures let you shorten exposure time, which matters more on this sensor than it did on the 26-megapixel body.
Exposure Settings: Retiring the 500 Rule
The classic "500 rule" (divide 500 by focal length to get maximum shutter speed before stars trail) was built around lower-resolution sensors viewed at modest output sizes. At 40 megapixels, trailing shows up at 100% well before that number, especially once you start stacking and pixel-peeping the result. In the field I use a tighter number, roughly 250 divided by the lens's actual focal length, and it has kept star points tight enough for stacking software to align cleanly.
| Lens | Focal Length | Classic 500 Rule | Tightened 250 Rule (this sensor) |
|---|---|---|---|
| Fujinon 8-16mm f/2.8 (wide end) | 8mm | ~62 sec | ~31 sec |
| Samyang/Rokinon 12mm f/2.0 | 12mm | ~42 sec | ~21 sec |
| Viltrox 13mm f/1.4 | 13mm | ~38 sec | ~19 sec |
| Fujinon 16mm f/1.4 | 16mm | ~31 sec | ~16 sec |
| Fujinon 23mm f/1.4 | 23mm | ~22 sec | ~11 sec |
This is a field guideline, not a formula from Fujifilm, and it assumes you are pixel-peeping the final stack rather than viewing at web size, where the classic rule is still fine. For a Milky Way core I usually land around ISO 3200-6400 with the aperture wide open and the shutter speed pulled from that tighter table, then adjust ISO up or down a stop based on how the histogram looks rather than chasing a fixed number.
Running an Interval Sequence in the Field
Both star stacking (multiple short exposures averaged to reduce noise) and star trail work (dozens to hundreds of exposures stacked to show star movement) rely on the X-T5's built-in interval timer rather than an external device, which is one less thing to carry and one less connection to fail in the cold. I set a 1-2 second gap between frames, long enough that the buffer clears but short enough that trail sequences do not develop visible gaps between stars.
Cold drains the NP-W235 battery fast. On a below-freezing night I plan on one battery per 60-90 minutes of continuous interval shooting and carry the spares inside a jacket pocket rather than in a bag, since a cold battery reports empty well before it actually is. For anything longer than a couple of hours I run the camera off USB-C power through a power bank, which the X-T5 accepts without issue and which effectively removes battery life as a constraint on trail length. Dual UHS-II card slots mean I can mirror the sequence to both cards, which has saved a session once when a card started throwing write errors partway through a three-hour trail sequence.
Getting Hundreds of RAF Files Into a Stacker
This is where X-Trans specifically causes friction that Bayer-sensor shooters do not deal with. Not every stacking program demosaics Fujifilm's RAF files cleanly, and picking the wrong one produces color mottling or outright artifacts in the stacked result.
| Stacking Tool | Platform | Native RAF Handling | Field Note |
|---|---|---|---|
| Sequator | Windows | Reads RAF directly | Free and my default for quick Milky Way stacks; slows down noticeably past 150-200 frames |
| Starry Landscape Stacker | Mac | Reads RAF directly | Handles the X-Trans demosaic cleanly, strong choice when stacking against a fixed foreground |
| DeepSkyStacker | Windows | Inconsistent with X-Trans | Convert RAF to 16-bit TIFF first, otherwise expect color mottling in the stack |
| Adobe Camera Raw + Photoshop stack mode | Windows/Mac | Reads RAF via ACR | Reliable but slow importing large batches; I keep individual stacks under 60 frames |
Before any of that, though, the sequence needs a first pass to remove the frames that will actively hurt the stack: a plane or satellite trail crossing the frame, a gust of wind that shook the tripod on one sub, condensation creeping across the front element halfway through the session. A three-hour trail sequence at 30-second subs is 360 RAF files, and at roughly 80MB each (lossless compressed) on a 40-megapixel sensor, that is close to 30GB to review by eye. I run that folder through imagic before it goes anywhere near a stacker: the local sharpness scoring flags the handful of subs that got nudged by wind or a footstep near the tripod, and since a lot of an interval sequence is visually near-identical frame to frame, the duplicate and burst clustering groups the set so I am reviewing clusters rather than scrubbing all 360 files one at a time. Everything runs on the laptop with no upload step, which matters more than it sounds like when you are dealing with 30GB of RAF files at a trailhead with no signal. If you want more background on how that kind of automated culling actually works under the hood, this breakdown of AI photo culling covers the sharpness and clustering logic in more detail.
Blending the Foreground and Holding Color Consistent
Most Milky Way images are a blend: a stacked sky exposure layered over a separate, usually longer, foreground exposure (or several, focus-stacked) to keep both properly exposed. Getting the two halves to sit together convincingly comes down to white balance and color grading discipline more than any single editing trick, since the sky and foreground were shot at different exposure lengths and sometimes different ISOs.
I shoot everything at a fixed manual white balance (usually around 3800-4200K) for the whole session rather than letting auto white balance drift between the sky and foreground frames, which avoids a color mismatch at the blend seam later. Once I have a grade I like on a stacked result, imagic's apply_my_style feature lets me carry that same color treatment across the rest of the session's frames automatically, since it is trained on my own past edits rather than a generic preset, so a batch of thirty foreground exposures from one night does not need thirty individual passes to look like they belong together. If color grading itself is the part you want to go deeper on, this guide to photo color grading covers the workflow beyond just white balance matching.
Frequently Asked Questions
Does the X-T5's 40MP sensor add more noise at high ISO than the X-T4's 26MP sensor?
At 100% crop, yes, individual pixels are noisier because each photosite is smaller and gathers less light. Once you downsample to a comparable output size or stack multiple frames, the difference mostly disappears. For single, unstacked high-ISO shots the X-T4 has a slight edge; for stacked astro work the gap is not something you would notice in a finished image.
Should I turn off in-body image stabilization for astro shots on the X-T5?
Yes, for any tripod-mounted exposure. IBIS is built to correct for handheld motion and can actually introduce a very slight blur when the camera is already stationary, since the system has nothing real to compensate for and can hunt. Turn it off in the menu whenever the camera is on a tripod, star tracker, or fixed mount, and only leave it on for handheld starscapes where you are relying on the 7-stop rating to get a usable shot without a tripod at all.
Does the X-T5 still have Fujifilm's star eater issue with long exposure noise reduction?
It is much better than the X-T2 and improved over the X-T3/X-T4 as well, but I would not call it fully solved. Run the dark-frame comparison test described above on any new firmware version before trusting a long session to it, and disable long exposure noise reduction in the menu if you notice any softening of faint stars.
What's the best affordable lens for Milky Way shooting on the X-T5?
The Samyang/Rokinon 12mm f/2.0 is the best value entry point: fully manual, sharp enough wide open for astro use, and a fraction of the cost of the Fujinon zoom or the Viltrox 13mm f/1.4. The tradeoff is manual focus and manual aperture control, which is a minor inconvenience for night photography where you are focusing to infinity by hand regardless of lens.