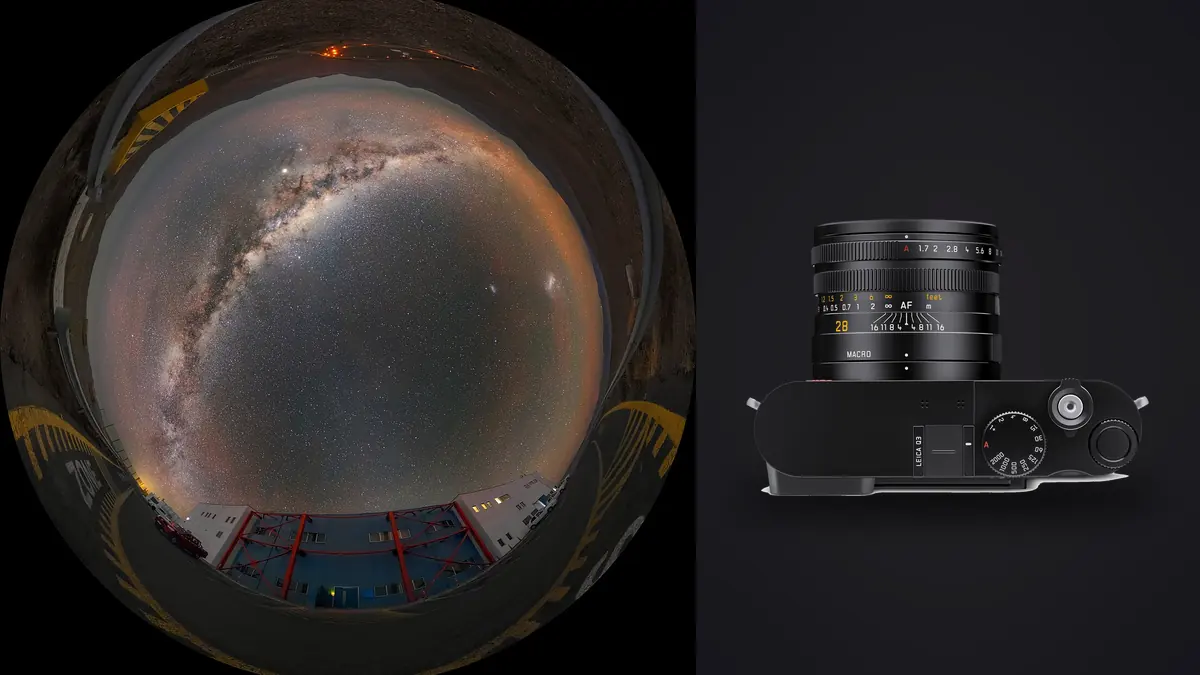
The Leica Q3 is not a camera anyone builds an astrophotography kit around on paper. It has no interchangeable lens mount, no built-in intervalometer worth trusting out of the box, and no image stabilization to lean on when the wind is nudging your tripod. What the Leica Q3 does have is a 60-megapixel full-frame sensor behind a 28mm f/1.7 Summilux, and after three trips to dark sky sites in the last year, I've come around to the idea that the fixed wide lens is the whole point, not a limitation you work around.
This is not a review. It's a workflow, built around one specific camera, for one specific technique: shooting a sequence of short exposures of the night sky and stacking them afterward to pull detail and reduce noise, rather than relying on a single long exposure or a star tracker. If you already own a Q3 and you've been eyeing the Milky Way season wondering whether the camera can do more than street photography, this is what I've learned putting it to that test.
Why the fixed 28mm earns its place under a dark sky
Most serious nightscape work happens between 14mm and 24mm on a full-frame body, because you want the arch of the Milky Way and a chunk of foreground in the same frame without stitching. 28mm is narrower than that, and the first two times I took the Q3 out I fought it, framing compositions that would have worked better on a 20mm rectilinear. The thing that changed my mind was accepting that 28mm is a nightscape focal length too, just a different kind: it forces you toward a single strong foreground element (a lone tree, a ridge line, a boat on a lake) instead of a sweeping horizon-to-zenith composition. Once I stopped trying to make the Q3 behave like a Sony a7 IV with a Sigma 14mm, the compositions got better, not worse. The f/1.7 aperture is the part that actually matters for stacking. A stop and a third faster than the f/2.8 you'd get on most wide primes people buy specifically for astro means either a third of the ISO for the same exposure, or roughly a third more real exposure time before you hit your noise ceiling. On a stacking sequence where you might be shooting 25 to 40 frames in a row, that difference compounds. I've pulled clean five-frame stacks at ISO 2000 with the Q3 that would have needed ISO 3200 on an f/2.8 lens to hit the same shutter speed.
Manual focus, in the dark, without trusting the ring
Here's the quirk nobody mentions in the marketing copy: the Q3's focus ring is focus-by-wire, not mechanically coupled to the lens elements, and it has no hard infinity stop you can feel with your thumb in the dark the way you can on an old manual Nikkor. Racking it all the way clockwise does not reliably land you at infinity. I learned this the annoying way, at a Bortle 3 site two hours from the nearest town, coming home with a folder of soft stars because I trusted muscle memory from a different lens. What actually works: switch to manual focus, find the brightest star or planet in the frame, punch in with the magnified live view (the Q3's EVF handles this well even in near-total darkness), and turn the ring slowly until the point of light collapses to its smallest, tightest dot. Then don't touch it again for the rest of the session. I mark the ring position with a strip of gaffer tape once I've nailed it, which sounds low-tech because it is, but it means I'm not re-hunting focus every time the camera goes to sleep or I bump the ring pulling it out of a bag.
Exposure time, resolution, and the trailing math
The old "500 rule" (500 divided by focal length equals your max exposure in seconds before stars trail) was written for 12 to 24-megapixel sensors. It does not hold up on a 60-megapixel file. Pixel pitch on the Q3's sensor is small enough that trailing becomes visible at pixel level well before the 500 rule says it should, especially if you're planning to crop or print large. In the field I use tighter numbers than the rule suggests, and I lean on the Q3's crop modes more than I expected to going in. The Q3's triple-resolution sensor gives you 28mm at full 60MP, plus in-camera crop framings at 35mm, 50mm, and 75mm equivalent that record smaller files straight out of the sensor rather than digital zoom guesswork. For star stacking this turns out to be genuinely useful: the 75mm crop lets you isolate a denser patch of the Milky Way core or a foreground silhouette against it without buying a second lens, at the cost of resolution and, since the effective focal length is longer, at the cost of your exposure window before trailing shows up.
| Framing (crop mode) | File size | Max single exposure before trailing (60MP files) | Typical ISO, Bortle 3-4 sky, f/1.7 |
|---|---|---|---|
| 28mm (native, no crop) | ~60 MP | 12-13 sec | 2500-3200 |
| 35mm crop | ~39 MP | 9-10 sec | 2500-3200 |
| 50mm crop | ~19 MP | 6-7 sec | 3200-4000 |
| 75mm crop | ~9 MP | 4-5 sec | 4000-5000 |
Those exposure ceilings are what I've settled on shooting pixel-level crops afterward, not a formula pulled from a spec sheet, so treat them as a starting point and adjust to your own tolerance for softness. The practical upshot is that native 28mm is where you want to be doing the bulk of your stacking work. The crop modes are for a specific shot you've already planned, not your default setting, because every step up in equivalent focal length shrinks your exposure window and forces the ISO up to compensate.
Building the actual stack
A stacking sequence on the Q3 looks like this in practice: compose and focus while there's still enough ambient light to see the foreground clearly, lock focus, switch to manual exposure, and turn off long exposure noise reduction in the menu. That last part matters more than it sounds. With NRR on, the camera doubles your time per frame by shooting a dark frame after every exposure, which on a 30-frame sequence turns a 15-minute session into half an hour, and you lose the individual dark-frame data you'd actually want if you were doing calibrated stacking properly. Leave it off and shoot your own dark frames separately if you want them. From there I shoot in bursts of 20 to 40 frames at whatever the table above allows for the framing I've chosen, using either the camera's own interval function or the Leica FOTOS app tethered over Wi-Fi so I'm not touching the body between frames. USB-C power delivery is the unsung feature here: running the Q3 off a small power bank during a long stacking session means battery life stops being the thing that cuts your night short, which it absolutely was the first time I tried this on battery alone in near-freezing temperatures and watched the percentage fall off a cliff after 45 minutes. I shoot the foreground separately, either as a longer single exposure at a lower ISO before the sky goes fully dark, or with a light painted pass afterward, and blend the two later. Trying to get both foreground and stars correctly exposed in the same 10-second frame at f/1.7 rarely works unless there's a strong ambient light source doing the work for you.
Sorting hundreds of nearly identical frames
Here is the part of this workflow that nobody warns you about before you do it the first time: a single night at a dark site with the Q3 shooting 60MP DNGs produces a genuinely enormous amount of near-duplicate data. Four sequences of 30 frames each, at roughly 80MB per raw file, is close to 10GB before you've even touched the foreground shots, and every single frame in a given sequence looks almost identical to the one before it at a glance. Scrolling through that in a standard raw browser, at 1am, cold, trying to spot which three frames in a 30-frame burst have a plane streak or a gust-induced blur, is genuinely miserable. This is where I stopped doing it by eye. I run the take through imagic before it goes anywhere near a stacking app, mainly for two things. First, its duplicate and burst clustering groups each stacking sequence together automatically instead of leaving me to eyeball which frames belong to which set, which matters when you've shot four or five sequences back to back at slightly different framings. Second, its sharpness scoring is genuinely useful for star fields specifically, because a star point is about as unforgiving a sharpness target as exists. A frame that looks fine on a laptop screen at 1am can turn out to have just enough tripod vibration or focus drift to soften every star, and scoring the sequence catches that faster than my eyes do after a long, cold night. It all runs locally on the machine, which matters more here than it would for a studio shoot, since I'm usually processing this the next morning at a rental cabin with no signal, not back at a desk with a stable connection. Once the sequence is culled down to the frames actually worth stacking (I usually end up keeping 70 to 85 percent of a sequence, tossing the rest for trailing, a stray headlight, or a satellite streak through the frame), I hand the survivors off to dedicated stacking software.
Stacking and blending
I use Sequator on Windows and Starry Landscape Stacker when I'm on a Mac, both of which handle the sky-only alignment and noise averaging without trying to also stack the foreground, which is what you want when your foreground and sky come from separate exposures anyway. The process is mechanical rather than creative: feed in the culled sequence, let the software align on stars and average out the sensor noise, export a single stacked sky frame, then bring that into whatever you're doing your blend and grade in alongside the separate foreground exposure. The 60MP files help here in a way I didn't fully appreciate until I compared a Q3 stack against an older 24MP body shooting the same target. Averaging noise across a stack works better the more actual signal you have per pixel to begin with, and downsampling a 60MP stack for web or print delivery hides sensor noise that would be more visible coming off a lower-resolution file pushed the same amount in post.
Keeping the grade consistent across sessions
Nightscape color grading is opinionated territory. Some people push toward a neutral, documentary rendering of the actual sky color; others push warm foregrounds against cool blue-black skies for contrast. Whichever way you land, doing it consistently across a season of shoots is harder than it sounds, especially when each session is a different location, moon phase, and level of light pollution. Once I had a stacked-and-blended frame I was genuinely happy with, from a session at a reservoir with a Bortle 3 sky, I ran it through imagic's apply_my_style feature, which builds a preset from your own edit rather than a generic look, so that the next batch from a different location starts from the same tonal foundation instead of me trying to remember what curve adjustments I made three weeks earlier. It's not a substitute for actually looking at each stack individually, foreground light and sky darkness vary too much site to site for a single preset to nail everything unattended, but it gets me to a consistent starting point fast instead of rebuilding a grade from scratch every session, and because it runs offline it works the same whether I'm editing at home or on a laptop at a cabin with no signal.
A few things I'd tell someone buying a Q3 specifically for this
The centered tripod thread, directly under the lens axis, is a small detail that turns out to matter if you ever want to shoot a multi-panel panorama of the Milky Way arch to get more resolution and horizontal coverage than the fixed 28mm gives you in a single frame. It's not a substitute for a proper panoramic head with click stops, but it means your nodal point error is smaller than it would be on a body where the thread sits off to one side. The camera's small size relative to a DSLR or mirrorless body plus a dedicated wide astro lens is a genuine advantage for the kind of dark sky location that requires a hike in with everything on your back, and I don't think that gets said often enough because gear reviews tend to focus on image quality and ignore how much a lighter kit changes which locations are actually reachable before your legs give out. The lack of IBIS is a non-issue for this specific technique since you're always on a tripod for star stacking anyway, but if you were hoping to also use the Q3 handheld for anything else on the same trip (interior shots at a lodge, handheld twilight frames while you wait for full dark), you'll notice the absence. I covered a different night at a separate dark sky site with this same setup in another Q3 star stacking guide, worth a look if you want to compare exposure choices across two different skies.
Frequently Asked Questions
Can the Leica Q3 shoot deep-sky targets like nebulae or galaxies?
Not meaningfully. A fixed 28mm lens with no tracking mount is a wide-field nightscape tool, good for the Milky Way arch, star fields, and foreground-inclusive compositions, not for tightly framed deep-sky objects that need real focal length and a tracker to gather enough light. If galaxy and nebula close-ups are the goal, this isn't the camera for that part of the hobby, and the Q3's crop modes help with framing but don't change the physics of a fixed 28mm optic.
Do I need a star tracker for this workflow?
No, and that's part of what makes it approachable. Stacking multiple short exposures instead of one long tracked exposure is specifically the technique that lets you skip a tracker: each frame is short enough to avoid trailing on a static tripod, and the stack recovers the signal-to-noise ratio you'd otherwise get from a single long tracked shot. A tracker would let you push individual exposures longer and use fewer frames, but it adds weight, setup time, and polar alignment to a kit that's otherwise meant to travel light.
Why turn off long exposure noise reduction if I'm already stacking?
Because stacking software is already doing noise reduction across your whole sequence, more effectively than in-camera dark-frame subtraction on a single exposure, and NRR doubles your time per shot for no benefit once you're stacking. Leaving it on during a stacking session on the Q3 roughly halves the number of frames you can capture in a given window of darkness, which hurts the stack more than the noise reduction helps.
How many raw files does a typical night actually produce, and how do you get through them?
A night with three or four stacking sequences plus foreground exposures on the Q3 regularly lands between 8 and 12GB of 60MP DNGs, most of it near-duplicate frames from the same sequence. I don't sort that by eye anymore. Running it through imagic first clusters each burst automatically and ranks frames by actual sharpness rather than a quick glance at a laptop screen, which is the difference between a 20-minute culling pass and losing an hour to it the morning after a cold night.