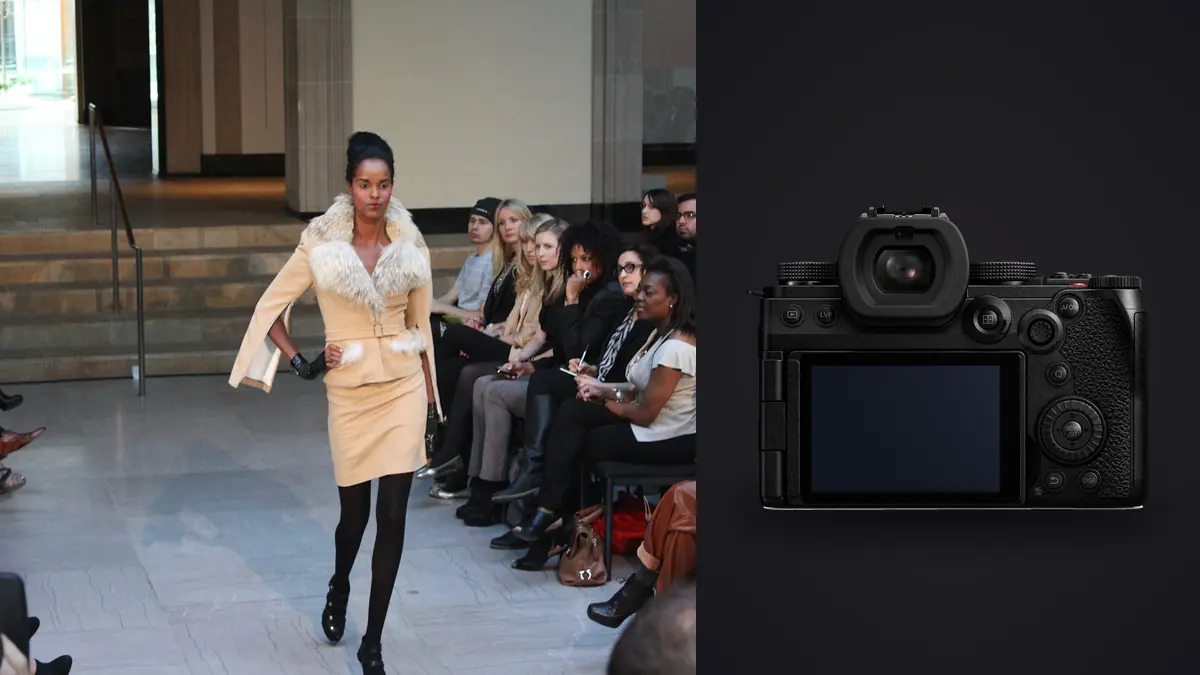
A lookbook day rarely goes the way the call sheet says it will. Light shifts, the model's energy dips after look six, the stylist needs one more pin before the next setup, and somewhere in the middle of that you're expected to hand the art director a clean edit within 48 hours. Picture a seasonal lookbook shot on the Panasonic Lumix S5IIX for a smaller apparel and accessories label that needs a tight, consistent set of images fast. This is what actually matters about the camera on a job like that, not the spec sheet version.
Why the S5IIX Ends Up on the Lookbook Call Sheet
The S5IIX isn't marketed as a fashion camera specifically. It's a hybrid stills/video body that Panasonic aimed at solo creators and small production teams who need to deliver both photos and motion from the same shoot day, which happens to describe most commercial lookbook work now. Clients want the still frames for the e-commerce site and the print lookbook, plus a handful of vertical clips for the brand's Instagram and TikTok, all pulled from the same session. Bringing a second video body used to be standard on these jobs. With the S5IIX, one camera and one card workflow covers both, which matters more on a budget-conscious apparel shoot than any single spec.
The other reason it shows up on my bag list: it ships with V-Log and V-Gamut active out of the box. The standard S5 II requires a paid firmware unlock (the DMW-SFU2 upgrade) to get that log profile. On the S5IIX you get it standard, along with the wider dynamic range it enables for grading BTS footage to match the stills' color treatment later.
Autofocus With a Model Who Won't Hold Still
Fashion lookbook subjects move constantly between poses, even in a "static" studio setup. The S5IIX uses Panasonic's phase-hybrid AF system (the company's first full-frame body to move off contrast-detect only), and the difference from the older S1 series is obvious the moment a model turns her head mid-pose. Human body, face, and eye detection lock on reliably even with the model three-quarter turned or partially behind a rack of hanging fabric. Where I still miss the reflexes of a Sony body: fast walking shots toward camera, the kind you want for a movement-driven lookbook spread. Eye-detect can hunt for half a second when the model closes the distance quickly under mixed studio and window light. My workaround is to switch from eye-detect to body tracking for anything involving a walk cycle, then trust the wider AF area rather than a locked single point. It's a minor adjustment, but if you're used to a camera that never drops focus on approach shots, expect to spend the first hour of a shoot re-learning where this one is a step behind.
Burst speed is 9fps on the mechanical shutter and climbs well past that with the electronic shutter in single-AF mode, which is plenty for catching the peak of a hair flip or a coat swing without rolling shutter artifacts creeping into a moving garment's edges. The tradeoff of shooting that much burst work is obvious to anyone who has culled a shoot before: a single look with three walk passes can leave you with 200 to 400 nearly identical frames to sort before you can even start picking favorites.
Sensor Output and What a Client Actually Needs
24.2 megapixels doesn't sound impressive next to a 61MP Sony body, and for most lookbook work it doesn't need to. Print lookbooks rarely run larger than A4 spreads, e-commerce product pages max out around 3000px on the long edge, and social crops need far less than that. What 24MP buys you instead is smaller RAW files (roughly 30-45MB uncompressed depending on scene detail) that don't choke a laptop mid-shoot when you're reviewing tethered, and faster write speeds to the dual UHS-II card slots when you're firing bursts between poses. The camera's 96-megapixel high-resolution composite mode exists for static subjects on a tripod, which rules out almost anything with a live model in it. It suits a flat-lay product shot of accessories between outfit changes, where the extra resolution lets a client crop tight on stitching detail for a website zoom feature. For anything with a person moving in the frame, skip it and shoot standard RAW.
Dynamic Range in Mixed Retail Lighting
A lot of lookbook work happens in spaces that weren't built for photography, showrooms with fluorescent overheads, retail floors with big storefront windows blowing out one side of the frame. The sensor holds highlight detail in blown window light better than I expected going in, enough that I can usually recover a stop and a half in a white curtain or storefront glass without banding. Shadow recovery on underexposed skin tones is solid to about three stops before noise gets distracting at base ISO, which covers the kind of exposure mistakes that happen when you're moving fast between fifteen looks in an afternoon.
Color and Skin Tones Out of the Box
Panasonic's photo profiles lean slightly warm and desaturated compared to Sony's default color science, which for fashion work is a genuine advantage rather than a personal preference. Skin tones across a range of complexions render without the pink or orange push I've had to correct out of other brands' JPEG previews, which matters when an art director is reviewing images on the back of the camera or on a tethered laptop screen in real time and needs to trust what they're seeing. I still shoot RAW and grade everything in post, but starting from a neutral base cuts down on the back-and-forth during review. For garments with strong saturated color (a lot of apparel brands lean into this for their hero pieces), the standard photo style holds color separation well without clipping a single-color garment into a flat block. Where I do see clipping is in specific magenta and cyan-leaning fabric dyes under LED continuous lighting, which is more a function of the LED spectrum than anything specific to the sensor, but worth test-shooting your lighting setup before a client's key wardrobe pieces are on set.
Lens Choices for the L-Mount
The S5IIX uses the L-mount, shared across Panasonic, Sigma, and Leica, which means the practical lens lineup for fashion work is wider and cheaper than it looks at first glance thanks to Sigma's Art series being ported over in full. Here's what makes sense in the bag for lookbook jobs, with rough current secondhand-market pricing:
| Lens | Max Aperture | Best Use on a Lookbook Set | Approx. Price (used, USD) |
|---|---|---|---|
| Panasonic Lumix S 24-70mm F2.8 | f/2.8 | Working the floor fast between full-length and waist-up crops without a lens change | $1,400-1,600 |
| Sigma 35mm F1.4 DG DN Art | f/1.4 | Environmental shots that keep set context, editorial-style location frames | $700-800 |
| Sigma 85mm F1.4 DG DN Art | f/1.4 | Tight beauty and detail crops, isolating the model against a flat backdrop | $900-1,000 |
| Panasonic Lumix S 50mm F1.4 | f/1.4 | Studio hero shots, natural perspective with minimal distortion on garments | $1,700-1,900 |
| Sigma 24-70mm F2.8 DG DN Art | f/2.8 | Budget alternative zoom when the 24-70mm Panasonic isn't in the kit | $800-950 |
The 24-70mm is what stays on the body for most of a lookbook day. Being able to go from a full-length walk shot to a waist-up crop without stopping to swap glass keeps pace with a model who's already changed outfits three times before you've finished reviewing the last set. The primes come out for the hero frames the client actually plans to run large, where the extra sharpness and background separation justify the lens change.
Settings by Shot Type
What I actually dial in changes by the kind of frame I'm chasing, not by some fixed "portrait mode" setting. This is roughly what to run through in a typical lookbook day:
| Shot Type | Drive Mode | AF Mode | Shutter Speed | Note |
|---|---|---|---|---|
| Movement / walk passes | 9fps mechanical (H) | AF-C, body tracking | 1/500s or faster | Generates the most near-duplicate frames to sort afterward |
| Studio strobe, static pose | Single shot or 3fps low | AF-S, eye detect | 1/160s (sync speed) | Strobe recycle time matters more than burst rate here |
| Beauty / detail close-up | Single shot | AF-S, eye detect | 1/250s+ | Manual focus fine-tune on jewelry or fabric texture |
| BTS video clips | N/A (video) | AF-C continuous | 1/50s at 24p | V-Log native means less grading work to match a house LUT |
| Flat lay / product detail | Single shot, tethered | AF-S or manual | 1/125s | Tethered live view for exact product placement checks |
Tethering, Power, and File Handling on Set
Studio days run tethered over USB-C to a laptop running Capture One, and this is where the S5IIX's connector choices actually pay off. The USB-C port handles both tethering and power delivery, so a laptop with enough output can keep the battery topped up through a long day without swapping batteries mid-shoot, which used to be a real interruption on older bodies with micro-USB charging only. The connection has stayed stable across every session I've run it, no dropped tether mid-burst, which is the bar for a tool you're not supposed to have to think about. Dual UHS-II SD card slots cover the practical need on a lookbook job: one card for the day's shoot, mirrored to a backup card in real time, so a card failure doesn't mean a reshoot. There is little need for CFexpress here because SD UHS-II write speeds keep up fine with 24MP RAW bursts, and it keeps card costs down on a job where the budget doesn't always stretch to premium media.
Where the day gets slow isn't the camera, it's what happens after the last look wraps. A single lookbook shoot with six to ten outfit changes, three walk passes, and a handful of detail shots per look routinely lands somewhere between 2,500 and 4,000 RAW frames by the end of the day. Most of those are burst duplicates from the walking sequences, three or four frames apart with only one or two actually sharp on the eyes and clean on garment movement. Sorting that by eye at 1am before a morning deadline is how a lot of freelance fashion photographers lose a night's sleep.
Where imagic Fits in the Pipeline
This is the part of the workflow worth changing if lookbook days leave you bleary-eyed doing manual culls. I run the day's RAW files through imagic before touching Capture One at all. The burst and duplicate clustering groups those walk-pass sequences automatically, so instead of scrubbing through 40 nearly identical frames of a model turning, I'm looking at four or five clustered groups with the sharpest frame in each flagged by its local focus scoring. That alone usually cuts a 3,000-frame day down to a 400-500 frame shortlist before I've made a single creative judgment call. Because the culling happens entirely on my machine, nothing about the day's unreleased images touches a cloud upload before the brand has approved anything, which matters more on fashion jobs than most categories since unreleased collection photos are exactly the kind of thing an agency doesn't want sitting on a third-party server ahead of a launch date. For more on how the underlying scoring works, imagic's culling engine breakdown covers the sharpness and clustering logic in more depth than I can here. The other feature worth a permanent spot in a lookbook workflow is apply_my_style, the trained preset tool. You feed it a set of images already graded to match a brand's look (such as that Panasonic-warm skin base plus a slightly lifted shadow curve), and it applies a consistent starting grade across the rest of the shortlist before you go in for per-image adjustment. On a job with ten outfit changes shot across shifting studio and window light, keeping the grade consistent look to look used to be the slowest part of the edit. It's a one-time purchase tool rather than a subscription, which for a freelancer billing per job instead of drawing a salary is a real difference in whether the software pays for itself after one client.
What I'd Tell Someone Renting This Body for a Lookbook Job
If you're used to shooting fashion on a Canon or Sony body and considering the S5IIX for a single job (a lot of people rent rather than own for this kind of work), the adjustment period is short but real. The color science needs less correction, the tethering is dependable, and the dual card slots plus USB-C power mean fewer interruptions during a long studio day. The autofocus is very good but not the fastest-reacting system on the market for subjects moving quickly toward the lens, so budget a practice session before the actual client shoot if you can. And plan for the culling step. No camera in this class ships with a way to sort 3,000 frames down to a deliverable set, and that's the stage that actually determines whether you make your deadline.
Frequently Asked Questions
Is the S5IIX worth the upgrade over the base S5 II for fashion work specifically?
The core imaging pipeline (sensor, AF system, IBIS) is identical between the two. What you're paying the S5IIX premium for is V-Log included standard instead of a paid unlock, USB-C SSD recording, and a more robust cooling setup for long video sessions. If your lookbook deliverable is stills-only with maybe a couple of short BTS clips, the base S5 II with the V-Log unlock purchased separately gets you to nearly the same place for less money. If motion content is a real deliverable on most of your jobs, the X version's video-first extras are worth it.
What lens should I bring if I can only pack one for a lookbook shoot?
The Panasonic Lumix S 24-70mm F2.8. It covers full-length walk shots and waist-up crops without a lens change, which matters more on a fast-paced lookbook day than the extra stop of light a prime gives you. Save the primes for the specific hero frames the client has flagged as needing extra polish.
Does 24 megapixels hold up for e-commerce zoom crops and print lookbook pages?
For standard e-commerce zoom features and print spreads up to roughly A4, yes, without needing to lean on the camera's high-resolution composite mode. That mode is only usable for static, tripod-mounted subjects, which rules out anything with a model in the frame, so treat the camera as a 24MP body for actual shoot-day work and reserve the high-res mode for the occasional flat-lay or product detail shot between looks.
How should I handle culling after a lookbook shoot with thousands of burst frames?
Don't start with a manual pass through every frame. Run the day's RAW files through a culling tool that clusters burst sequences and flags the sharpest frame in each group first, then do your creative edit on the shortlist rather than the full take. It's the difference between reviewing a few hundred pre-sorted frames and scrubbing through several thousand near-duplicates by eye. If you're new to this step of the pipeline, imagic's guide on speeding up a photo workflow has more on where culling fits relative to editing and delivery.