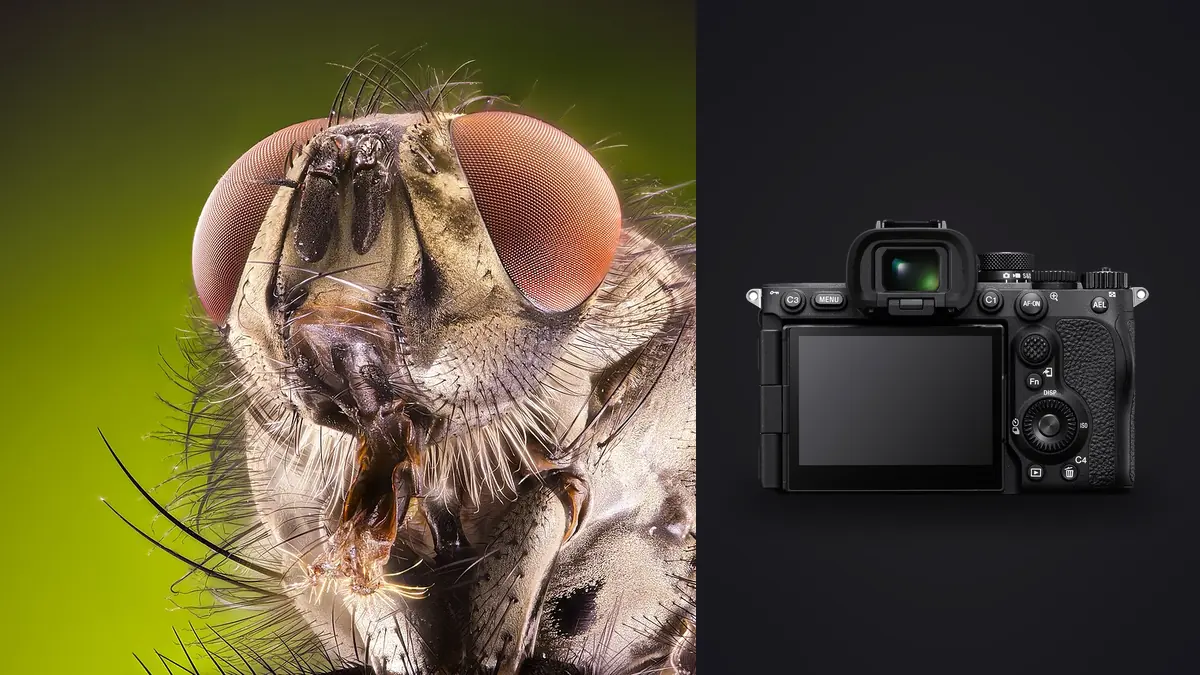
A dependable Sony A7R V macro and insect photography RAW Workflow starts with the finished photographs, not with a software preset. The intended sequence, crop, viewing size, color treatment, and deadline determine which files deserve protection and how much latitude the RAW master must retain. This guide follows that exact RAW Workflow from capture through backup, selection, development, quality control, and export.
The A7R V records 61 megapixel full-frame ARW files and offers compressed, lossless-compressed, and uncompressed choices plus in-camera focus bracketing. Both card slots accept UHS-II SD or CFexpress Type A media. That flexibility is useful, but a high-resolution macro file also exposes vibration, diffraction, dust, and a misplaced focus plane clearly. That identity matters because a sound macro and insect photography process uses the camera's real strengths while respecting its practical limits. It does not treat a high frame rate, large sensor, subject detector, or compact body as a guarantee of a useful photograph. Every stage should preserve enough evidence to reverse a choice without confusing a derivative file with the original.
Define the result before selecting a RAW option
Write a deliverable note for the Sony A7R V assignment before formatting cards. Include the number of final images, likely aspect ratios, largest reproduction size, color space, file type, naming rules, and whether the client expects individual frames or a visual sequence. For macro and insect photography, add the editorial tests that matter but cannot be inferred from sharpness alone. Those may include gesture, subject identity, continuity, atmosphere, product accuracy, privacy, or the relationship between adjacent frames.
Choose ARW as the Sony A7R V master when the macro and insect photography brief needs recoverable white balance, careful highlight handling, or substantial tonal work. A simultaneous JPEG can help with reference and rapid communication, but it should not silently replace the RAW source. Test the selected compression option in the actual processor before a paid assignment. Smaller files are useful only when their compatibility, bit depth, and editing behavior remain suitable for the delivery.
| File role | Purpose | Rule |
|---|---|---|
| ARW master | Maximum reversible editing latitude | Preserve unchanged |
| Review JPEG | Fast comparison and communication | Mark as a derivative |
| Working edit | Adjustment decisions and versions | Keep linked to the master |
| Delivery file | Client or publication use | Export to a written specification |
Configure capture around the subject, not the menu
For a still macro subject, mount the A7R V securely, use a remote release or timer, and test the shutter mode with any flash. For a living insect, prioritize a shutter speed that controls body movement and wind before lowering ISO. Avoid maximum bursts without a purpose; short sequences around a head turn, wing opening, or landing are easier to compare and protect.
Set the first A7R V bracket frame on the nearest required detail and choose enough frames and a small enough step to overlap through the far boundary. Make a short trial rather than assuming the camera's bracket count matches the subject. For a single handheld frame, place a small point on the near eye or leading structure and verify it at full magnification.
Make a controlled test under the expected light and inspect it at full resolution. Check the intended plane of focus, subject movement, fine texture, bright channels, dark transitions, and any repeated light source that could band under an electronic shutter. Stabilization can reduce camera movement, but it cannot stop a moving subject. Likewise, subject recognition can assist acquisition, but the photographer still chooses the relevant subject and decisive instant in a Sony A7R V macro and insect photography frame.
Give the lens, position, and light distinct jobs
A native E-mount macro lens with adequate working distance leaves room for diffusion and reduces disturbance to insects. A rail helps static stacks by changing camera position predictably, while focus bracketing changes optical focus and can alter magnification slightly. Keep the background far enough away to remain simple, and control it at capture rather than relying on blur alone.
Create a neutral color reference for the Sony A7R V macro and insect photography set whenever the lighting permits it. Photograph a gray target or known neutral under each materially different source, then leave the reference in the same folder as the affected images. A reference is a starting point, not an instruction to remove every intentional color cast. It helps distinguish a camera or processing shift from the actual character of the scene.
Protect important Sony A7R V highlights using the histogram and channel warnings rather than LCD brightness alone. In macro and insect photography, a pale garment, reflective surface, spotlight, white structure, or bright sky can clip in one channel before the overall preview looks damaged. RAW offers adjustment latitude, but a fully clipped channel contains no texture for the processor to recover.
Preserve sequence identity on the cards
Send full-size A7R V ARW files to tested CFexpress Type A or fast UHS-II media and configure the second slot as backup when required. Mixed card types can behave differently during long brackets. Photograph a marker between stacks, record magnification or lens position, and verify that every component reached both intended destinations.
JOB_CODE/
  01_CAMERA_ORIGINALS/
    SONY_A7R_V_CARD_001/
  02_VERIFIED_BACKUP/
  03_REVIEW/
  04_WORKING_EDITS/
  05_EXPORT/
  06_DELIVERY_NOTES/
Copy the complete card structure into a uniquely named folder. Do not scatter files from several cards into one directory until duplicate filenames, camera clocks, and sequence boundaries have been checked. If two bodies are involved, synchronize their clocks before capture and retain a camera identifier in the folder or filename. This makes a Sony A7R V macro and insect photography sequence traceable after sorting changes the display order.
Verify two copies before culling
Copy the Sony A7R V macro and insect photography originals to a working drive, create an independent second copy, and verify both before returning media to circulation. A folder that appears in a file browser is not proof that every byte arrived. Use a copy tool with verification or generate checksums, then spot-open files from the destination. Keep the two copies on separate devices, and move one away from the working system when the risk of loss justifies it.
imagic supports Sony ARW files and can cull A7R V sequences locally. It does not assemble focus stacks, so use its reversible status and editing stages around a dedicated stacker while keeping the complete ARW source group.
Cull technical failures before editorial alternatives
Begin the Sony A7R V macro and insect photography review at sequence level. Group frames made from the same action, pose, focus bracket, lighting setup, or composition, then compare within each group. Reject obvious accidents first: unintended releases, blocked frames, irrecoverable clipping, focus on the wrong plane, severe motion that has no expressive purpose, and duplicates with no independent value. Do not delete at this stage. A reject status is reversible and keeps the original available for audit.
Inspect A7R V macro groups for the chosen eye or front detail, body movement, antenna and leg position, wing reflections, background intersections, and complete depth coverage. A bracket with one shifted frame may create a visible blend defect. Keep alternate single frames when the stack fails, and avoid confusing a nearby dust spot with part of the subject.
imagic can assess sharpness, exposure, closed eyes, and composition while grouping bursts and near-duplicates locally on Windows or macOS. For this Sony A7R V macro and insect photography set, treat those results as a structured review aid. The photographer remains responsible for factual importance, consent, narrative, styling accuracy, and any intentional departure from technical perfection. Culling changes status rather than deleting the camera original.
Develop the RAW master in a repeatable order
Open the ARW sequence with one consistent camera profile and normalize white balance, exposure, lens correction, and noise treatment before stacking. Use modest capture sharpening because a stack can amplify hard edges. At 61 megapixels, remove sensor dust on the working master or synchronized components without erasing natural spots, scales, or hairs.
Iridescence and glossy insect surfaces can change color with angle, while flowers and foliage may push one channel toward clipping. Compare the RAW file with the field reference and neighboring frames, then correct local saturation selectively. Keep subtle color variation across a shell or wing instead of replacing it with a uniform, over-saturated tone.
Apply global corrections to the Sony A7R V macro and insect photography files before local ones. A practical order is camera profile, white balance, exposure, highlight and shadow placement, tone curve, color, lens correction, noise treatment, and capture sharpening. This prevents a local mask from compensating for a global error. Recheck earlier controls after a major exposure or profile change because the apparent need for saturation, contrast, or noise reduction may disappear.
Judge sharpening for the Sony A7R V macro and insect photography file at an appropriate magnification, and separate capture sharpening from output sharpening. Its fine detail can invite aggressive settings that emphasize pores, dust, foliage edges, fabric texture, or noise more than the subject. Noise reduction should address objectionable noise without erasing the small structures that make this photograph credible. Inspect both a critical detail and a smooth tonal area before synchronizing settings.
Keep composite and special captures honest
Treat every A7R V focus bracket as one documented capture unit. Preserve the front and back boundaries, remove only unusable components, and blend in dedicated software. Inspect antennae, hairs, leaf edges, reflective highlights, and the background for halos or duplicated detail. A clean composite should still look optically plausible.
Batch by lighting group, then inspect exceptions
Create Sony A7R V adjustment groups from real macro and insect photography capture conditions, not from the whole card. Useful boundaries include a lighting change, lens change, room, set, stage act, weather shift, subject distance, or exposure strategy. Choose a representative frame from the middle of each group, establish a neutral baseline, and synchronize only controls that should genuinely match. Crop, healing, aggressive highlight recovery, and subject-specific masks usually need individual review.
After synchronizing the Sony A7R V macro and insect photography group, inspect the first, middle, and last image plus every keeper with a different histogram. This catches drift from changing light, flash recycling, passing clouds, stage LEDs, or a shifted subject position. A learned style can provide continuity when it has been trained from the photographer's own edits, but it should follow technical normalization rather than conceal inconsistent exposure or white balance.
Export for the destination and verify the files
Export a full-resolution macro master before creating publication, web, or print derivatives. Check the subject's critical structures after resizing, and reduce output sharpening if it creates bright rims or rough backgrounds. Crop only after the stack edges and any magnification change are understood.
Set output dimensions, color space, bit depth, compression, metadata, and naming from the written brief. JPEG is suitable for many web and gallery deliveries, while TIFF can preserve more information for a downstream print or retouching stage. Do not enlarge, strip metadata, watermark, or sharpen by habit. Each choice should answer a delivery requirement for the Sony A7R V macro and insect photography project.
For more context around the Sony A7R V macro and insect photography process, the desktop workflow explains local culling and non-destructive editing. The single-photo web editor is useful for a quick derivative edit, while more selection and finishing systems appear in the AI & Technology blog collection. The job's own written requirements still take priority over a general reference.
Use a capture-to-delivery checklist
- Brief: record subject priorities, sequence needs, crop, output, and privacy limits.
- Capture: confirm ARW, shutter behavior, focus method, white balance reference, and highlight margin.
- Media: label cards or internal storage and keep exposed media physically distinct.
- Ingest: preserve card structure, record counts, and verify two independent copies.
- Group: keep bursts, brackets, poses, and lighting changes visible as sequences.
- Cull: separate technical rejection from editorial selection and retain reversible statuses.
- Develop: normalize globally, synchronize by condition, and inspect exceptions.
- Special work: preserve every component of a stack, bracket, composite, or merge.
- Export: render to the destination specification and inspect files outside the editor.
- Archive: keep camera masters, adjustment records, approvals, and the export recipe.
Frequently asked questions
Should every Sony A7R V macro and insect photography frame be recorded as RAW?
For Sony A7R V macro and insect photography, RAW is appropriate when the job needs maximum correction latitude or a durable editing master. A JPEG-only choice can be reasonable for a tightly controlled, immediate use, but it should be deliberate and tested against the actual destination.
Can automated scoring choose the final macro and insect photography story?
No. In a Sony A7R V macro and insect photography review, scoring and duplicate grouping can narrow technical choices, but they do not know which subject, gesture, garment, play, species behavior, or spatial relationship matters to the brief. Final selection remains an editorial decision.
When is the Sony A7R V RAW Workflow finished?
The Sony A7R V macro and insect photography workflow is finished when approved files have been exported to specification, opened and checked, delivered through a verified copy, and archived with their masters and adjustment records. Finishing the edit without verifying derivatives leaves the workflow incomplete.