What you are looking at
The bench holds one 50mm lens, pulled apart along the rail so its glass groups and brass helicoid are visible instead of hidden inside a barrel: the rear group by the mount, the iris between the groups, the front group riding on the helicoid. Drag the focus ring (or turn the dial on the console) and the helicoid screws the front group in or out. Pick f/2, f/5.6 or f/16 and the iris opens or closes the cone of light passing through. Switch the lens to Assembled, or press X, and the parts slide back together into one barrel.
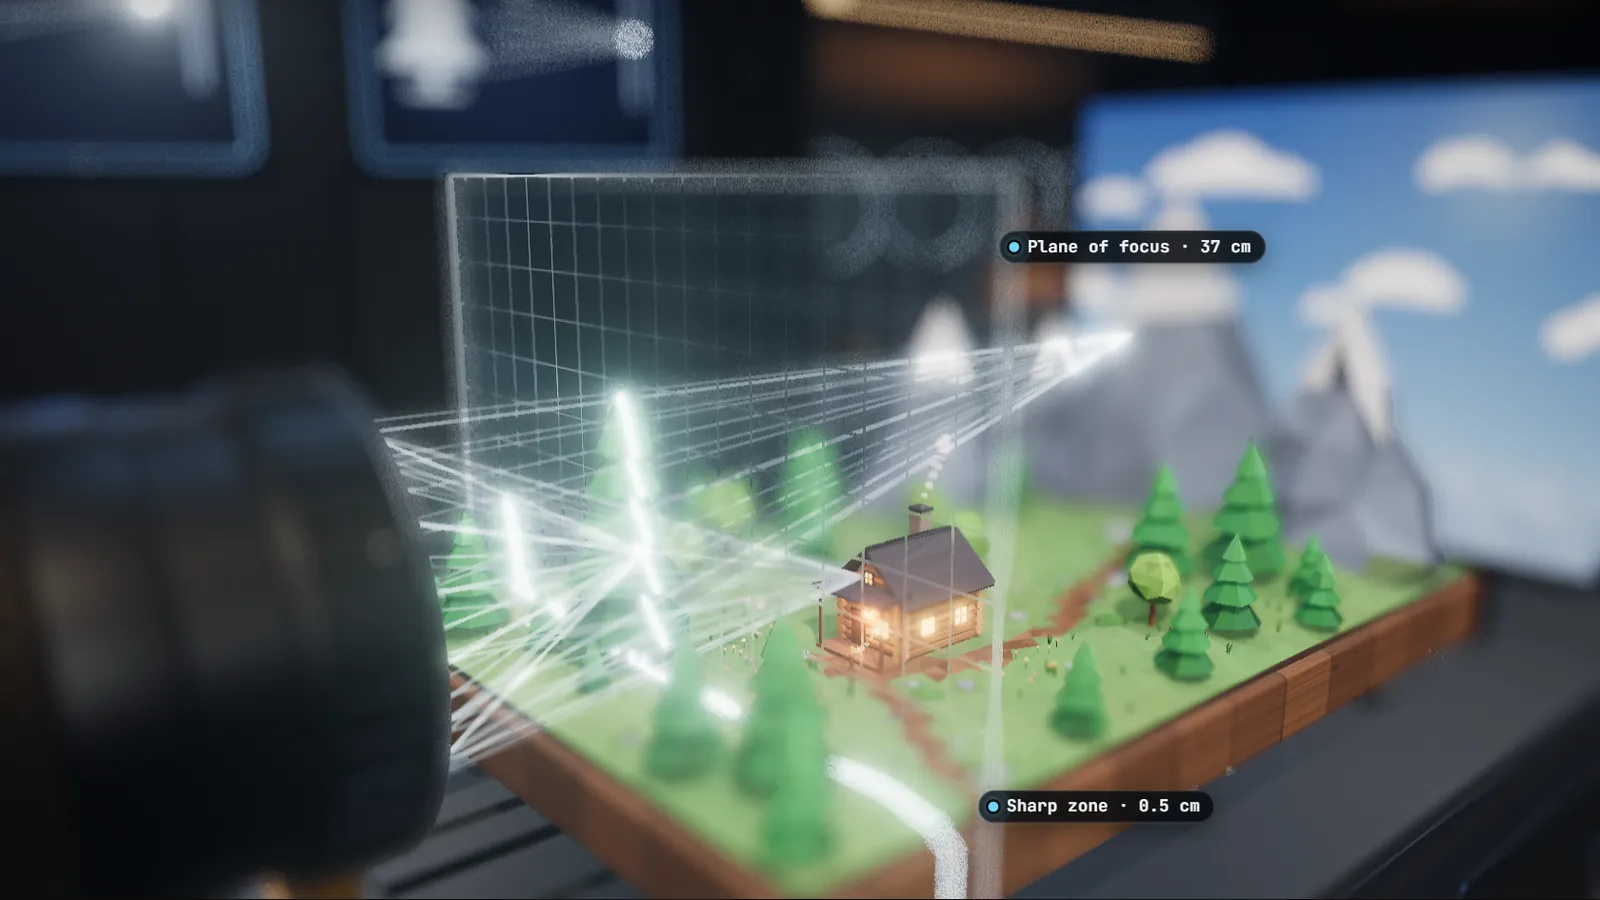
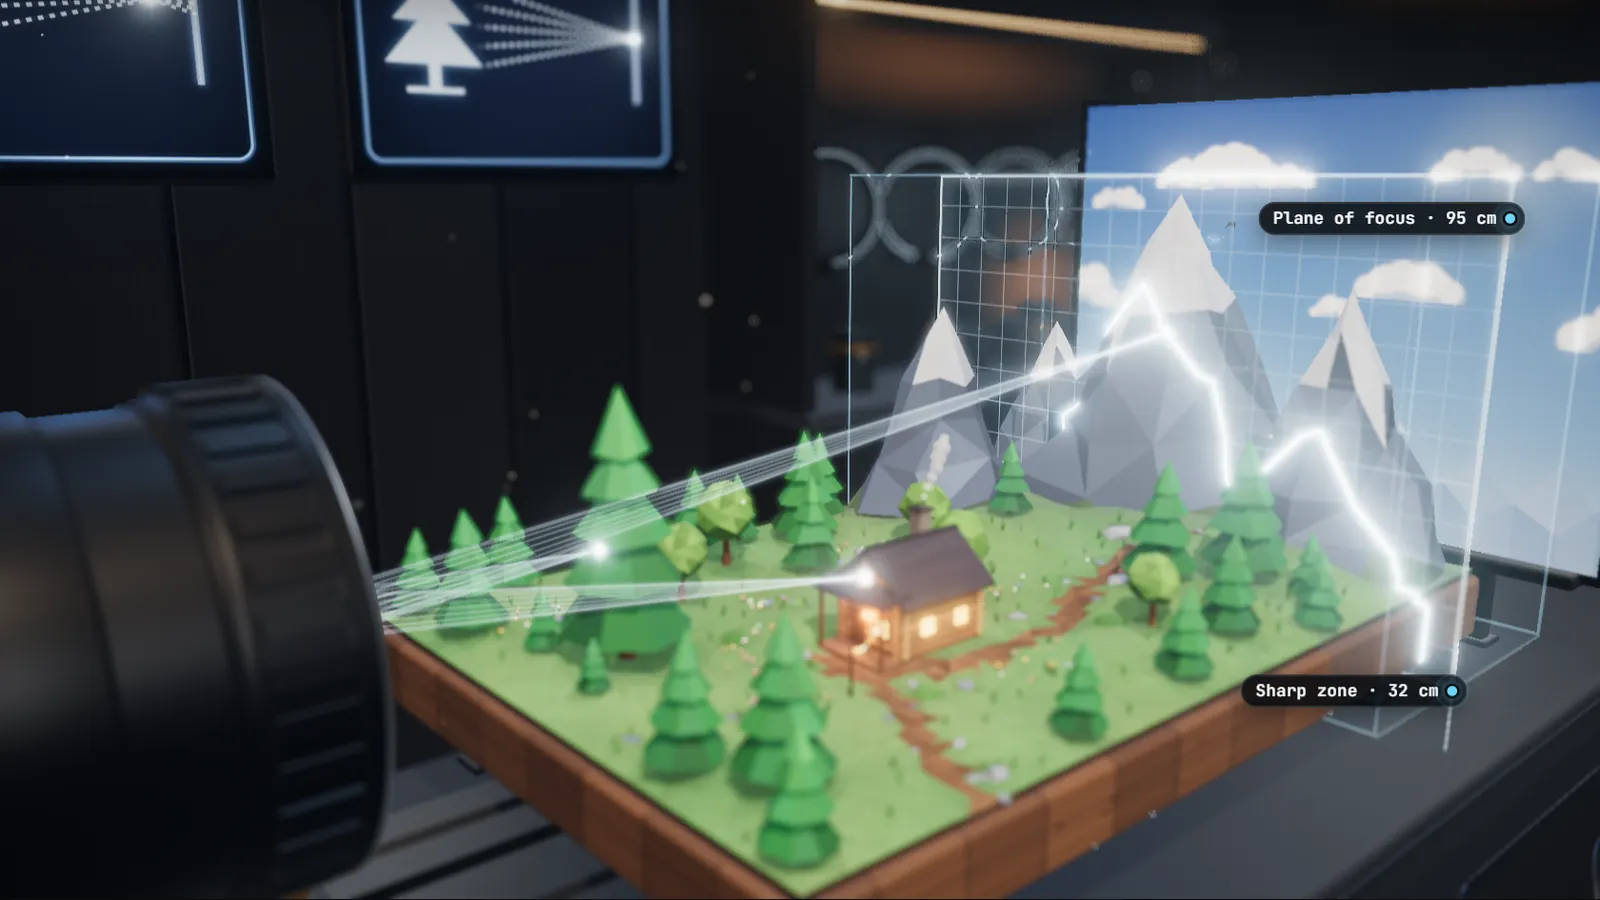
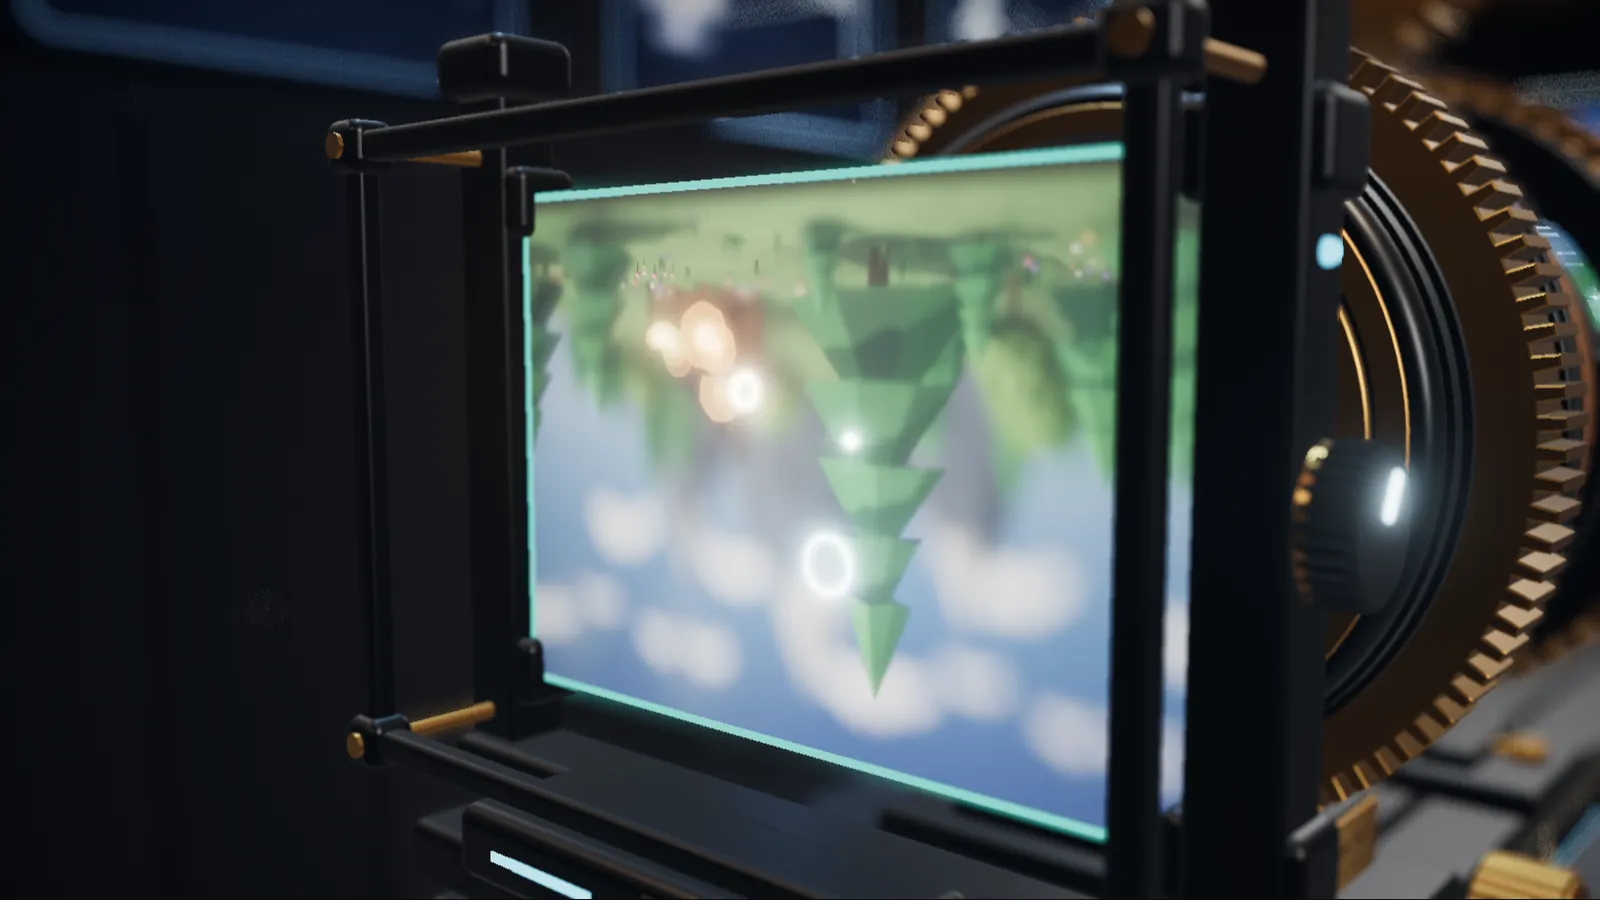
In front of the lens, a sheet of grid glass stands at the true focus distance and cuts straight through a small diorama: a pine at 37cm, a cabin at 55cm and a mountain peak at 95cm, the three stops the Foreground, Middle and Background buttons jump to. Behind the lens, at the other end of the rail, the rays land on the sensor's own ground glass. The picture it shows is upside down, the same way a real lens always projects it before any mirror or screen turns it back the right way up for you.
The Scene switch at the top of the controls points the same lens at two more subjects, each with its own lesson: a dog's portrait, where the sharp zone is about a centimetre deep, and a harbour at dusk, where every out-of-focus light turns into a ball of bokeh.
The plane of focus is a plane, not a point
A lens can only put one distance into true focus at a time. Light from a point at that distance leaves the back of the lens as a cone that closes to a point exactly on the sensor. Light from anything nearer or further closes to a point in front of the sensor or behind it, so by the time it reaches the glass it has opened back out again into a small disc. That is what the glowing grid on the bench is drawing: not a fuzzy zone, but one flat plane, slicing through the scene wherever the focus ring puts it. Everything on that plane is a point. Everything off it is a disc, and the disc grows the further it sits from the plane in either direction.
Why the sharp zone is so thin up close, and how aperture opens it up
Focus on the pine at 37cm and set the aperture to f/2 and the zone that still reads as acceptably sharp runs from about 36.7cm to 37.3cm: barely half a centimetre deep. Close down to f/5.6 and it grows to roughly 36.3-37.8cm, about 15mm. Close down further to f/16 and it stretches to about 34.9-39.3cm, close to 44mm, eight times the zone at f/2 from the same spot. That is the whole trick behind stopping down for a macro shot or a product shoot: the lens has not changed, only the width of the cone of light it lets through, and a narrower cone tolerates more distance either side of the plane before its disc grows large enough to notice.
Distance does the same job without touching the aperture at all. Move the focus point out to the peak at 95cm and, even at f/2, the sharp zone is about 4cm deep, roughly seven times as deep as the same f/2 gave you at 37cm. Nothing this close to a lens is ever going to behave like something 95cm away, whatever aperture you pick.
Use both at once and the change is dramatic. Focus on the peak at 95cm, close down to f/16, and the sharp zone runs from about 81cm to 114cm, roughly 32cm deep: nearly sixty times the half centimetre you started with at 37cm and f/2. On the bench, the thin sheet of glass swells into a deep block around the mountain.
What "sharp enough" means
Depth of field is not really a boundary, it is a judgement call given a number. This bench treats a disc as acceptably sharp once it is smaller than the sensor's circle of confusion, taken here as the standard 43.27mm full-frame diagonal divided by 1500, about 0.029mm on the sensor itself. That is the same convention the Depth of Field Calculator uses, so the two tools never disagree about where a zone ends.
You can watch that judgement being made on the bench itself. Focus on the pine at f/2 and the peak, sitting 58cm further back, lands on the sensor as a disc about 2.4mm across, roughly 6.6% of the frame width: soft enough to read as background blur at a glance. Close down to f/16 with the focus untouched and the same peak shrinks to about 0.3mm, under 1% of the frame width. That is still ten times the circle of confusion, so the bench still keeps it outside the sharp zone: a clear mountain now rather than a smear, but visibly softer than the pine.
Why the nose is sharp and the eye is soft
Switch the scene to Portrait and the lens is pointed at a dog, close enough to fill the frame: the tip of its nose 45cm away, the near eye at 50cm, the far eye at 53cm. At that distance a 50mm lens at f/2 has almost nothing to spare. Focus on the near eye and the sharp zone runs from about 49.5cm to 50.5cm: about a centimetre deep, on a face that runs 8cm deep from the tip of the nose to the far eye.
The nose is the nearest and most prominent thing in the frame, which makes it an easy place for focus to land. Focus on the nose and the sharp zone sits from about 44.6cm to 45.4cm, under a centimetre, with both eyes behind it. The near eye lands on the sensor as a disc about 0.31mm across, nearly eleven times the 0.029mm circle of confusion, and the far eye as a 0.47mm disc, sixteen times it: a crisp nose and two soft eyes, and the eyes are the first thing anyone looks at. Even f/16 does not rescue it: with the focus left on the nose, the zone ends at about 48.6cm, still short of the near eye.
Put the focus on the eye and the picture turns round. The near eye becomes the point and the nose, 5cm in front of it, becomes the 0.31mm disc. The far eye, 3cm further back, still lands as a 0.16mm disc at f/2, more than five times the circle of confusion, so one eye is sharp and the other only nearly. That is usually the better photograph: a soft nose reads as depth, a soft eye reads as a miss. To get both eyes, focus between them at 51.5cm and close down to f/5.6: the sharp zone now runs from 50cm to about 53.1cm, 3.1cm deep, both eyes land inside it (the near one only just), and the nose stays a soft 0.14mm disc. Closing down on its own is not enough: at f/5.6 with the focus still on the near eye, the zone ends at about 51.5cm, short of the far eye. Up close, where you put the sharp zone matters more than how deep you make it.
See it on the bench: the plane of focus on the tip of the nose, with both eyes behind it.
Where bokeh comes from
Bokeh is the same disc again, only easier to see. Every point of light that is not on the plane of focus reaches the sensor as a disc, and a small bright light against a dark background makes that disc impossible to miss. Switch the scene to Harbour, a harbour at dusk, and focus on the boat at 40cm, at f/2: the lamp at 70cm, 30cm behind the plane, lands as a disc about 1.5mm across, over 4% of the frame's width, and a light as far back as the dome at 110cm as a 2.3mm disc, over 6%. That is the difference between a point of light and a ball of it.
The size of the disc depends on two things. The first is how far the light sits from the plane of focus. Focus on the lamp instead and the lamp shrinks to a point, a light at the dome, now only 40cm behind the plane, spreads to just 0.7mm, and the boat, 30cm in front, grows to 1.4mm. The second is the aperture. The disc is a small picture of the opening the light came through, so it scales with that opening: with the focus back on the boat, stop down to f/16 and the opening is an eighth as wide as at f/2, and so is the lamp's disc: about 0.19mm, around half a per cent of the frame's width. It is no longer a ball, only a glint, and still not sharp: 0.19mm is more than six times the circle of confusion, so the bench still counts the lamp as outside the sharp zone.
The shape comes from the aperture too. A round opening makes round discs; an iris of straight blades makes a polygon with one side per blade. The lens on the bench has seven, so its discs are nearly round wide open and turn seven-sided as you stop down.
See it on the bench: the ground glass focused on the boat at f/2, with the harbour's lights behind it turned into discs.
Focus bracketing and stacking
The screen in the middle of the console holds five frames of the same scene, focused progressively deeper: 33cm, 42cm, 55cm, 72cm and 95cm, each one taken at whichever aperture you have picked. Click a frame and the lens refocuses to that distance. That is a focus bracket, the sequence a macro or product photographer actually shoots when one aperture cannot put the whole subject in the sharp zone without diffraction softening everything anyway. Stacking software then keeps only the sharpest region from each frame and merges them into a single image that is sharp from front to back in a way no single exposure could manage on its own.
Where missed focus actually comes from
On a real shoot it is rarely the maths that goes wrong. An autofocus point locks onto a fence instead of the face behind it. A subject leans forward the two or three centimetres a f/1.8 portrait has to spare between focus lock and shutter. A body and lens disagree slightly about where their own focus motor thinks "in focus" is, and every frame lands a fraction in front of or behind the plane you meant. None of that shows up as a blurry photo you can fix afterwards, only as a keeper you did not get, sitting next to nine near-identical frames where you did.
How much light gets through
Aperture is the size of the hole the iris leaves open. Photographers measure it in stops: one full stop lets in exactly half the light of the stop before it, or double the light of the stop after it. The f-numbers look evenly spaced, f/2, f/2.8, f/4, f/5.6, f/8, f/11, f/16, but light scales with the area of the hole, not its width, so it falls as 1 divided by the f-number squared. Stop down from f/2 to f/16, six full stops, and the light does not fall to a sixth or an eighth: it falls to 1/64. Watch the ground glass at the sensor end of the bench while you close the iris and that is what you are seeing: the same hole that widens or narrows the sharp zone also decides how bright the picture starts out, before shutter speed or ISO get a say.
Shutter speed and the moving slit
Shutter speed is how long the sensor is allowed to collect the light. Drag the shutter slider to the right and the picture on the glass brightens, a stop for every doubling of the time, and anything moving starts to smear, live, before you have taken anything. Press Shoot and the bench's focal-plane shutter runs in slow motion so you can watch it work: two curtains cross the frame, one opening it and a second chasing behind to close it again. Slower than 1/250s, the flash-sync speed, the first curtain finishes crossing before the second one sets off. Faster than that, the two curtains travel together as a narrow slit, scanning the light across the frame instead of opening it all at once.
While the shutter is open the scene keeps moving, and the bench renders the whole exposure rather than one instant, so anything that moved smears: a dog's wagging tail, a bird's wingbeat, a gull crossing the harbour. Hold the camera by hand and a second kind of blur stacks on top, a wobble too small to notice by eye but large enough to soften a photo the longer the shutter stays open. The rule of thumb is roughly one over the focal length, about 1/50s for the bench's 50mm lens. Focus Lab gives that a little slack, so shake starts to show at 1/40s and slower. Switch on the Tripod toggle and it disappears, leaving only whatever the subject itself is doing.
ISO: turning up the volume, not the light
Aperture and shutter speed both control how much light actually reaches the sensor. ISO does not: it comes after, amplifying the signal the sensor already collected, the same way turning up the volume on a quiet recording does not add anything that was not there before. Raise the ISO and the photo gets brighter, but the noise, the grain and speckle in flat areas of a photo, grows too, because the amplifier is boosting a signal built from fewer photons for the same brightness. On the bench that noise is barely visible before about ISO 3200, and turns obvious by ISO 12800. ISO is the last lever to pull, useful once the aperture is already as wide as it will go and the shutter is already as slow as you can hold or the subject allows.
The exposure triangle, and the camera's dial
Aperture, shutter speed and ISO are the exposure triangle: change one and, to keep the same brightness, one of the other two has to move to match it. The bench's mode dial mirrors a real camera. In M, manual, the default, you set all three yourself and every change shows on the picture straight away. In A, aperture priority, you choose the aperture and the camera works out the shutter speed. In S, shutter priority, you choose the shutter speed and the camera works out the aperture. An exposure meter reads how far off the result is, from -3 stops, too dark, to +3, too bright.
The trade-offs are real, not just numbers. In the lamp-lit portrait room, at EV 7 and ISO 400, f/2 gives an easy 1/125s shutter. Close down to f/16 for a deeper sharp zone and the meter now wants 1/2s, six stops slower and well past the point a hand can hold steady. In manual the picture simply goes six stops darker until you give the light back; A mode would hand you that half-second shutter without complaint. The fix is a tripod, or giving some of those stops back with ISO instead of shutter time. The valley in afternoon sun rarely bites this way: EV 14 lets f/16 still shoot at 1/60s. The harbour at dusk is EV 4 and opens at ISO 1600: f/2 still manages a handheld 1/60s, f/5.6 drops to 1/8s, and f/16 needs a full second, tripod territory again.
Frequently asked questions
It is the one distance from the lens that is projected onto the sensor as a true point. A lens can only focus at one distance at a time, so the plane of focus is that distance drawn out flat across the whole scene. Anything nearer or further lands on the sensor as a small disc rather than a point, which is what depth of field is measuring.
Because only the plane of focus is ever truly sharp. Everything else in the frame is rendered as a blur disc whose size grows with its distance from that plane, and a disc small enough stays under the eye's own resolving limit and still reads as sharp. That tolerance has a name, the circle of confusion, and it is what every depth of field figure is built from.
No. The aperture never moves the plane of focus, only the focus ring does that. What the aperture changes is how quickly a disc grows as you move away from that plane: a wide aperture like f/2 lets a fat cone of light through, so the disc grows fast and the sharp zone is thin. A narrow aperture like f/16 lets a thin cone through, so the disc grows slowly and the sharp zone is much deeper either side of the same plane.
The plane of focus is a single distance: the one place a lens is actually focused. Depth of field is the range of distances in front of and behind that plane whose blur disc is still small enough to call sharp. One plane, one number; depth of field, a zone built around it from the aperture, the focal length and how far away the plane itself is.
On the eye. Close up the sharp zone is tiny: with a 50mm lens at f/2 and the eye 50cm away it is about a centimetre deep, so focusing on the nose, a few centimetres nearer, leaves the eyes visibly soft. Focus on the nearest eye, and if you need both eyes sharp, focus between them and close down a little: on the Focus Lab portrait, 51.5cm at f/5.6 gets both.
A bokeh ball is the blur disc of an out-of-focus light. It grows with the width of the aperture and with the light's distance from the plane of focus, so a wide aperture and a light far behind the subject make big balls, and stopping down shrinks them towards a glint. Its shape is the shape of the aperture: round when the iris is wide open, and a polygon with one side per blade when straight blades close it down.
A lens bends light that crosses through a single point near its centre, so a ray leaving the top of a scene ends up crossing to the bottom of the image, and a ray from the left ends up on the right. That is simply how a lens forms an image, on a ground glass, on film or on a digital sensor. A camera's viewfinder or an on-screen preview then flips it back the right way up for you, either optically with a mirror and pentaprism or in software.
Aperture, shutter speed and ISO together decide how bright a photo is: the exposure triangle. Change one and, to keep the same brightness, one of the other two has to move to compensate. Widen the aperture, slow the shutter, or raise the ISO, and the photo gets brighter; narrow the aperture, speed up the shutter, or lower the ISO, and it gets darker.
A smaller aperture, a higher f-number, is a smaller hole, and a smaller hole lets less light through: closing down from f/2 to f/16 cuts the light to 1/64. To end up with the same brightness the sensor has to collect light for longer, which is why aperture priority mode slows the shutter every time you close the aperture down. In the Focus Lab portrait room that means the shutter drops from 1/125s at f/2 to half a second at f/16.
As a rule of thumb, roughly one over the focal length: about 1/50s for a 50mm lens. Focus Lab gives that a little slack, so handheld shake starts to show at 1/40s and slower. A tripod removes that wobble entirely, which is why Focus Lab lets you switch one on before you shoot.
Yes. ISO amplifies the signal the sensor already collected rather than gathering more light, so the same amplification that brightens the photo also boosts noise, the grain and speckle visible in flat areas. On Focus Lab that noise is barely visible below about ISO 3200 and clearly visible by ISO 12800.
They are exposure modes. M is manual, Focus Lab's default: you set the aperture, shutter speed and ISO yourself. A is aperture priority: you choose the aperture and the camera works out a matching shutter speed. S is shutter priority: you choose the shutter speed and the camera works out the aperture. An exposure meter shows how far the result sits from a correct exposure, from -3 stops to +3.
Yes. No signup, no account, and everything on the bench runs in your browser.
Then let imagic find the frames that actually landed on the plane
imagic scores every photo in a shoot on sharpness, exposure, noise, composition and detail, locally on your machine, nothing uploaded, and picks the sharpest frame out of every burst automatically. Free 500-export trial, no card required.