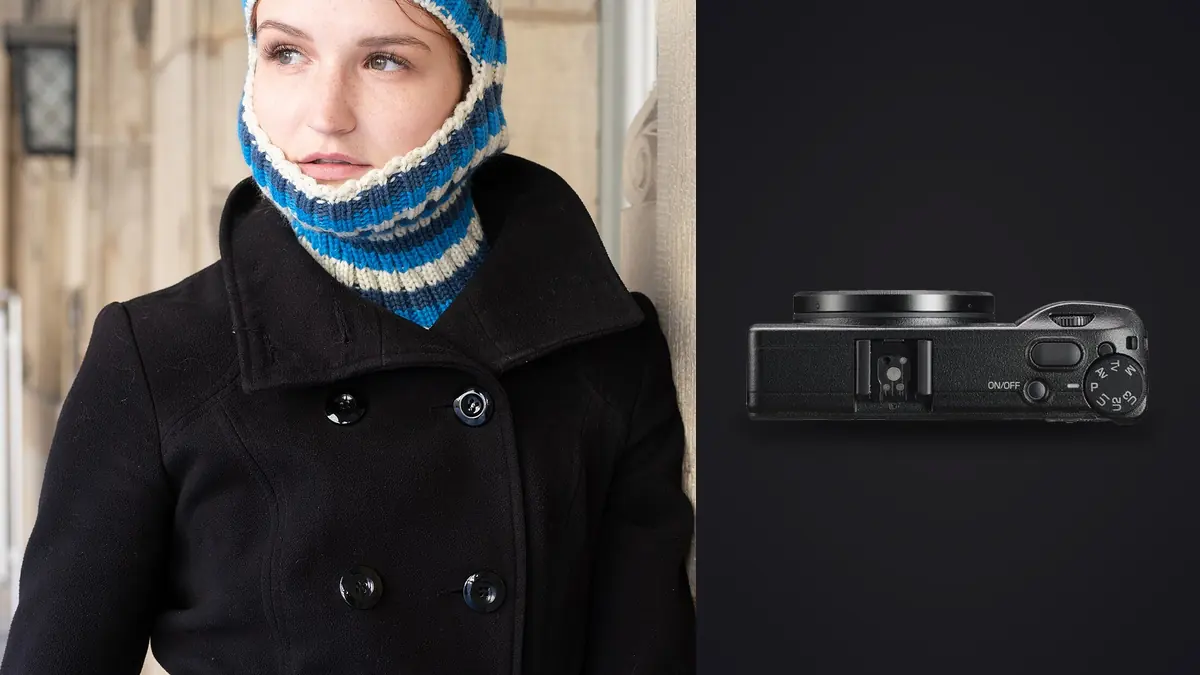
The Ricoh GR IIIx is a specialist choice for a commercial fashion lookbook. Its 24-megapixel APS-C sensor, fixed 40mm-equivalent f/2.8 lens, leaf shutter, stabilization, and compact body suit an environmental, close-to-the-subject visual language. It does not offer lens changes, a built-in viewfinder, conventional studio ergonomics, or the redundancy expected from many primary professional bodies.
That makes the brief decisive. The GR IIIx works when the client wants an intimate on-location story and the production has a backup plan. It is a poor fit when every garment needs identical compression, extensive tethered approval, long battery endurance, or several focal lengths. Advanced technique begins by using the fixed lens intentionally rather than pretending the limitation is not there.
Write a brief that fits forty millimeters
The fixed lens gives a natural perspective for full-length environmental portraits, three-quarter frames, and garment details when the photographer can move. It keeps enough setting to describe a street, studio corner, hotel, or workshop without the dramatic stretching of an ultra-wide lens. The look can feel direct and editorial.
Scout the required camera positions before approving the body. A narrow corridor may prevent a full-length frame, while a public street may not allow the photographer to step back safely. Mark the closest and farthest useful distances and confirm that the model remains large enough in the 24-megapixel file.
If the shot list requires tight beauty, strong telephoto compression, overhead views, and very wide groups, one fixed lens creates avoidable compromise. Use the GR IIIx as a secondary perspective or choose an interchangeable system. A commercial brief should not depend on severe cropping as a lens substitute.
Design a repeatable frame architecture
Create three standard distances: full look, three-quarter look, and detail. Mark camera and model positions for each. Keep verticals and horizon consistent where the layout will place images side by side. The fixed focal length makes this repeatability easier once positions are known.
Leave space for final page ratios, titles, and crops. Ask the designer whether negative space belongs on a particular side. A 40mm-equivalent view can integrate typography naturally when the background is chosen in advance. Do not assume a centered portrait can be stretched into every layout.
Use environmental lines to support the silhouette without cutting through the head or joints. Door frames, curb edges, shelves, and windows can organize the series. Review at thumbnail size to ensure the geometry remains consistent across different outfits.
Configure exposure before the pace increases
Use manual exposure under stable controlled light. Set shutter speed for the model's movement, aperture for required garment depth, and ISO for a healthy exposure. Confirm skin and pale fabric highlights with the histogram and warning display. Save the settings so a dial movement can be recognized quickly.
For changing outdoor light, manual exposure with Auto ISO can preserve shutter and aperture. Keep compensation directly reachable and set an upper sensitivity from processed files. A dark coat or white dress can influence automatic choices, so expose from the important skin and fabric, not the overall scene average.
The built-in neutral-density filter can support wider apertures in bright conditions, but confirm its state visibly. An accidental ND setting can push ISO or shutter speed in the wrong direction indoors. Include it in every lighting-change check.
Use focus modes by movement type
For a static pose, use a small autofocus area or face detection and confirm the near eye. The fixed lens does not guarantee enough depth at close distance. A hand, lapel, or accessory extended toward the camera may sit outside the plane. Stop down or align the pose when the product detail must remain sharp.
For walking or turning, use continuous focus and define a finish mark. Capture a short sequence as the model enters the prepared zone. The GR IIIx is not a high-end tracking body, so repeatable motion and clean backgrounds provide more dependable results than erratic improvisation.
Snap Focus can place focus at a preset distance for a consistent mark. Treat it as a measured manual zone, not a guarantee. Test the actual distance, aperture, and final output, because printed depth scales can look generous on a detailed file.
Direct movement around a known endpoint
Ask the model to begin, move, and finish in precise places. A coat swing, half turn, step, or bag adjustment should end where focus and light are strongest. Demonstrate the path without dictating every body angle. This creates repeatable variation while preserving natural momentum.
Set shutter speed for the face and key garment. Stabilization helps with photographer movement, not the model. If the concept calls for a crisp face with moving fabric, capture a safe sharp version first, then slow down for deliberate blur.
Review hands, hems, labels, closures, and accessory position along with expression. A technically sharp portrait can fail the commercial purpose when the garment folds badly or a required detail disappears. Give the stylist a defined review point rather than interrupting every movement.
Use the leaf shutter with controlled flash
The leaf shutter supports flash synchronization at fast shutter speeds within the camera and flash system's capabilities. That can help balance daylight on location while keeping a compact lighting setup. Test the exact trigger, flash, power, and shutter combination before the model arrives.
Small battery flashes may lose effective output or recycle slowly at demanding settings. Use a deliberate cadence and watch for exposure drift through a sequence. Moving the light closer through a larger diffuser can improve efficiency and softness, provided the stand remains safe.
Separate ambient and flash roles. Shutter speed mainly changes ambient contribution within synchronization limits, while aperture, ISO, power, and distance affect flash exposure. This distinction makes a dark background or changing skin exposure easier to diagnose.
Light for fabric as well as skin
Texture, sheen, black detail, and white detail may require different source angles. A broad frontal source can make skin soft but flatten woven material. Move the key sideways enough to reveal structure, then add controlled fill so shadows retain useful information.
Reflective leather, satin, jewelry, and eyewear can produce clipped patches. Change light or camera angle before reducing the entire exposure. A large reflection can describe gloss when its shape is clean; a small hard hotspot often looks accidental.
Capture a neutral reference for each lighting setup and keep white balance fixed. Outdoor shade, direct sun, warm interiors, and LEDs should be grouped separately in editing. One global correction cannot make overlapping sources identical.
Protect composition from close-range distortion
A 40mm-equivalent lens is moderate, but close camera distance can still enlarge whatever is nearest. Hands, shoes, or a bag pushed toward the lens may appear dominant. Move back when possible and keep the sensor plane appropriate to the body line.
For full-length frames, avoid placing the head and feet at extreme corners. Leave room for correction and page crop. A low angle can emphasize shape, but it should not accidentally misrepresent garment proportions. Compare the frame with the product brief.
Do not plan to repair perspective by stretching the file heavily. Software correction discards pixels and can distort fabric. Camera height and position are the advanced controls that preserve a natural look.
Manage heat, power, and redundancy
The small body and battery require a practical rotation plan. Carry charged spares, keep them labeled, and avoid leaving the camera powered between setups. Screen use and repeated review consume energy. A lookbook schedule should include battery changes before critical sequences, not during them.
Use reliable cards and confirm capacity. The GR IIIx is not built around dual-card redundancy, so the production needs a backup camera and frequent verified ingest where the risk requires it. A small body should not become a single point of failure for a commercial day.
Allow the camera to cool if it becomes unusually warm and follow manufacturer guidance. Keep it shaded when not shooting outdoors. Compactness supports mobility, but it does not remove normal equipment care.
Keep review and delivery commercial
Group frames by outfit and required view. First reject technical failures, then select for garment shape, expression, label visibility, and set consistency. A local app such as imagic can score sharpness, exposure, closed eyes, and composition and group duplicates while files remain on Windows or macOS.
Automated scoring cannot approve fit, styling, brand requirements, or model usage. Keep client selections and licensing notes separate from technical ratings. Use non-destructive edits and apply consistent color by lighting group.
Export JPEG or TIFF according to the production brief and inspect every delivered crop. Preserve the DNG original and approved selection. More local processing guidance appears in the AI and technology guides.
Run the advanced lookbook checklist
- Brief: confirm that a fixed 40mm-equivalent view covers every required frame.
- Positions: mark full, three-quarter, detail, and movement endpoints.
- Exposure: verify shutter, aperture, ISO, ND state, and highlights.
- Focus: assign static, continuous, and Snap Focus roles.
- Light: test leaf-shutter sync, recycle, fabric texture, and skin.
- Redundancy: prepare batteries, cards, backup body, and ingest points.
- Approval: separate technical, stylist, client, and usage decisions.
- Delivery: inspect crops, profiles, filenames, and output count.
Rehearse the first outfit before call time. The fixed-lens approach works when every department understands its boundaries and uses its speed deliberately.
Plan client review without disrupting capture
The GR IIIx is not built around a large tethered studio review experience. If the client needs immediate large-screen approval after every look, define a separate supported transfer and review method or choose a primary camera system designed for that workflow. imagic does not provide tethering.
For a lighter on-location production, schedule review after each outfit. Copy or display only the marked candidates, keep the model and client away from unculled private frames, and confirm focus, garment shape, required details, and layout space. A short planned review protects momentum better than passing the camera around after every exposure.
Record approval as a filename or rating, not a verbal memory. Keep technical approval, styling approval, and final usage approval distinct. A sharp frame may still need a wardrobe correction, and a client favorite may still require model-use confirmation.
If a larger review is essential, test the complete reader, display, color profile, and naming path before call time. The compact camera can remain part of the look, but the production should not improvise its approval system around it.
Frequently asked questions
Can the Ricoh GR IIIx be the only camera on a paid lookbook?
It can fit a narrow environmental brief, but its fixed lens, single-card design, and compact battery make a tested backup important. Match risk planning to the assignment.
Is Snap Focus useful for a walking model?
Yes when the model crosses a measured mark and depth is sufficient. Test the real distance and aperture, and use continuous autofocus when movement does not stay in the zone.
Does the leaf shutter make every flash usable at every speed?
No. Trigger delay, flash duration, power, and camera support still matter. Test the complete combination at the intended shutter speed and shooting cadence.